

How to design a beautiful garden
Summer has arrived and it's time to take care of your garden. Discover some ideas and advice to decorate yours in Sweet Home 3D.
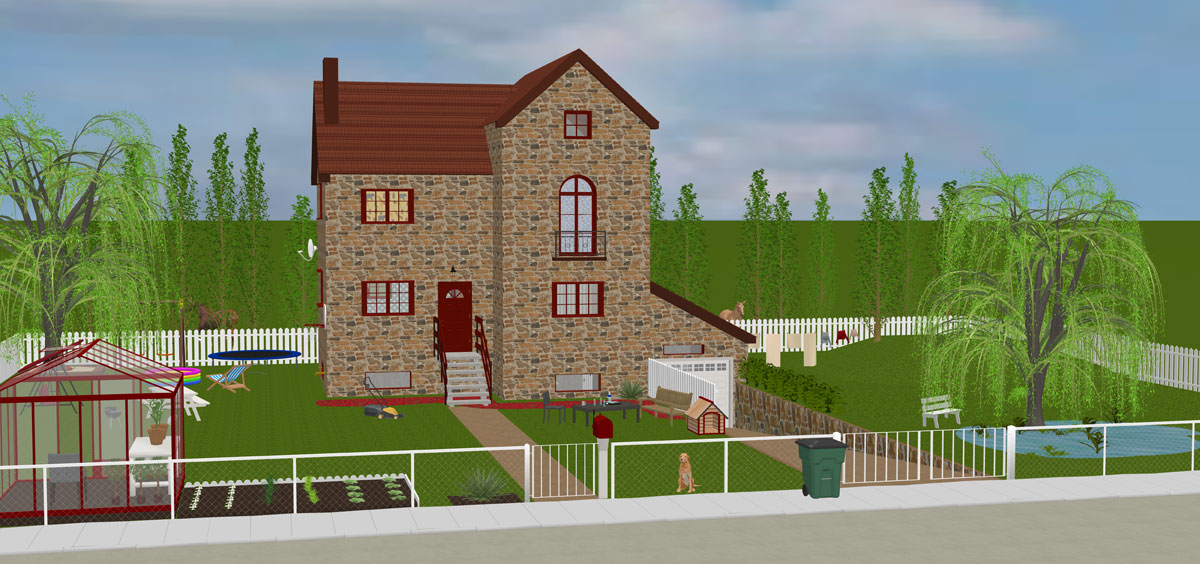
The images shown in this tip are parts of the following image created from the file BeautifulGarden.sh3d (14 MB - designed by eTeks and distributed under CC-BY license).
Using furniture and textures designed by contributors
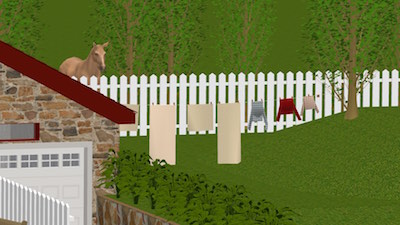
Years after years, Furniture Libraries bring more interesting furniture for your garden (generally available in the Exterior category) like garden furniture, barbecues, animals, outdoor games, fences of various types...

...and even this elegant clothes line.
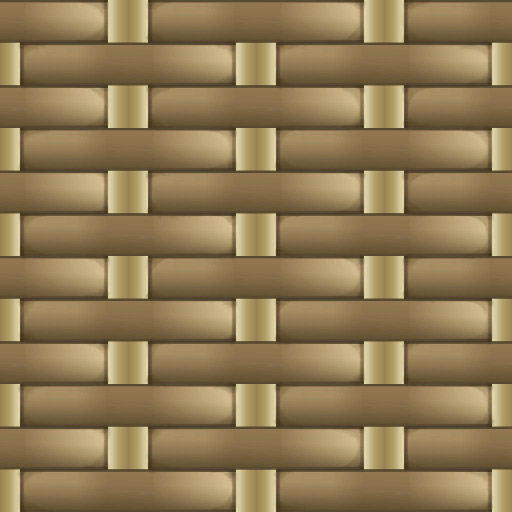
And in the last Textures Libraries update, did you notice the various types of rattan for the outside furniture?
 |
 |
 |
 |
 |

Designing outdoor areas and flowerbeds
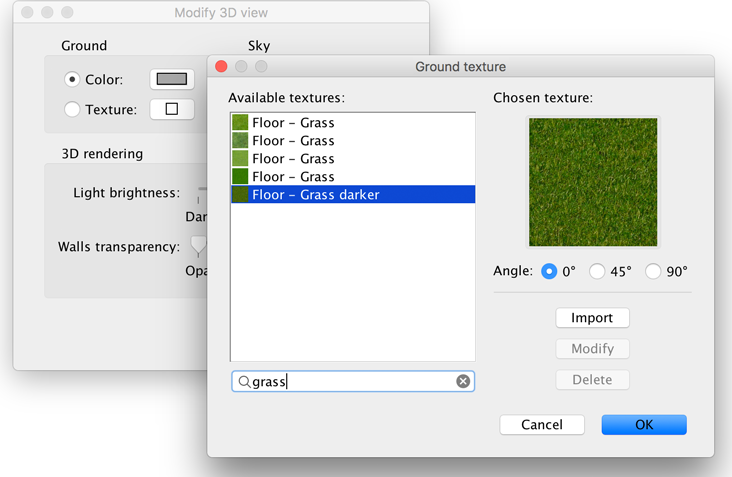
Free textures libraries provide also textures in order to design exterior areas with grass, ground, sand, flowerbeds... like the following recently added ones (see Textures import page for details about how to import Textures libraries).
 |
 |
 |
 |
 |
 |
 |
 |
 |
 |
To apply one of these textures to the whole ground, just choose the 3D view > Modify 3D view menu item and select the texture of your choice.
Then, if you want to draw an area like a path and change its texture, you can use the Room creation tool to draw its outline and change the texture of its floor with the one of your choice, after selecting the Plan > Modify room menu item and clicking on the Texture button of the floor. If showing the area of this special kind of room isn't useful, you may also unselect the Display area check box shown in the Modify room dialog box (by the way, note that when you draw a room which don't touch any wall, its "ceiling" isn't visible for this kind of use).

For more complicate or irregular shapes like a flowerbed, you may draw a room with more points after deactivating magnetism.
This tip explains how to design faster a nice rounded shape like the one shown in the following screenshot.

First, draw the approximate shape of the flowerbed with the Wall creation tool.

Then, double-click on each wall that matches a border you want to bend, and in its wall modification dialog box enter an Arc extent value. You may also directly draw round walls while drawing them, keeping the ctrl key (or the alt key under Mac OS X) pressed when you click a second time at the end point of a new wall; an arc of a circle joining the two ends of the new wall will appear, and you can modify the arc extent of the round wall by moving the mouse pointer, until you click a third time.

After a few attempts, you should obtain a nicer shape, like in the following screen capture.

Then select Plan > Create rooms menu item and double-click in the surface surrounded by the walls to create a room (if it doesn’t work, check whether all the walls are correctly connected).

Delete the walls that helped you to design this surface (or change their height with a small value to let them look like a kind of dividing low wall), and double-click on the new room to change its floor with a flowered texture, like the Field of poppies used here, and unselect the Display ceiling option.

Finally, you may adjust the shape of the flowerbed by moving some of the room points if needed. You may also use the Add point to room or Delete point from room items available in the contextual menu.

Designing a vegetable garden
To design a vegetable garden, you can use a simple box from Miscellaneous category and change its texture with a Wet soil texture for example. The one shown in the following image is 8 cm high and surrounded with small edges. To ensure the small edges in a given row are correctly aligned and located beside each other, select them and choose the Furniture > Align side by side menu item. In case this row is too short or too long compared to the box side along which you want to align them, select the menu Furniture > Modify, change their width and choose again the Furniture > Align side by side menu item.

This box will let you "plant" some vegetable, with the help of simple tricks. For example, you can reuse succulent plants as salads by changing their size and setting the material of their pot and soil as invisible. To ensure they look as planted in the ground, change also their elevation and height, and rotate some of them.

You can use the same tip with the different plants and flowers available in Sweet Home 3D Furniture libraries. Here are some tasty leeks based on this 3D model !
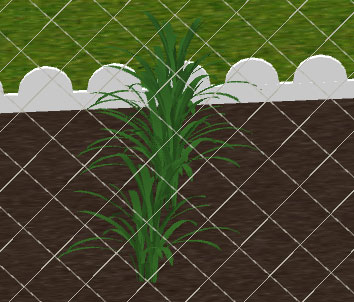
For the following kind of flowerbed which shows the upper part of a yucca, it is easier to place the plant at a lower level and draw a simple room at the garden level.

If you don't have an underground level in your plan yet, create one by selecting the Plan > Add level menu item, choose Plan > Modify level item and enter a negative value in the Elevation field of the level modification dialog box (in our example, the Basement level at -130 cm is used). Then, add a tall plant at the lower level and change its size or elevation, keeping the upper part visible at the elevation of the garden level.

As the previous screenshot shows, any object added at a lower level always creates a hole in the ground with a width and depth equal to the ones of the bounding box of the burried object. Note that the texture / color used to fill the bottom and the sides of underground holes is the same texture / color selected for the ground in the 3D view modification dialog box.
Then, using the Room creation tool, draw a room point by point at the garden level to cover this hole and change the texture of its floor with a texture like Wet soil.

If ever you need to see the burried plant completely again, you should select the underground level to which it was added and check if the 3D view > Display selected level default menu item is selected if the level change has no effect. This is the defaut option in Sweet Home 3D, as opposed to the 3D view > Display all levels option which always displays all objects in the 3D view (except the objects belonging to levels you made unviewable).
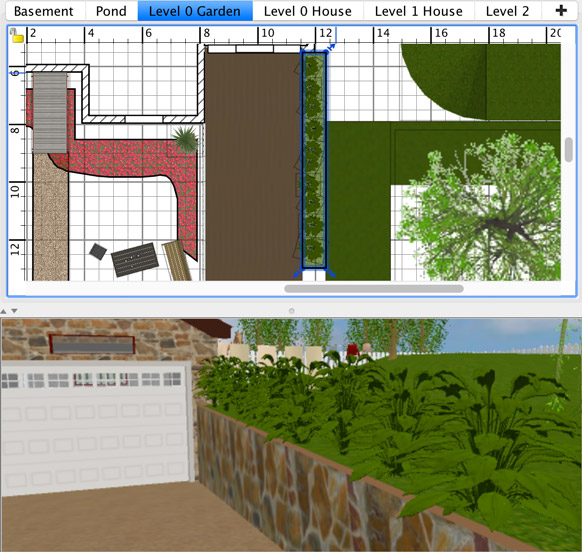
The plants edge made of Spathiphyllum and placed along the garage slope is designed the same way, with plants placed at various elevations at the Basement level and covered by a room at garden level. You actually can't see this room in the 3D view because its floor texture is the same as the one of the ground.
Designing slopes at various heights
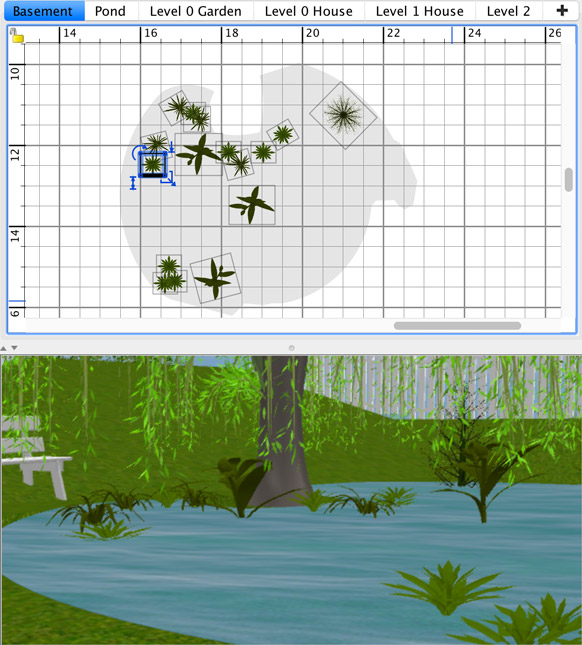
Following the same tips, here's how to design a pond on the right of the garden.

This pond is the floor surface of a room drawn at an underground level. As its elevation isn't as low as the basement of the house, create an additional underground level with the Plan > Add level menu item, then select the Plan > Modify level menu item to change the name and the elevation of the new level.

At this new level, draw the shape of a lake the same way we did for the poppies flowerbed at the beginning of this article: draw walls surrounding the pond, set their arc extent, then select the Room creation tool, create a room with a double-click in the surface surrounded by the new walls, delete the walls and change the texture of the room floor with a water texture like Sea.
Adjust some points of the room floor if necessary, until you get a nice shape for the pond (you may hide the Weeping willow to work more easily).

At the moment, the hole where the pond appears is surrounded by 80 cm high grass straight walls, and we need to add some slopes on its sides to give access to people to this nice place. These slopes can be made of 80 cm high triangles imported and placed at the Pond level around the lake (this triangle is also used for the garage slope). Once correctly aligned at the corner of each other (use Furniture > Align menu items to help you), group them with the Furniture > Group menu item to make a hole in the ground for the whole pond and its surrounding slopes.

Finally, here's how to add a small hill behind the pond.

This kind of 3D shape aren't generally made only of simple triangles and building their corners often requires some other 3D models like the geo_cone or geo_triangle_pyramid additional shapes for landscape proposed by Okh.
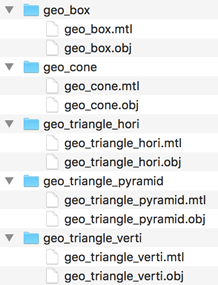
Download the shapes you need and import them with the Furniture > Import furniture menu item or with a direct drag and drop in the plan. Add them at the garden level and assemble them side by side to build the hill of your choice like the 1 meter high hill shown in the following screenshot.

And now, enjoy a nice summer in your garden!

Re: How to design a beautiful garden
Download more 3D models available in other libraries, particularly the ones designed by Scopia.
