

Sunlight simulation
This tip shows how to make a video in which you can see where the sunlight goes by in a room during a day.
Design your room and place lights
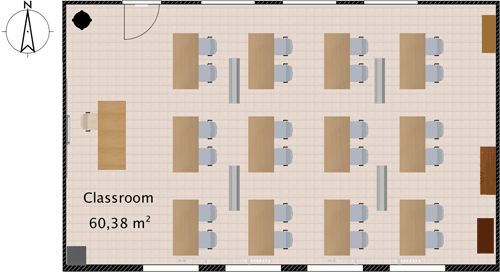
Imagine you designed with Sweet Home 3D the following classroom (available in the file Classroom.sh3d - designed by eTeks and distributed under CC-BY license):
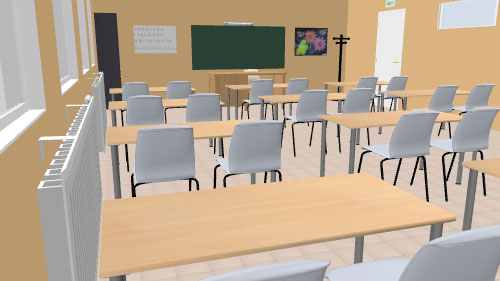
And you wonder how the sunlight will goes by in the room seen from a point of view placed at the rear:
Of course, if you want to see where the light goes during the day, the room should have some windows placed on a wall that is not oriented to the North. You should also add your own lights in the room in order to obtain a good result, even at a daytime, because sunlight doesn't bounce on objects or wall in Sweet Home 3D.
Then check the result at a moment of the day with the photo creation tool at one of the two best quality levels.

Create a video
Choose the point of view from which you are going to see the light passing by.
Then select the 3D view > Create video menu item, unselecting the Add ceiling lights checkbox to use only the lights you added if necessary. Choose the time at which you want to start your video. Click on the red button to select the beginning of the video. Then choose a later time at which you want to end the video and click on the red button again to fix the end time of the video. To create a video with the sun, you must choose one the two best quality levels, but since the video takes time to compute, you can make first tests by selecting the third quality level instead of the best one.

Once ready, click on the Create button, wait the end of the video computation, and click on the Save button.
Here is what it gives at the 3rd quality level betweem 9:00 and 19:00:
Once you've obtained a result that pleases you, you can choose the highest quality level and a larger resolution. Keep in mind that changing the date will probably give a different result, according to your geographic location. If needed, you may adjust your latitude and longitude with the dialog box shown by the Plan > Modify compass menu item.

For example, here's a video at the best quality level rendered in Oslo (Norway) computed at a resolution of 1280x720 pixels:
Thanks to Sophie for her help in the writing of this tip.


