Denmark
Joined: Jul 7, 2013
Post Count: 635
Status:
Offline
Lighting tips for advanced rendering
At the risk of repeating myself…
There has been several discussions about light on this forum. The latest I recall is this thread, where I mentioned my five basic rules for rendering:
1) Never tick the "Add ceiling light"-box. It ruins every rendering. 2) Avoid lighting up the ceiling 3) Use many sources, and keep the intensity low. 4) Don't let walls get in the way of the camera. It's better to temporarily move some walls than to shoot at extreme wide angles. 5) Experiment with different light settings.
Of course there are different groups of SH3D-users, and not everyone take interest in the art of lighting (just like I'm not particularly interested in HTML5-apps for Android). So I fully understand users that might never even consider wasting their time on rendering an image with a quality above Q1. A lot of users defines their primary objective to present ideas or constructions rather than presenting "artwork". I also understand those who are in a hurry to present their latest masterpieces and just don’t have the patience to work on the minuscule details. But judging from my observations on this forum, there are still some contributors who obviously appreciates the challenge of creating their imitation of reality as accurate as possible, and now and again they present us with stunning renderings, highly detailed and perfectly lighted.
When it comes to me, I'm more interested in the illustrative appearance of my pictures than in the constructional or architectural accuracy. That's what forms the basis for this thread.
So, for those who are still interested, here are some of the working methods I use when I'm, to the best of my ability, creating a scene for rendering.
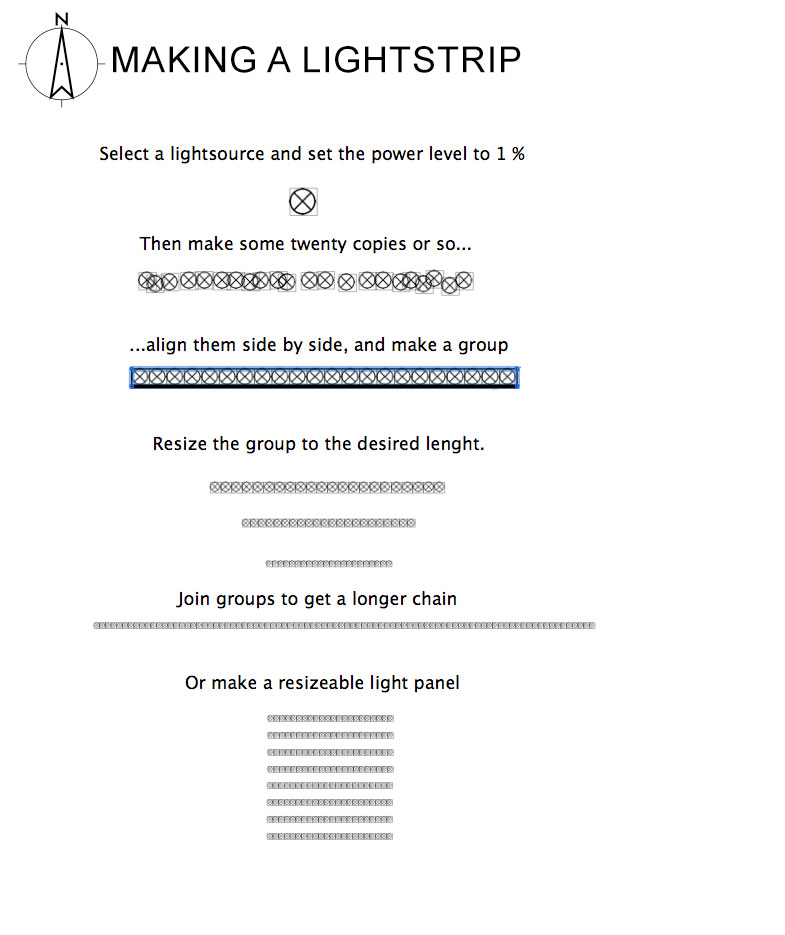
Using light-strips has over the years become one of my favourite discoveries. A light-strip is simply a bunch of light sources changed together in order to create a more even spread of the light. It’s easy to make a light-strip, and light-strips does not significantly increase the rendering time.
If you don't want to spend time creating it, you can download this file (unzipped SH3D-format)
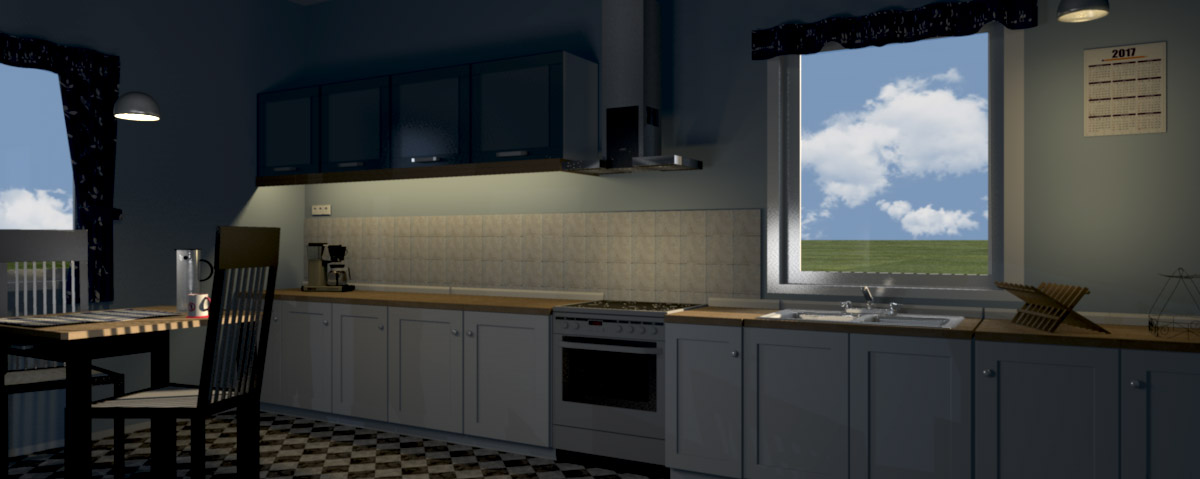
An example. Here I have used two light-strips placed under the upper cabinets to light up a kitchen counter:
If you should want to see how I lighted this kitchen, you can download the SH3D-project here .
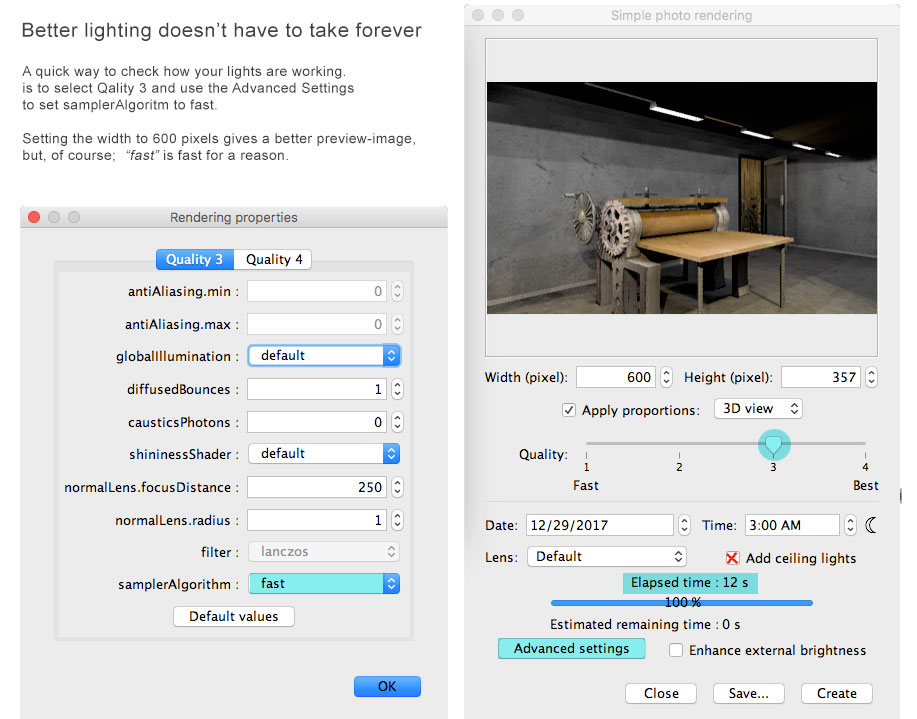
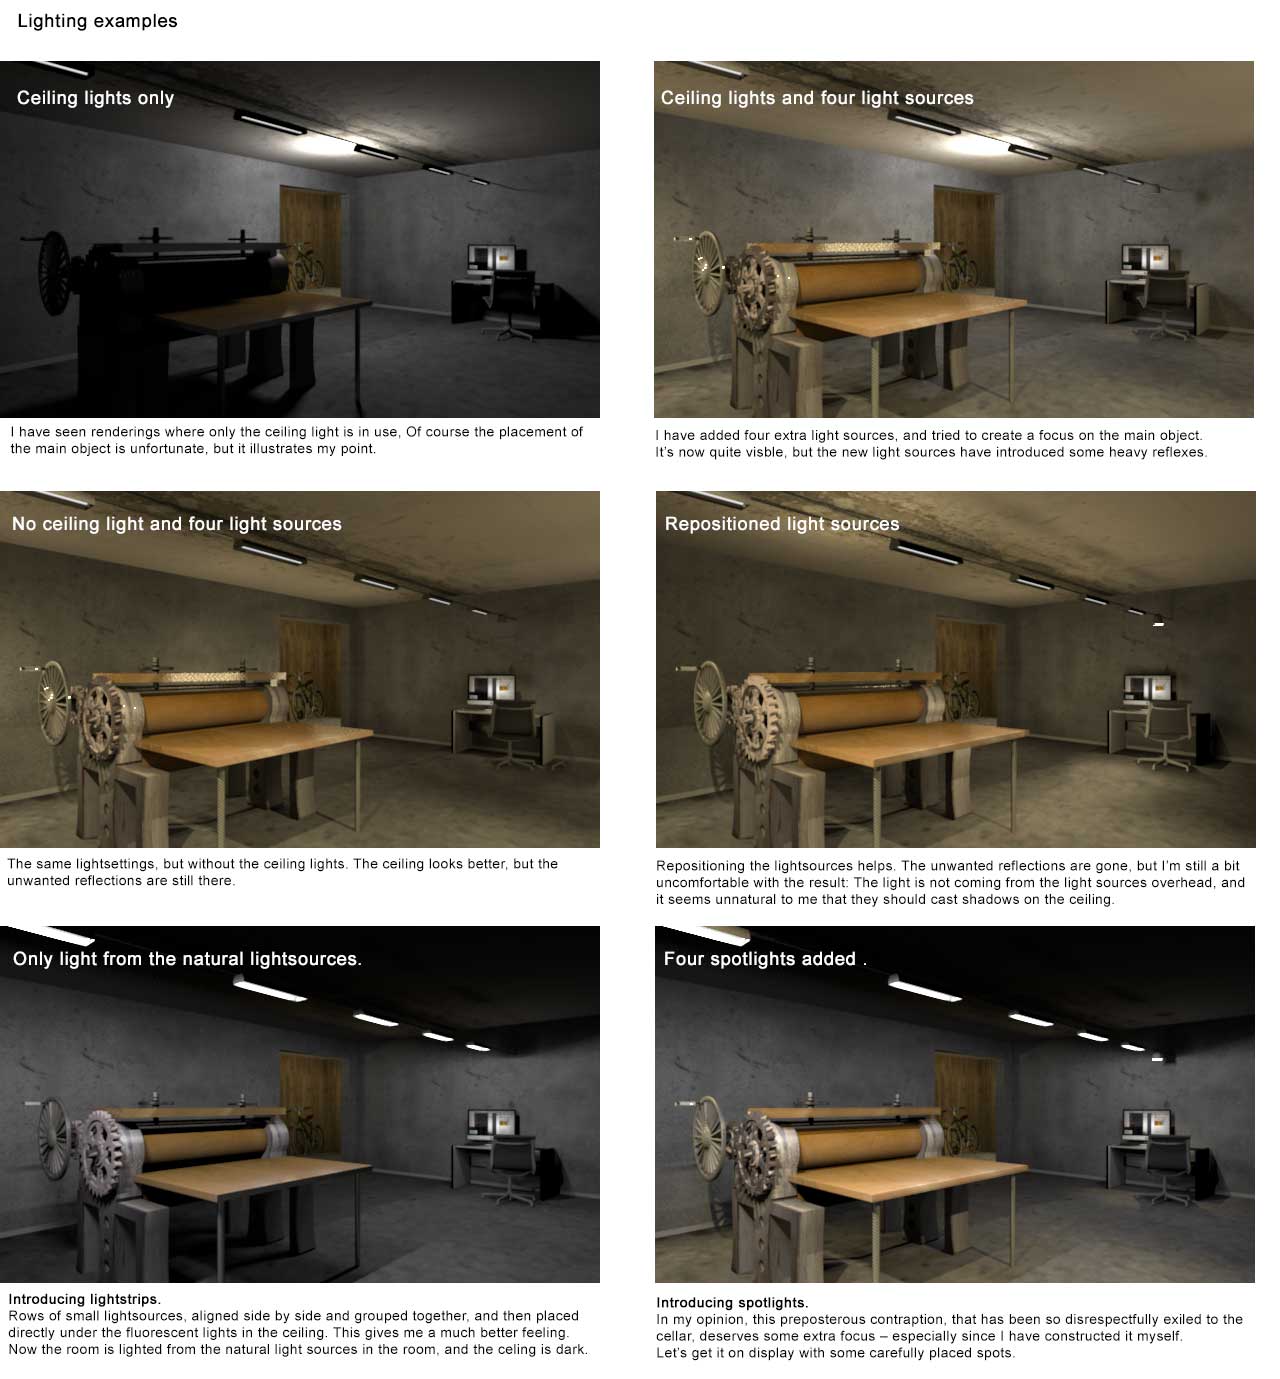
Lighting a cellar. A cellar is often lighted by the use of fluorescent light bays. We have some of these in both the cellar and the garage, and so has our neighbours. So I have chosen to use fluorescent light bays for my next example. Here is a my try-and-fail case-study.
This is a bigger version of the final rendering:
Using the fast rendering option, it took me about twenty previews to make this presentation – in other words; I spent about 3 minutes waiting for the preview renderings. That's not a lot. The whole process of creating the furnished cellar and placing the lights, took me about 3 hours, including some occasional interruptions and a morally motivated lunch break.
Spotlights. Using adjustable spotlights has become another of my favourite lighting methods. Spotlights can be resized from large to nearly invisible, and, if so desired, easily be hidden and placed out of view. Although they are equipped with a non-changeable light source, the adjustable Light Power makes it quite easy to blend them in with the rest of the lighting. The spotlights I'm using are created by OKH, and can be found here.
If you have an interest in studying my project file, feel free to download it: Cellar-light.sh3d
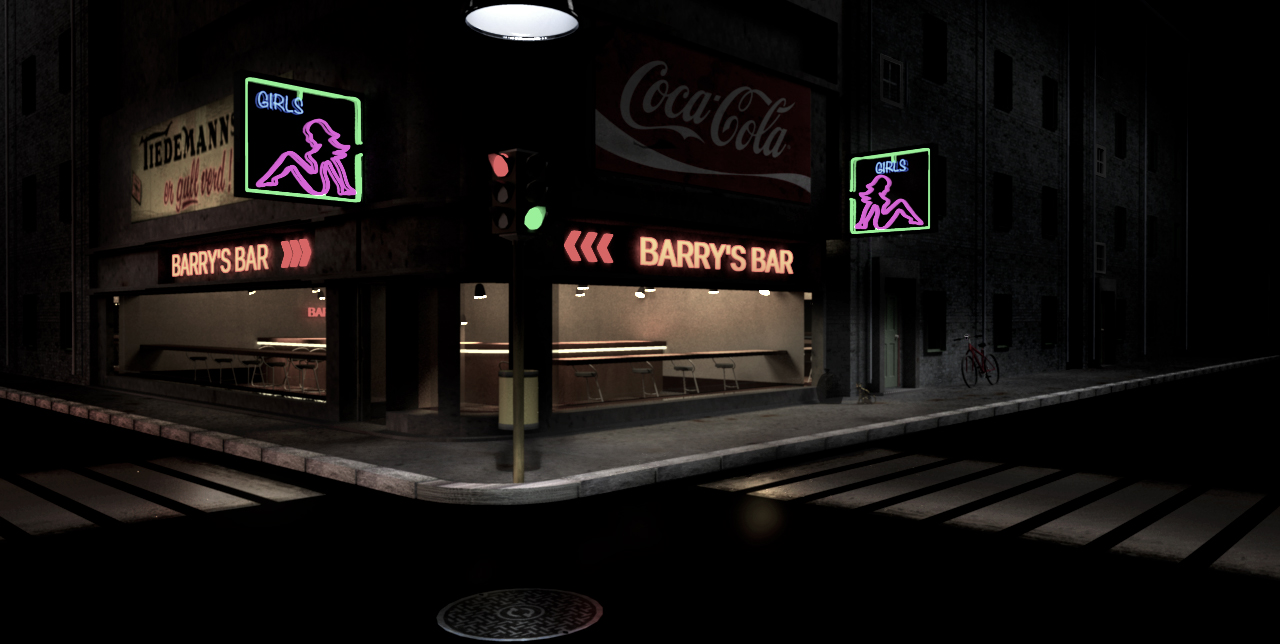
If you have noticed, and wondered about, why the bulbs in my light bays seem to be glowing, it's because they do. I have seen there's a discussing going on about the glow function in this thread. This is a topic that have been discussed several times before, but the earlier discussions has not been as instructive as there. I suggest reading it if you want to make renderings that go something like this:
Sweet Home 3D is a fantastic program for architectural creations, for furnishing and redecoration, as well as for creating pure fantasies and illustrative work. I use it for the latter.
My arts teacher had a favourite phrase: Every picture tells a story – a story that ends at the moment of it’s creation. I used to think he was right, but today I have started thinking that it's only partly true. In my opinion images can create stories as well as telling them, long after they are created. Just observe children at an art exhibition, as they are imagining the hidden stories behind a painting.
I found this in my diary:
Happy holidays.
Cecilia
----------------------------------------
[Edit 3 times,
last edit by Ceciliabr at Dec 30, 2017, 3:57:43 PM]
Can I do it with sweet home 3D (light with no dark shadows)? My main problem are the walls, no matter what time/day I set the walls has pretty dark shadows, and I can't set the sun 90° above the apartment. I want to eliminate the sun totally, but I have no idea how.
Denmark
Joined: Jul 7, 2013
Post Count: 635
Status:
Offline
Re: Lighting tips for advanced rendering
@BullFrog
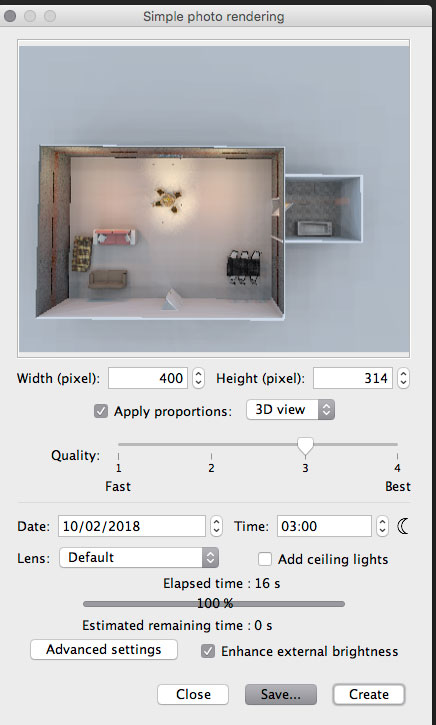
You can come close if you use the PhotoVideoRenderer-1.3, set the clock to night (moon symbol), preferably use a grey sky-texture (not colour) and tick Enhance external Brightness.
Denmark
Joined: Jul 7, 2013
Post Count: 635
Status:
Offline
Re: Lighting tips for advanced rendering
@BullFrog
Well, black is black , and white is white – and any mixture of the two is called grey. Obviously your sky is too dark. Try THIS grey, and see if it helps. This is the one I use. Or try using a completely white texture.