Joined: Aug 27, 2014
Post Count: 36
Status:
Offline
Re: Reality Check
Concerning the books textures. I have worked out an easier way to correctly map simple textures like that. I don't use Blender. Instead, I take the original texture and import it into Sweethome3d. I size it in the editor, making note of the dimensions. Then I add a box and resize that to match the dimensions of the texture. Then I apply the texture. Then I export the box as an object. Then I can import it into Blender and place it on the bookshelf as I want it. Repeat for the other books. When all is as I like it, join all into a single object and export as object format again. Then import into the Sweethome3d Library editor. It will come in with all textures correctly oriented.
Easier? Seems overly complicated for my taste. I can't imagine doing that for every single of the roughly 80 books on the shelf. That must take forever! If you do it in Blender you can use one image for all the spines on one shelf (or even several shelves at once). Use the image as background in Blender to get the size of each individual book spine right - no need to take note of book dimensions. Then unwrap all book spine faces at once and correct the resulting UV layout by exactly placing the faces on the texture image. The tedious part is not actually the UV layout itself but the placement of the planes for the book spines on the background image.
I must admit that it takes some effort to learn how image textures work in Blender. But once you get the hang of it you quickly start to appreciate the possibilities it gives you.
USA
Joined: Aug 2, 2014
Post Count: 52
Status:
Offline
Re: Reality Check
To each his own. You are right about the difficulty of applying textures in Blender. I can never seem to get it right. Either the texture overlaps the face it is supposed to be applied to, or it's off on one or more of the dimensions and when I try to adjust it, it seems to get worse not better. And even when I manage to get it somewhat close to what I want, when I go to import it into Sweethome3d, the textures almost always disappear. If I load the object in Blender the texture is there, load it in Sweethome3d and it's bare. I've tried putting it into zip files, zipping it with all textures. Nothing seems to work. Doing it my way, works - at least for me. If I didn't say it before let me say it now...you did good on your project. It looks fantastic.
I am a newbie trying to design my living room, added lights but dont know how i can view my design with the lights on or turning the lights on. Thabk you very much for the assistance.
Joined: Aug 27, 2014
Post Count: 36
Status:
Offline
Re: Reality Check
@jfs51765: You should ask general questions in the appropriate forum in a new thread and not abuse other people's threads.
To anwser your question: Light sources are only visible in rendered photos or videos at the two best quality settings. It's not possible to see the lights in the live 3D view in SH3D. When you add a light source (or a lamp that includes a light source) it will be turned on by default. You can adjust its power in the change furniture dialog.
Australia
Joined: Jun 9, 2013
Post Count: 20
Status:
Offline
Re: Reality Check
Truly brilliant, slimpy. I had to look them over a few times to work out the photo from render. Well done. I understand the point of your SH3D realistic render 'experiment', but also agree with a previous poster ... that it wouldn't take much post-processing in Photoshop to make the two images exactly the same. Nice work.
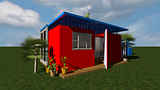
---------------------------------------- Container Housing Projects
Joined: Feb 6, 2015
Post Count: 75
Status:
Offline
Re: Reality Check
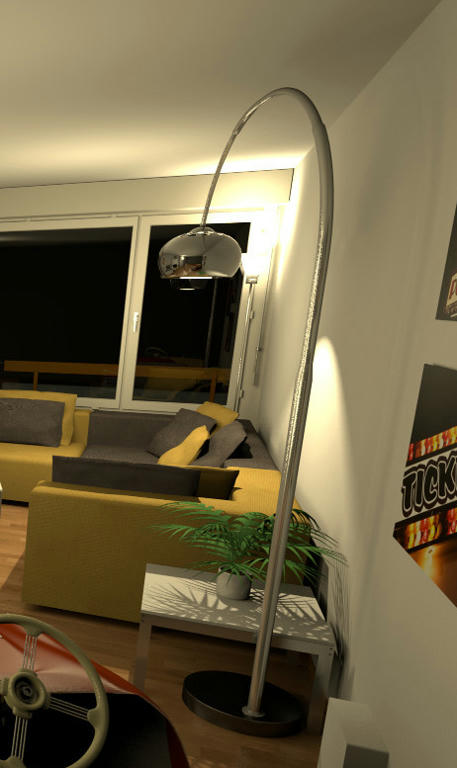
Where can you get the lamp? Another question, why does the lamp not reflect the light source? I see your rooms has a lot of light sources, but they don't appear on the lamp!
----------------------------------------
My channel: https://www.youtube.com/channel/UCM1mqUjGRtD4uCXX5qzgG3w
The lamp doesn't reflect the light sources because they are generally invisible. The only thing you see when placing a light source in your scene is the lighting effect on objects. Unlike real light sources there is no light emitting object (light bulb, etc.), only an abstract sphere from where light rays extend.
Likewise you don't see any light source directly (or indirectly in mirrors), even when placed in the middle of a room.
Joined: Feb 6, 2015
Post Count: 75
Status:
Offline
Re: Reality Check
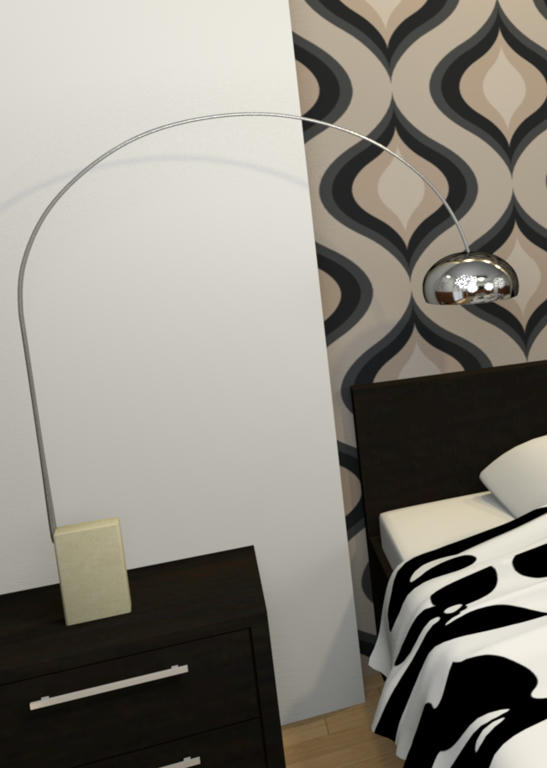
Thank Simply,
I still don't get it. Did you set the lamp max shiny? Whenever I set furniture or objects shiny, they reflect all light sources. Can you help me make the lamp not reflect the light sources? You can look at my pic here.
Joined: Aug 27, 2014
Post Count: 36
Status:
Offline
Re: Reality Check
Hi AnhĐinh
Sorry for the late reply.
I think the key difference between our lamp models is that I don't rely on the shininess property of the object. Instead, my lamp makes use of the sweethome3d_window_mirror prefix.
If the name of an object (group) in a model (e.g. the lamp) starts with sweethome3d_window_mirror, SH3D will render the object surface as a mirror (only in photo creation at the two best levels).
The mirror model in the stock furniture catalog is a good example for this feature. The following is the OBJ File of that model with the g property (object, group name) set to sweethome3d_window_mirror
# Blender3D v245 OBJ File: mirror.blend
#
# Modelled by Emmanuel Puybaret / eTeks under Blender 3d modeller for SweetHome3D
# This file is under Free Art License, see http://artlibre.org/licence/lal/en for more informations
#
# www.blender3d.org
mtllib mirror.mtl
v 20.066208 19.999985 -0.231418
v 20.066208 -19.999994 -0.231418
[...]
g sweethome3d_window_mirror
usemtl Material_mirror.jpg
s off
f 1/1 2/2 3/3 4/4
[...]
Joined: Feb 6, 2015
Post Count: 75
Status:
Offline
Re: Reality Check
Thanks Slimpy for your help.
Would you be pleased to show me how to edit the properties of object? I open Furniture Editor but I can't find the way to edit object in a model like yours.
----------------------------------------
My channel: https://www.youtube.com/channel/UCM1mqUjGRtD4uCXX5qzgG3w