Italy
Joined: Jul 18, 2018
Post Count: 155
Status:
Offline
Re: Light & textures - rendering examples of this and that.
Here is a result I obtained using your template Cecilia.
What do you think about it?
For the one with seaview, I think you placed the horizon way too high. Make sure the horizon and the distant mountain are within the green band in Cecilia's template.
Here is the result, I think it is better, thank you Rontant.
Denmark
Joined: Jul 7, 2013
Post Count: 637
Status:
Offline
Re: Light & textures - rendering examples of this and that.
But the problem is that I should scale a lot the background image in order to have a large covering of the sky, and this brings a lower quality of it.
Seems you are using a wide angle FoV here. Try setting the FoV to around 60 and move the camera back until you have a nice shot.
Note: you can move the camera further back to see the coordinates better. In fact you can move the camera anywhere on the x,y and z -axis, and your preview will still show exactly the same sector of the sky.
Do this again:
Look at the coordinates. Your image does not need to cover more than what's inside the coordinates, neither the width or the height.
Denmark
Joined: Jul 7, 2013
Post Count: 637
Status:
Offline
Re: Light & textures - rendering examples of this and that.
@ AdeleAlli
I think it's better when the horizon/sky-image is sized this, but maybe you should select a wider image, so that the horizon is covered for the full with of the snapshot.
If I could see your project file, I could make some suggestions about using the sky image.
Joined: May 12, 2013
Post Count: 1545
Status:
Offline
Re: Light & textures - rendering examples of this and that.
Thanks for the tutorial, Cec. Brilliant as usual. I suspect quite a few of us have struggled with getting a (mountainous) horizon right.
Just to emphasise the point you also made in the cheating thread 7182, using a template for the sky is a good idea to deal with the projection Puybaret explained in thread,5533#24187.
There are some nice ways to find real 360° panoramas if you are willing to do a stitching job - and depending on the landscape.
Creative use of various street-view images.
Google Earth type services, such as Virtual globe (good detail for Scandinavia, less so elsewhere - use numeric input to grab the pictures from consistent hight and correct angles).
Or, if the plan situation has a reasonably clear view of the horizon, climb up on the roof and take panorama images.
Point is, a template will make the stitching and projection editing significantly easier.
You may also have mentioned this, at least implicitly, but the sky texture starts and ends RIGHT in the SH3D view. I.e. if the SH3D compass points the default North, the panorama texture will begin at due East.
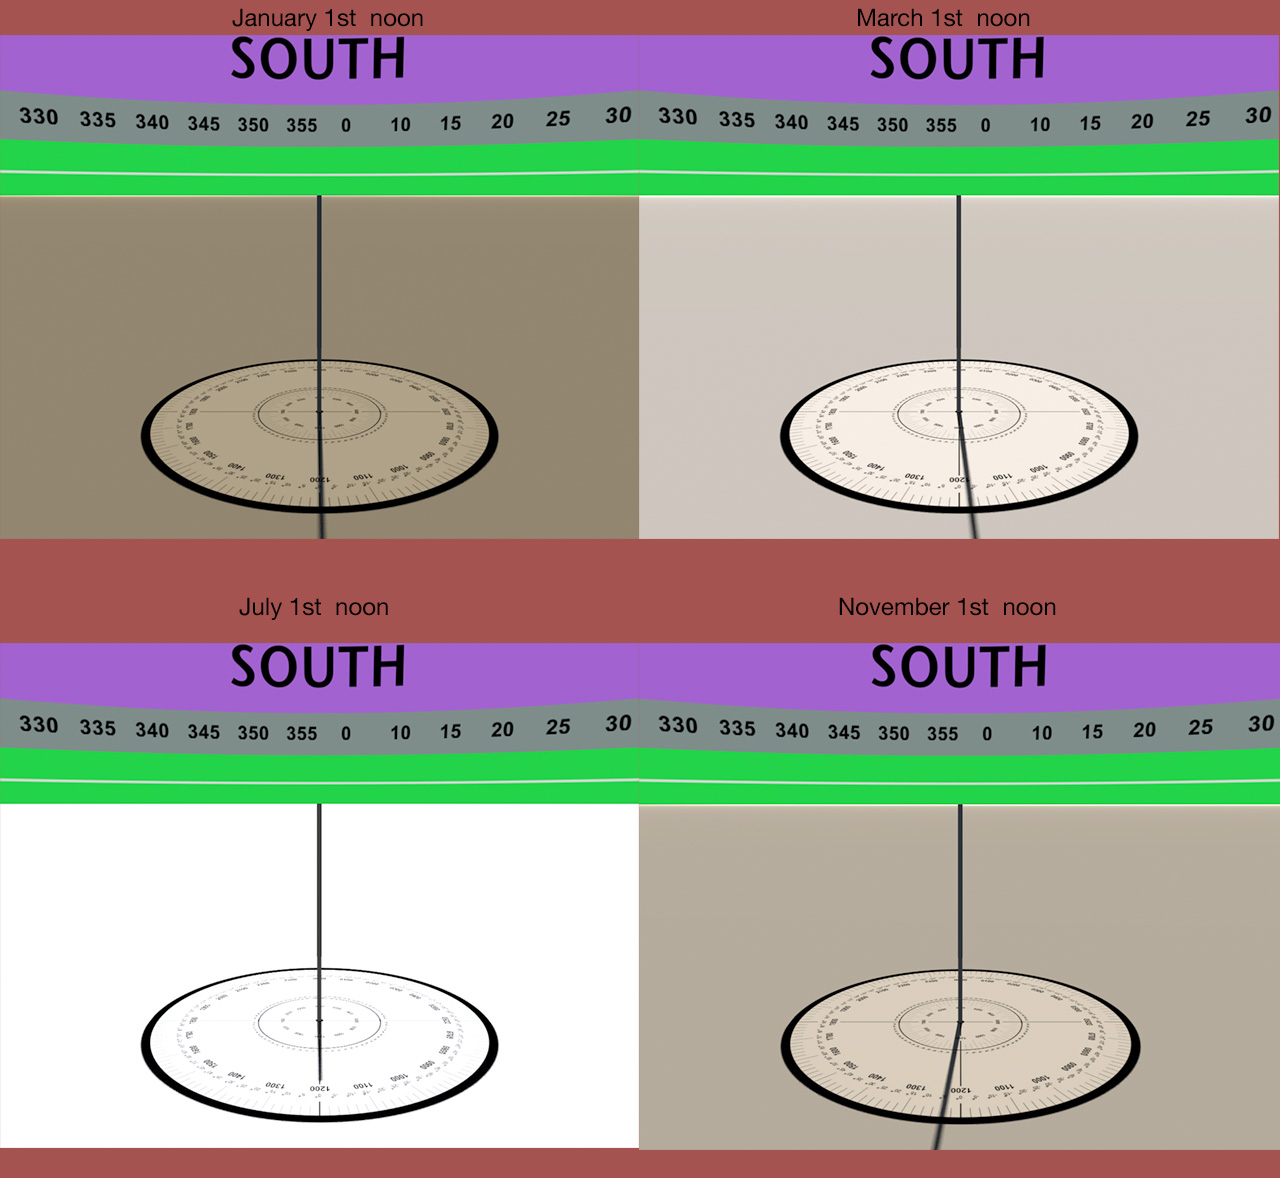
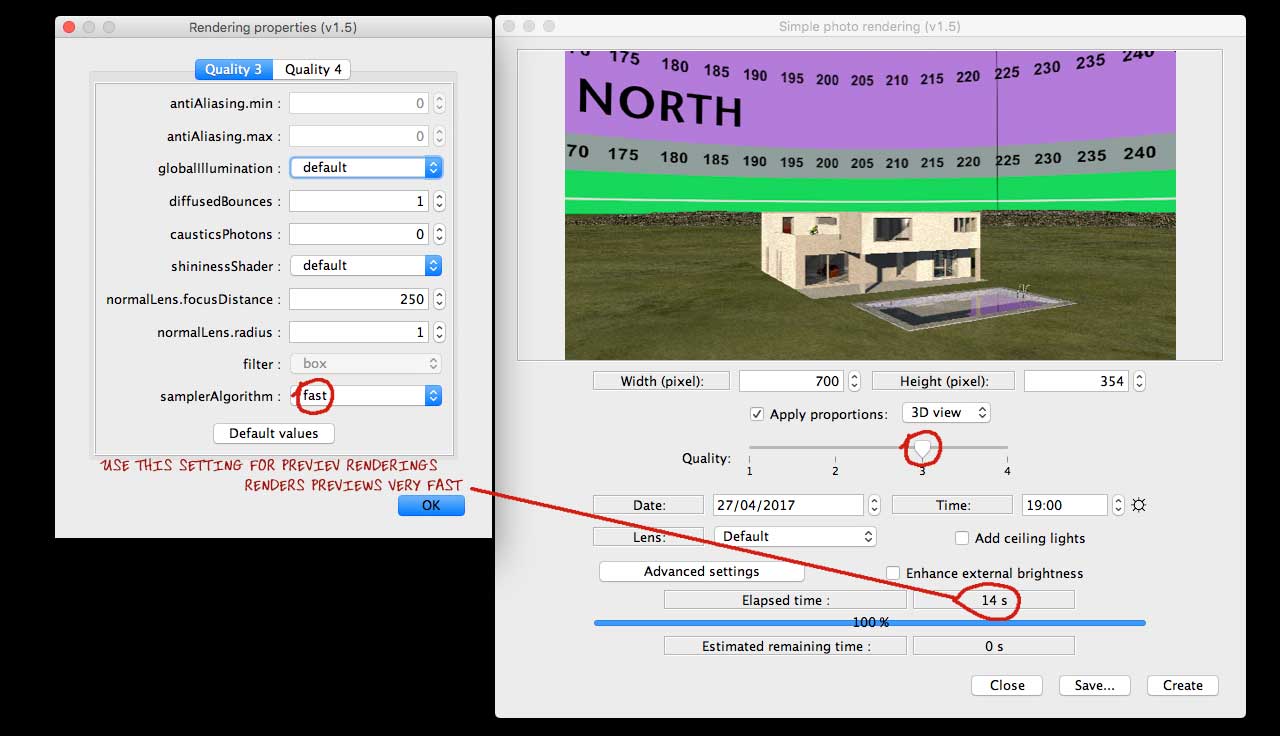
So far, so good - 4:1 (360×90) grid, vertical degrees compress towards zenith to adjust the panorama gives a general feel for the location with approximate views from around the house. Forgetting picture perfect for a second and thinking vertical accuracy: what is the best scale? Sure, I know there is a difference between 3D view and hq rendering (feature request 668). And as long as I can get a general idea what I will see from my favourite chair, I can live with inaccuracy (gave up on an accurate starry night sky ). But I have this unpleasant feeling that I am missing something with my 360×90 grid.
The image below is late October midday sun at 60° North(should be some 18° above horizon - placed on in image as illustration). But in addition to the 3D view showing more sky than the rendering, I cannot really make up my mind whether it looks (approximately) right.
Btw. and just for reference for anyone coming across this thread, there are some good tips in the blog too: Sunlight simulation - an all time favourite, useful for practical planning. How to add a scenery....
ok
PS. As Xiste pointed out, yours is a perfectly good hjell. Only smell missing.
..stoccafisso and regarded a delicacy...
Tried stoccafisso again recently in Veneto, thinking that my taste might have matured. It had not. But my Italian friends were unperturbed by the distinct taste and smell. Most strange.
France
Joined: Nov 7, 2005
Post Count: 9440
Status:
Offline
Re: Light & textures - rendering examples of this and that.
Thanks for sharing this very nice tip Cecilia
I added a link to this thread at the end of the tip about adding a scenery around a home, and I'm going to try to fix the issue that shows a different mapping of a sky texture in the 3D view and in SunFlow. I probably never correctly programmed the 3D view mapping. The problem is that it may break the computability of old files in the coming version, with skies a little different in the 3D view Note that the version 6.0 should also fix the frustum issues that remained.
----------------------------------------
Emmanuel Puybaret, Sweet Home 3D creator
Joined: May 12, 2013
Post Count: 1545
Status:
Offline
Re: Light & textures - rendering examples of this and that.
I'm going to try to fix the issue that shows a different mapping of a sky texture in the 3D view and in SunFlow...
Maybe, it is just me, but it would be a great help if 3D view and rendering were the same. And even better if I could understand the projection and manage to make a reasonably accurate template...
Sorry for messing with your thread Cec, but I could not help thinking about the vertical scale after more testing with your brilliant template. And although I am mathematically challenged, maybe it is as simple as calculating the sine of the angle to place the horizontal lines (???). I put it into an .svg template (which again can link to a panorama file for scaling, link is Inkscape compatible).
Denmark
Joined: Jul 7, 2013
Post Count: 637
Status:
Offline
Re: Light & textures - rendering examples of this and that.
@okh If this is messing with my thread, you are welcome to mess as much as you like!
I suspect quite a few of us have struggled with getting a (mountainous) horizon right.
Me too! But there are, I assume, two reasons for wanting this:
One is the aesthetic reason – to get a nicer illustration.
The other is to make close to realistic predictions of the views framed by the windows – using a backdrop as aid when deciding placement and angle of a house.
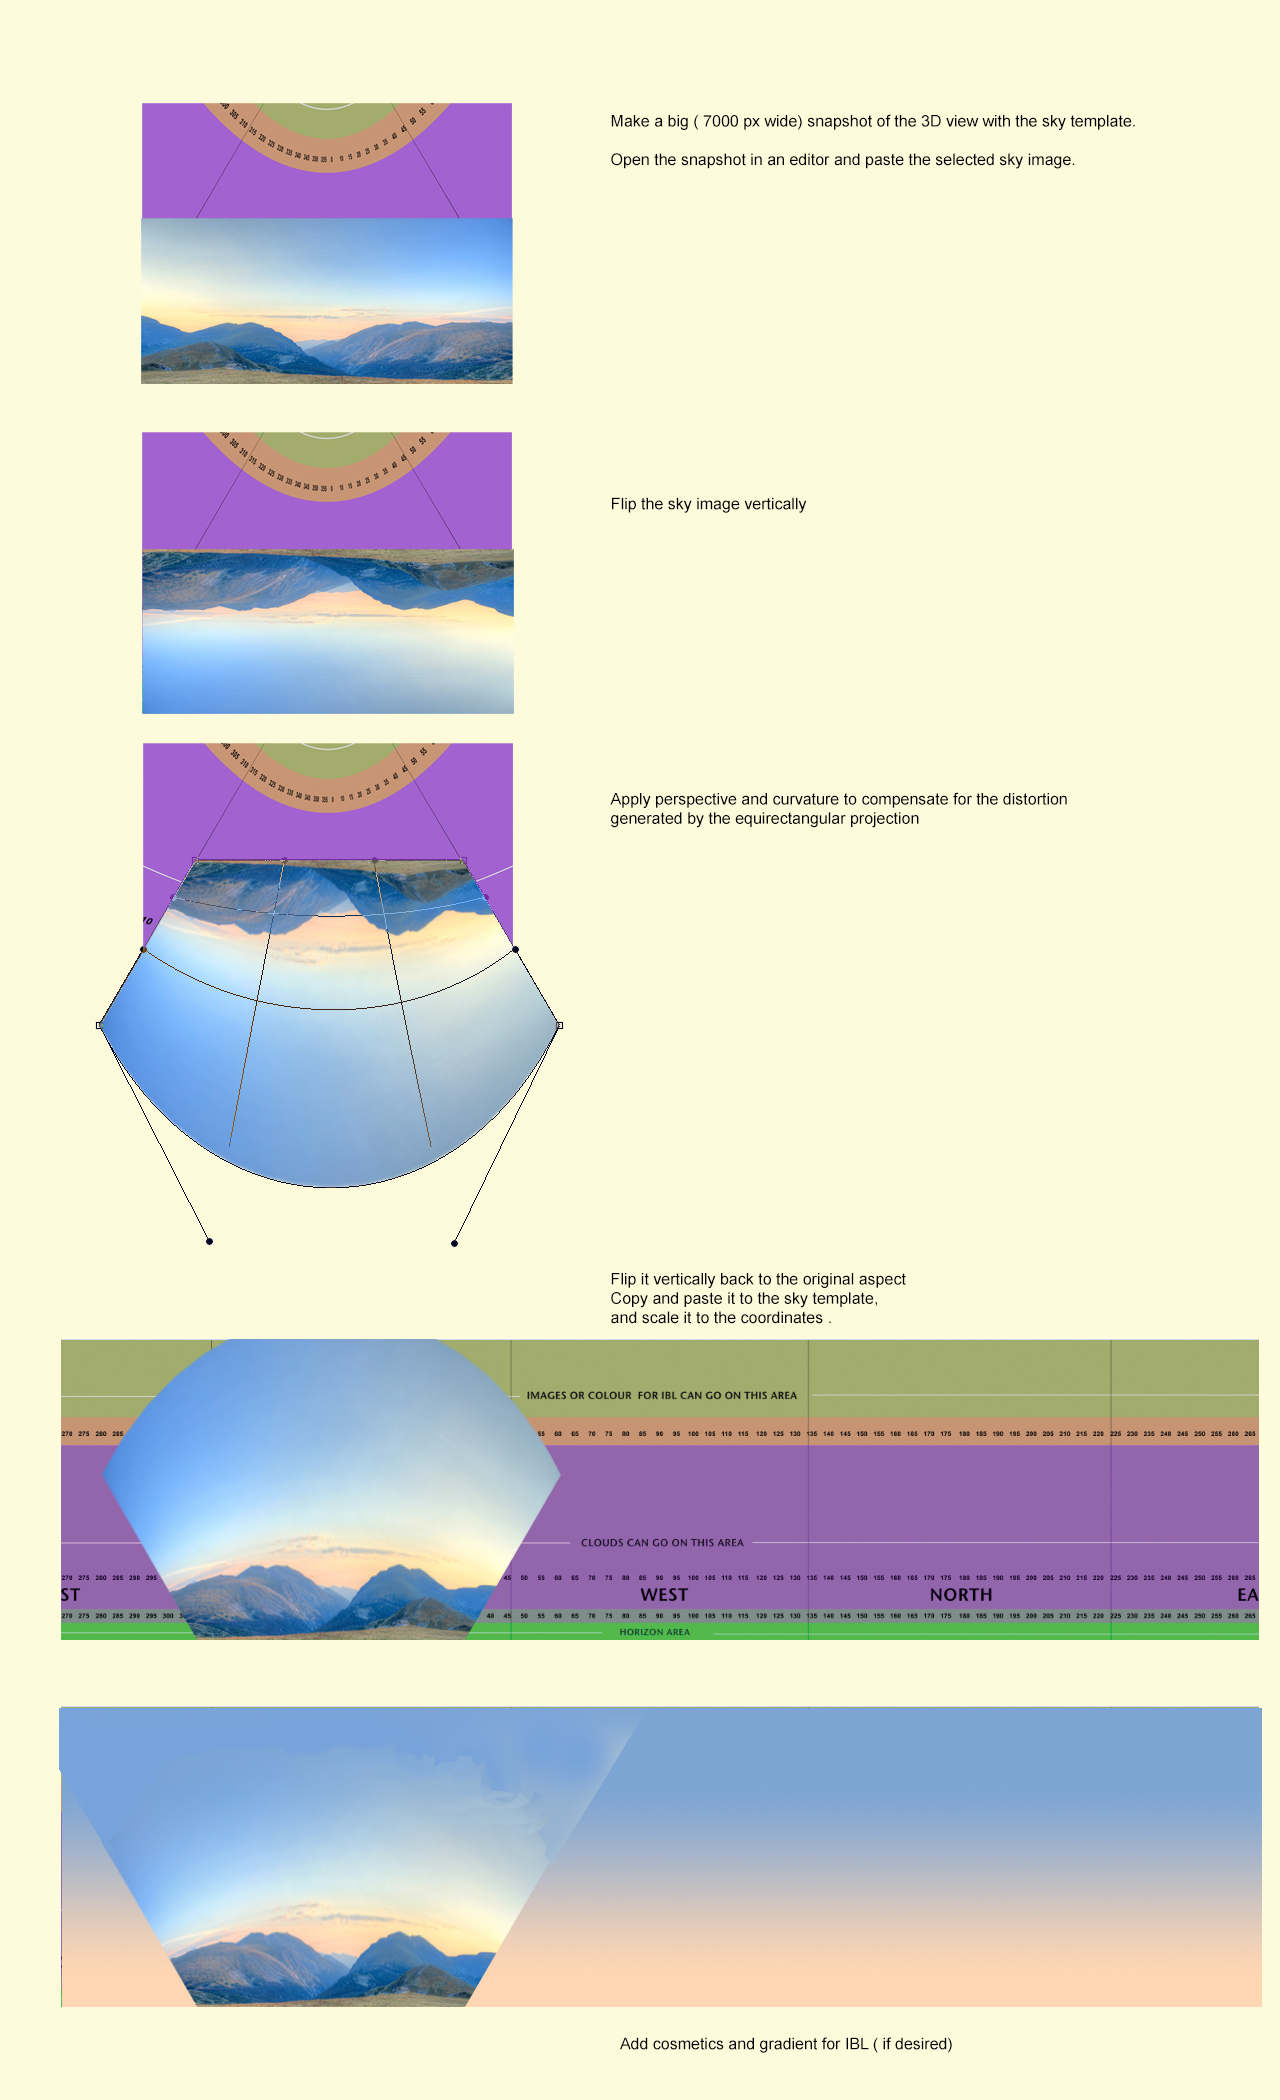
Achieving the latter (accurately), I think, will not be possible with the simple template I have made, In fact I don't think it's possible to make any template that can be used to completely compensate for the equirectangular distortion. But to perform an inversion might be a possible compensation –at least to a certain extent.
Maybe, it is just me, but it would be a great help if 3D view and rendering were the same.
A matching view between the 3D preview and the rendered image would be great!
And even better if I could understand the projection and manage to make a reasonably accurate template... smile
Tsk tsk tsk... isn't it just a 4 by 1 rectangle projected on a hemisphere? So all we have to do is make an attempt to invert the distortion... right? Sounds easy... but I know it isn't. Anyway, let's try a quick & dirty inversion-method:
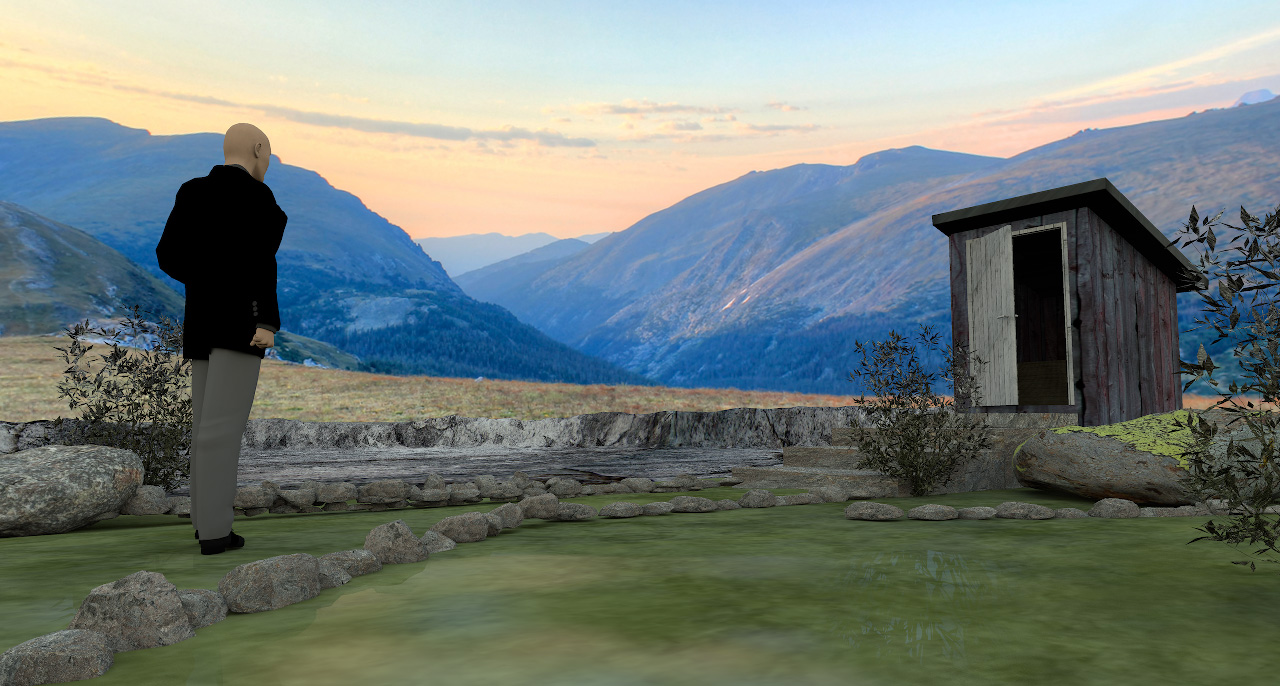
Example rendering:
It seems I could have curved the sky image bit a bit more. Try and fail is the name of the game. But it seems to work – to a certain extent
______________
For illustrational purposes, the challenge with using sky images containing mountainous formations or other sizeable objects, is to match light and shadows, exposure, tint and blurriness. A quick rendering shows that the sunlight is too bright. And I have noticed that the colour of the sunlight varies, not only by the time of day, but also by the time of year – and so do the shadows. So colour-matching by changing time and date will not work.
Since the colours and the exposure will be a complete mismatch with sunlight, IBL is the solution. Using IBL, I can colourize the upper part of the sky image to make a better colour-match. The drawback is that the shadow-map will be quite dull and render a lifeless image.
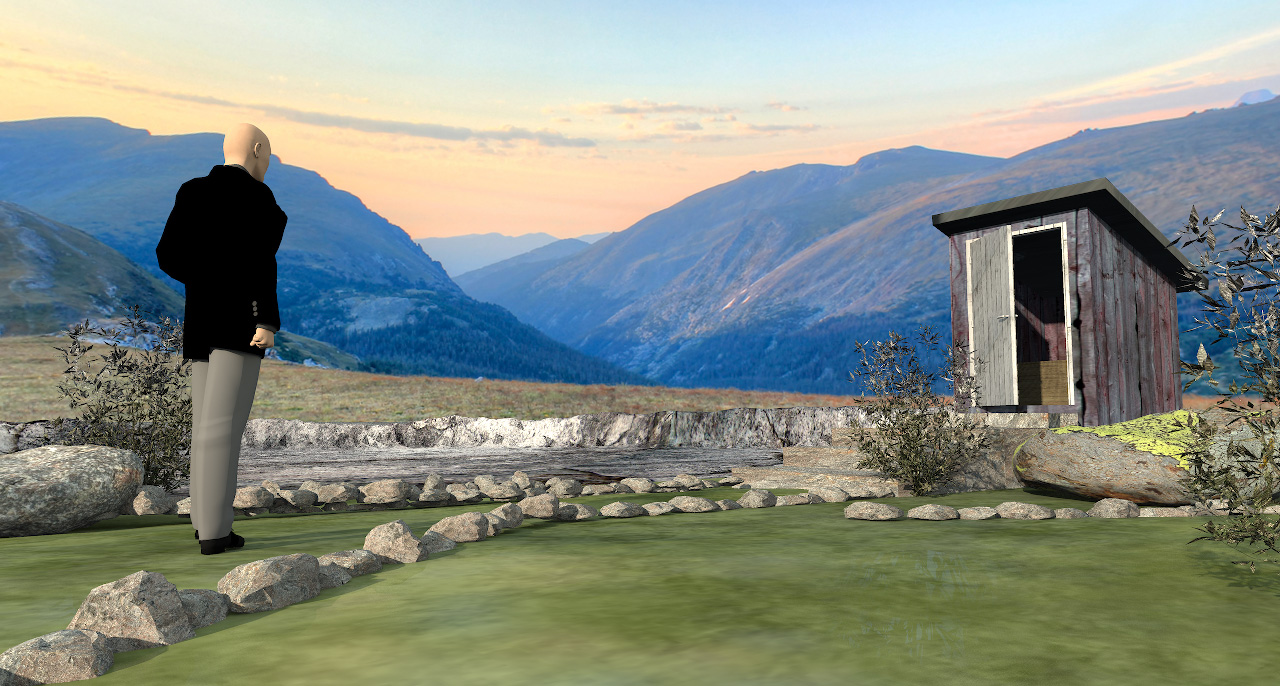
So if I have to use this sky image, I have to add shadows by using a fake sunlight – that I can create with light panels. Like this:
OK, so now the rendering is a bit closer to useable – a bit – but it's not quite there yet. If I put in a few hours of work, I just might make it work.
I will discuss lighting in a later post – and show examples.
Cec
----------------------------------------
[Edit 1 times,
last edit by Ceciliabr at Sep 5, 2018, 8:59:22 PM]


 ). But I have this unpleasant feeling that I am missing something with my 360×90 grid.
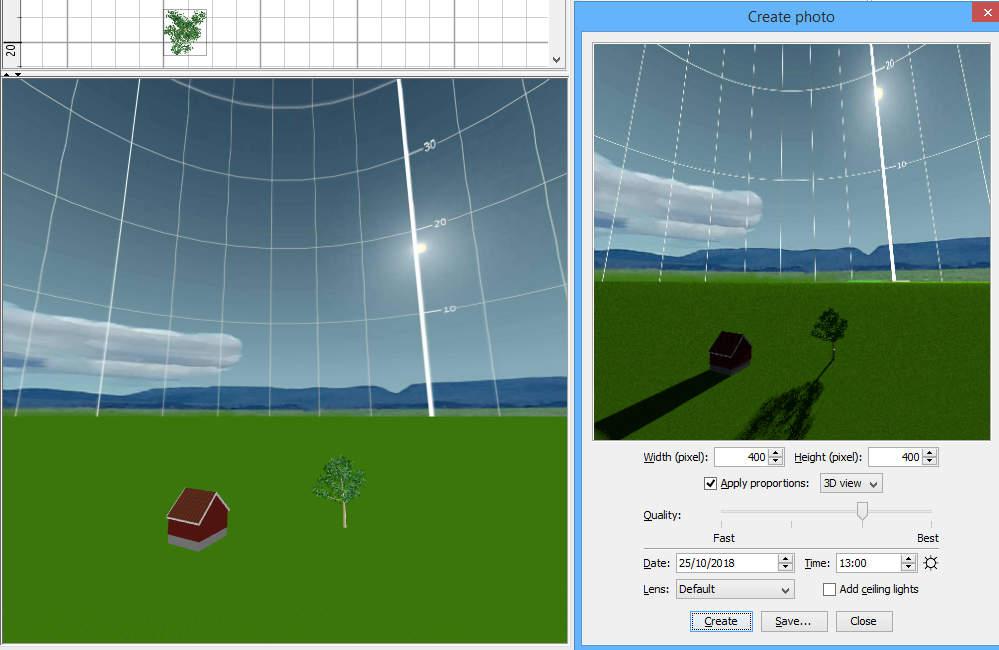


 .
.