This tip shows you the way to design a mezzanine in Sweet Home 3D. It is also a good occasion to review the differences between Create walls and Create rooms tools and the order in which they should be used for a nice rendering.
Follow the guide!
Draw the walls of the first level
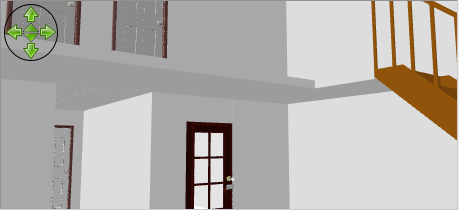
Using Create walls tool, draw the walls of your first level then place doors and windows.
As objects can’t have a negative elevation, the large window of the room where the mezzanine will take place (shown at the right of the following screen shot) has to be added at this level if you want it to spread on the two levels of your home.
Draw the walls of the upper level
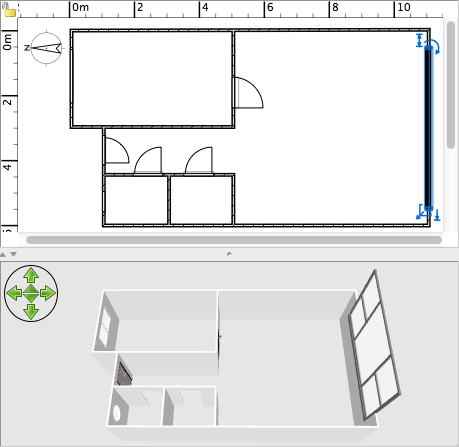
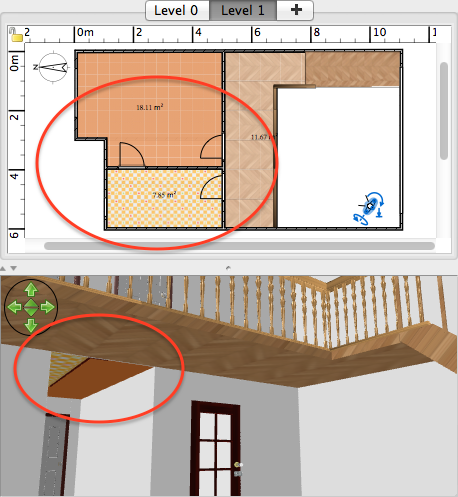
Select Plan > Add level menu item to create the upper level, and still using Create walls tool, draw the walls of that level.
Note that when the upper level is selected, you can see the walls of the lower level drawn with a light gray color and the end points of the drawn walls are magnetized on the end points of walls of the lower level. This will help you to keep the walls of the second level aligned on the ones of the first level, like for the external walls. You may also simply copy / paste the external walls of the lower level in the upper level.
As the large window added to the first floor is taller than the lower level height, note also that it still appears at the upper level and makes a hole in the wall part added at the upper level.
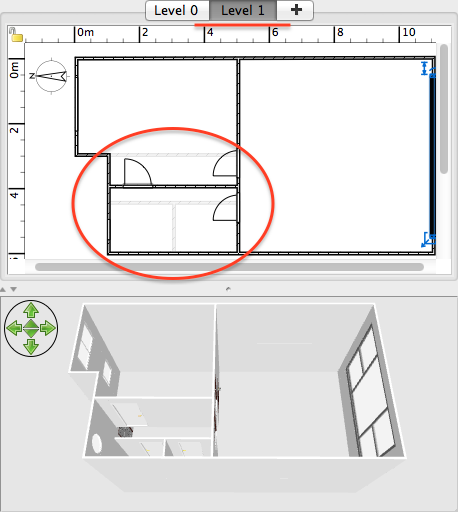
At this point, all the walls of your home are set up, but as the previous screen shot shows, floors of the upper level are missing and all the items of the lower level can be seen in the 3D view at the upper level.
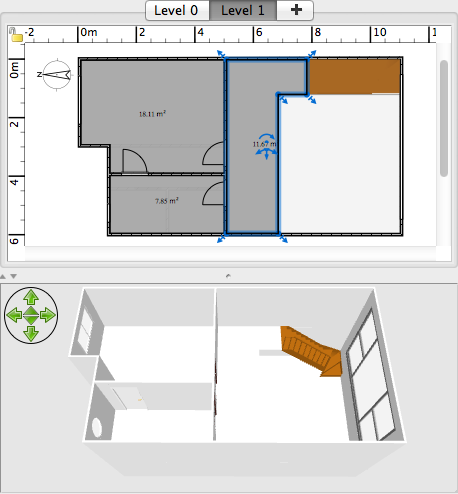
Draw the rooms
It is now the time to use Create rooms tool. This tool will let you draw the floor and the ceiling of your rooms (but ceilings are generally visible only in Virtual visit mode). In Sweet Home 3D, rooms are used to decorate your home with a color different from the default light gray and to create the floors that separate levels.
When a room covers fully a space closed by walls, the simplest way to create it is by double clicking in that space. Note that the created rooms also show automatically the measured area of the drawn room.
For special spaces like a mezzanine which is not a room totally surrounded by walls, draw a room point by point with the same Create rooms tool.
In our example, we added our staircase at the lower level before drawing the mezzanine to be able to place the mezzanine precisely at the border of the staircase.
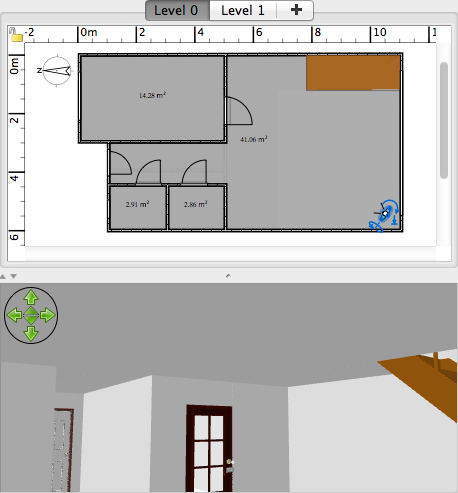
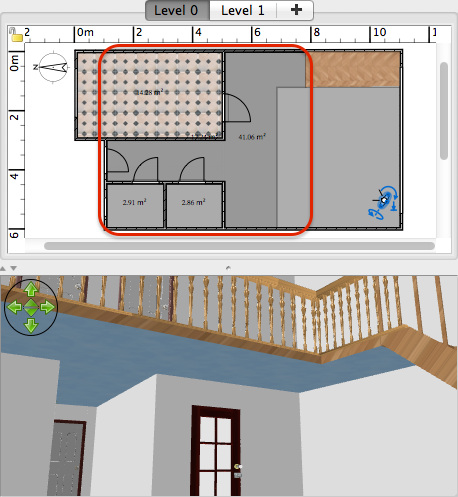
Once done, select the lower level and draw the rooms of this level with a double click to be able to decorate the floors and the ceilings of that level with various colors or textures. But this is not enough: if you switch to Virtual visit mode and look upwards in the room with the mezzanine from a point of view at the lower level, you’ll discover that a ceiling covers all the surface of this room, requiring some adjustments.
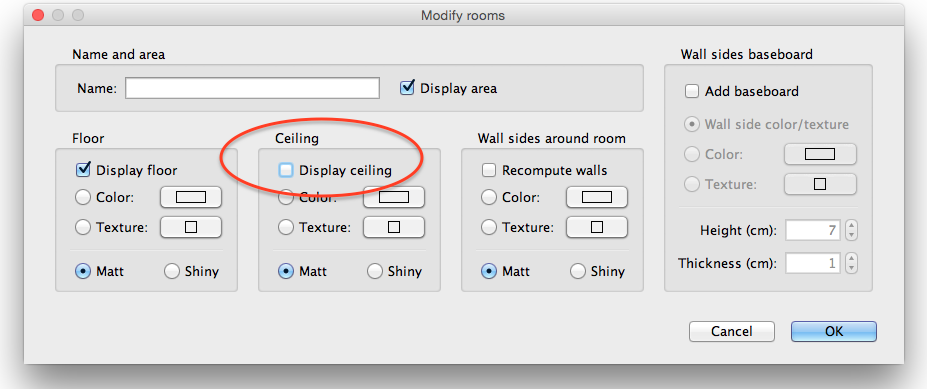
To fix this issue, hide the ceiling of that room: select the room, choose Plan > Modify rooms menu item and uncheck the Display ceiling option.
Then, as the following screen shot shows, the mezzanine will be shown correctly because Sweet Home 3D displays the opposite side of the floor added to an upper level, even if the ceiling is missing at the lower level.
Decorate your home
You can now start to decorate your home: for example, at the upper level, orange carpet in the bedroom, yellow tiles in the bathroom, and parquet on the mezzanine. Again, if you look upwards in the main room from a point of view at the lower level, you’ll see that the textures of the upper rooms will appear at the ceiling of the lower level.
To fix this second issue, draw point by point a new room covering the corridor and the mezzanine, then display its modification dialog box and this time, uncheck the Display floor option. You’ll get two superimposed rooms that cover the corridor and the main room of the home, the largest room being used to decorate the floor and the smallest one used to decorate the ceiling of the corridor and the mezzanine.
Hoping you understood the goal of rooms in Sweet Home 3D and the possibilities offered by their Display floor and Display ceiling options, you can now continue your preferred decoration… until late in the night!
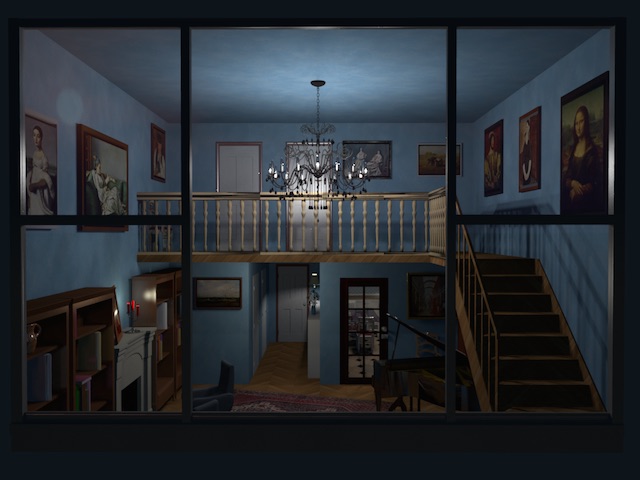
If you’re interested, the home file created in this tip is available in the file FlatInMontmartreWithMezzanine.sh3d (8.6 MB – designed by eTeks and distributed under CC-BY license). The paintings added to this arrangement were found on Wikipedia.