Denmark
Joined: Jul 7, 2013
Post Count: 635
Status:
Offline
Re: Light & textures - rendering examples of this and that.
3) Using the external brightness setting (IBL) (to some extent). TRUE Sample values have been increased for good interior rendering and better definition of the outer shadows.
It's a very nice feature that I use a lot. Adding different colours or images (or even solid black) to the top part of the sky, can really make some incredible lighting effects.
And I'll add in 4) Using detailed or complex objects like trees. In this case, the rendering "stagnates" on a part then accelerates.
Absolutely! But it's important to differentiate between large and complex models.
Norway
Joined: Apr 18, 2014
Post Count: 264
Status:
Offline
Re: Light & textures - rendering examples of this and that.
If you're a local, you are welcome to laugh your head off.
Nope, being somewhat local I'm not laughing my head off! Your attempt to create a "hjell" has resulted in a quite adequate rendition. And let me add: These are wonderful renderings, Cecilia, you have totally captured the soul of northern Norway here!
In Italy dried cod from Lofoten, Norway is called stoccafisso and regarded a delicacy. In Norway we feed it to the dogs.
Denmark
Joined: Jul 7, 2013
Post Count: 635
Status:
Offline
Re: Light & textures - rendering examples of this and that.
Cecilia, I love this two nasty marsians!
me too, and my daughter absolutely fell in love with them and named them Popp and Ding. She wants to have them 3D-printed.
I have been experimenting a bit in my spare moments and tried out different ways to create models, apply textures and use the new light panels from Enko. That's how the two ugly martians came about, without any relationship at all to anything else I normally do. I plan on publishing some more of these absurd experiments later.
Denmark
Joined: Jul 7, 2013
Post Count: 635
Status:
Offline
Re: Light & textures - rendering examples of this and that.
PART TWO
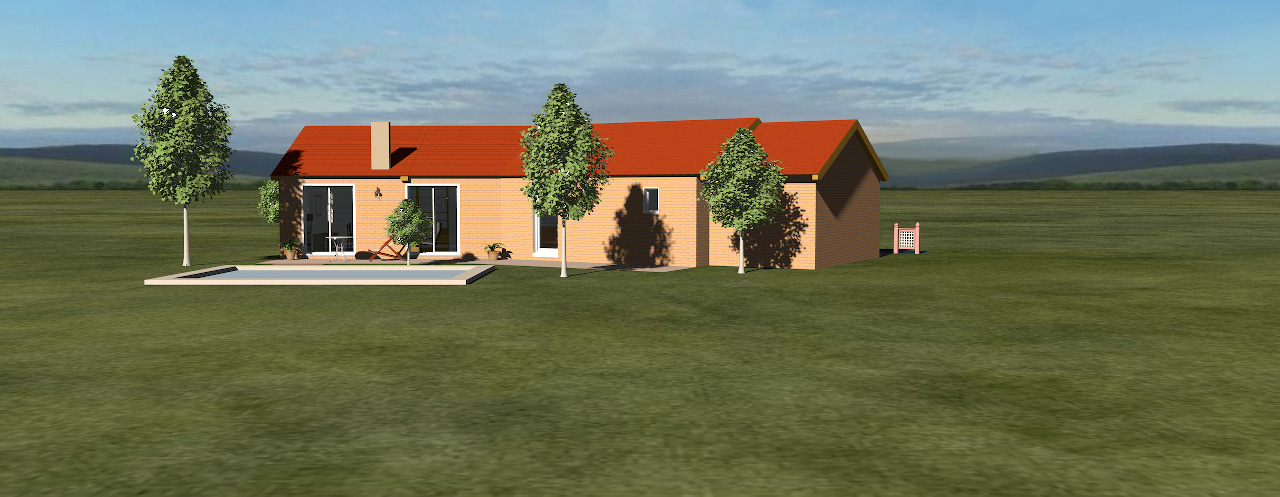
The final output of any 3D project will often be an illustration of some sort, like f.i. this snapshot of SweetHome3DExample4 , here placed in a rural environment,
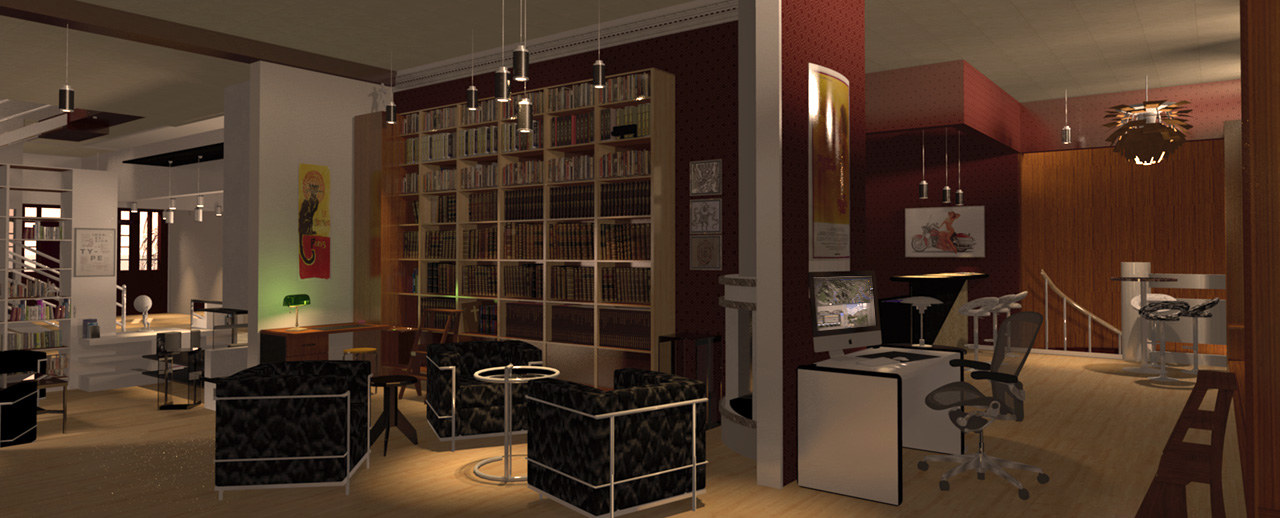
or like this interior from 2014 (one of my first projects),
or a snapshot of a toxic camping ground,
or something completely different.
So...
ABOUT THE SKY
Yes – I am aware of the fact that for most users the technical quality of a snapshot from SH3D is of less importance – but since the program offers to create photographic snapshots (and since there has – in the past – been held competitions here to score the best SH3D-rendering), I assume that for some users both the artistic and the technical quality of the end product has a certain value. Being one of these users myself, I prefer to have something other than a tiled lawn, a pixelated sky and a sharply drawn horizon surrounding my creations. Avoiding that, has been a priority since I first started using SH3D.
EXAMPLE
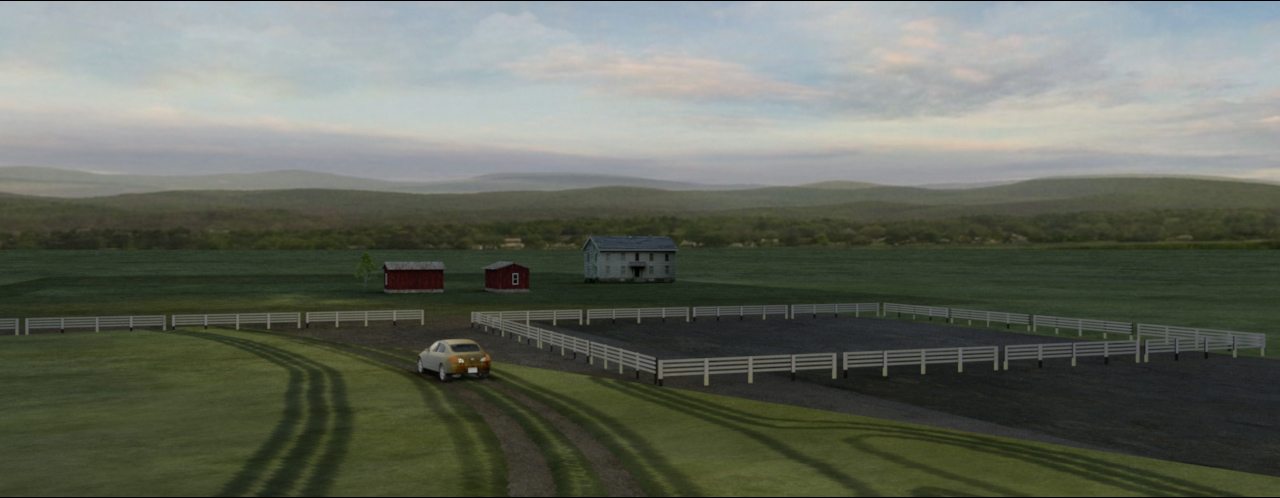
A morning shot of a small farm surrounded by a lively horizon:
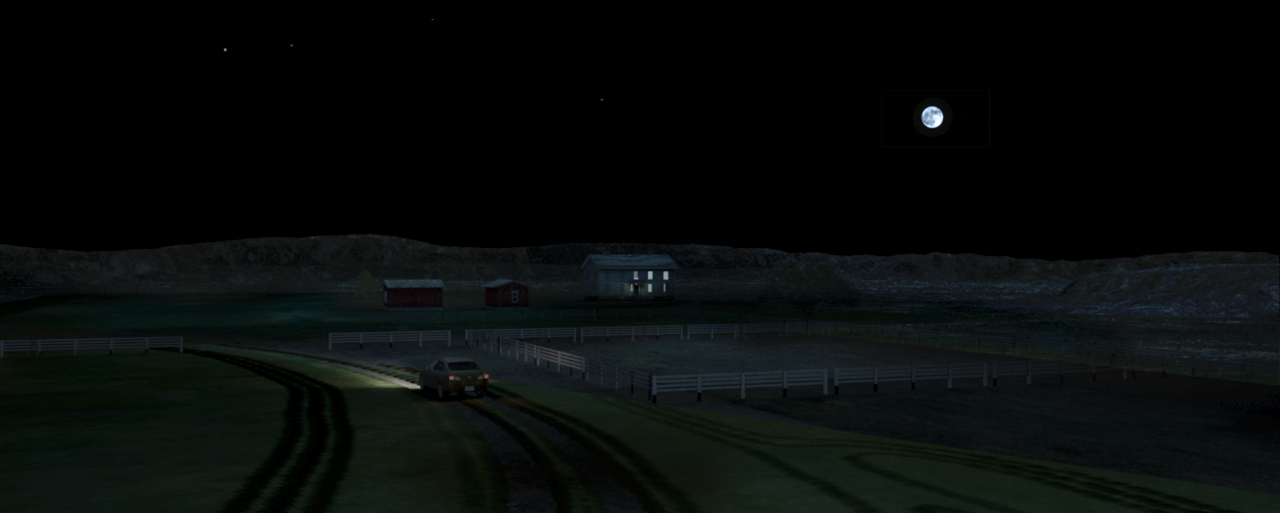
or in a totally different mood – created by a sky with a moon and a couple of stars:
This is easy to do for anyone with basic knowledge of any photo-editing software. I use Photoshop, but Gimp is a totally free open source equivalent that's easy to use.
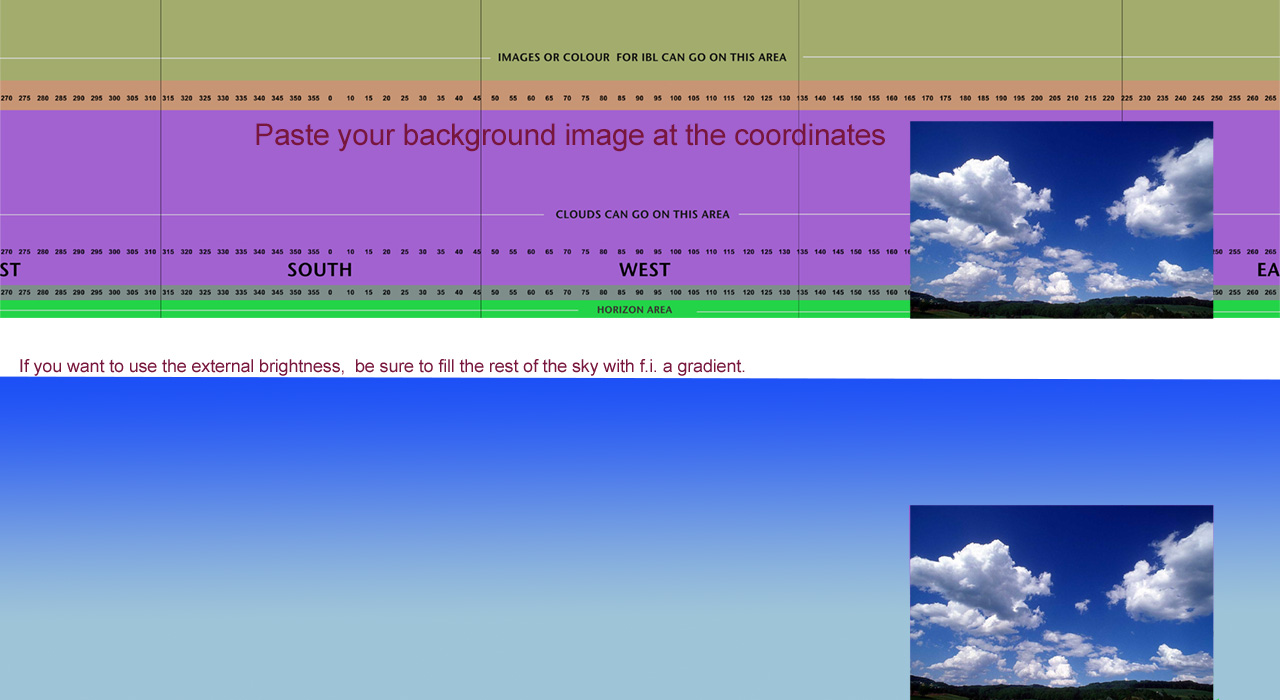
The sky is basically a 360° backdrop.
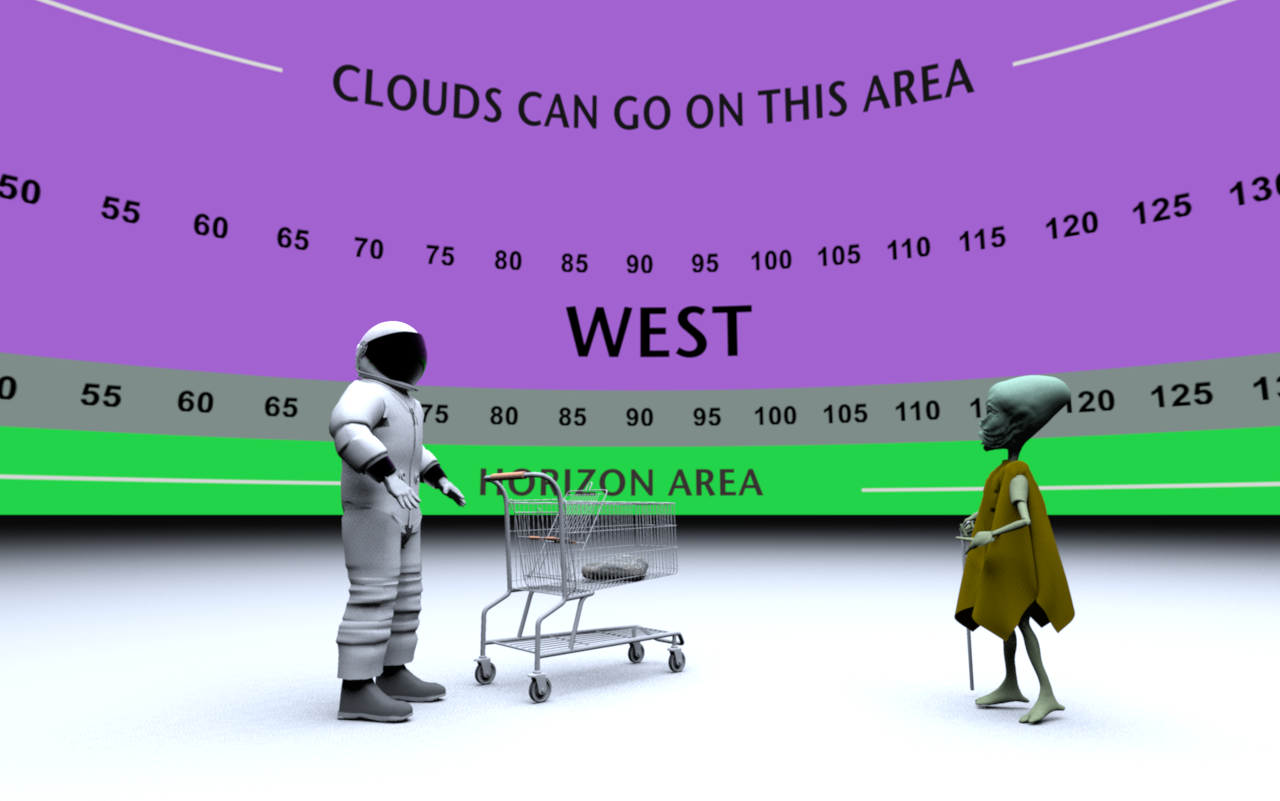
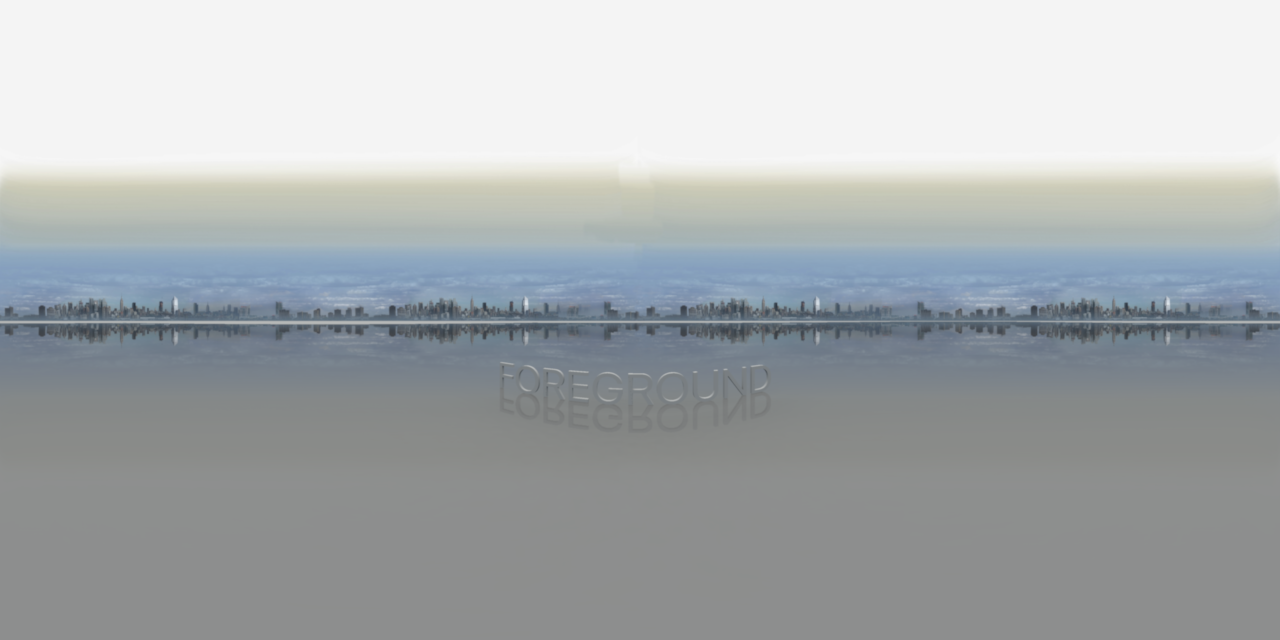
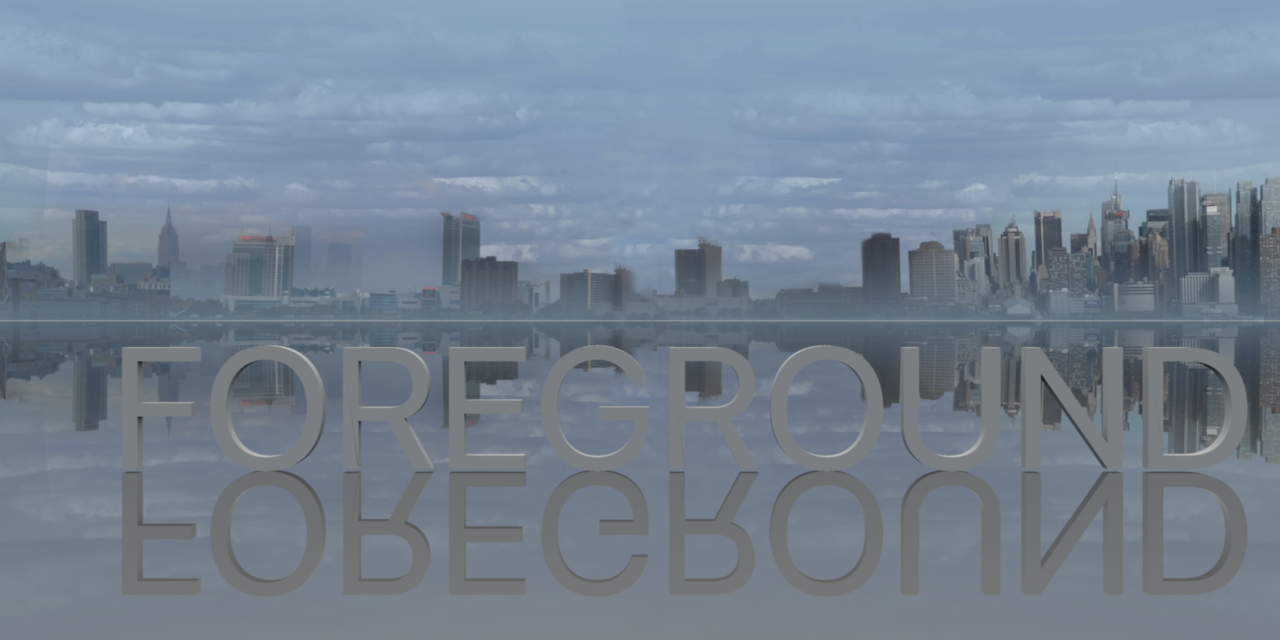
When I want to create a certain environment and atmosphere for my projects, I can either use one or several separate standing backdrops, or I can use the sky. The advantage of using the sky is that I don't have to move my backdrops around and adjust the lighting every time I want to shoot from a different angle or change the perspective. The disadvantage is that it can be a bit tricky to determine where to put things on the sky: The equirectangular projection has played tricks on me for several years, and it's only recently that have I been able to uncover the basic principles – and how to handle it. To help me find my way around it, I have constructed a handy template that enables me to pinpoint quite precisely where to place a moon, a sunset or some decorative clouds on the sky image, in order to make them appear exactly where I want them to be on the final renderings. The template looks like this:
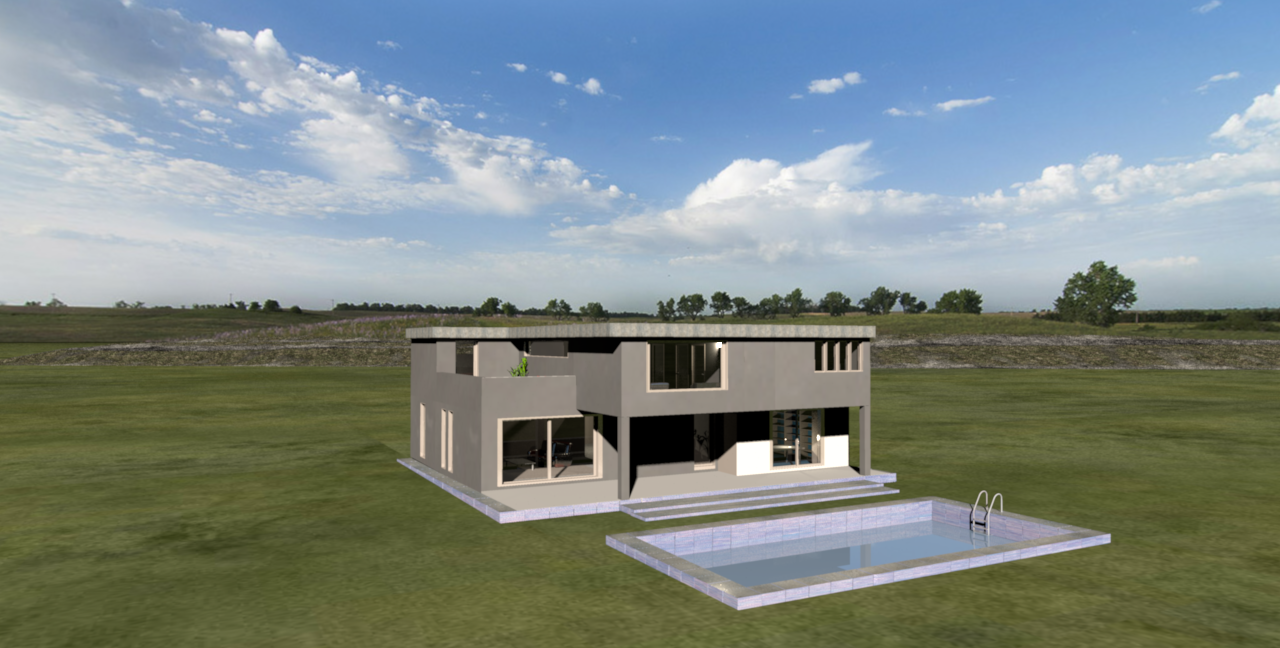
and renders like this:
________________
So, if anyone think they can find it useful: Right-click on the links to download.
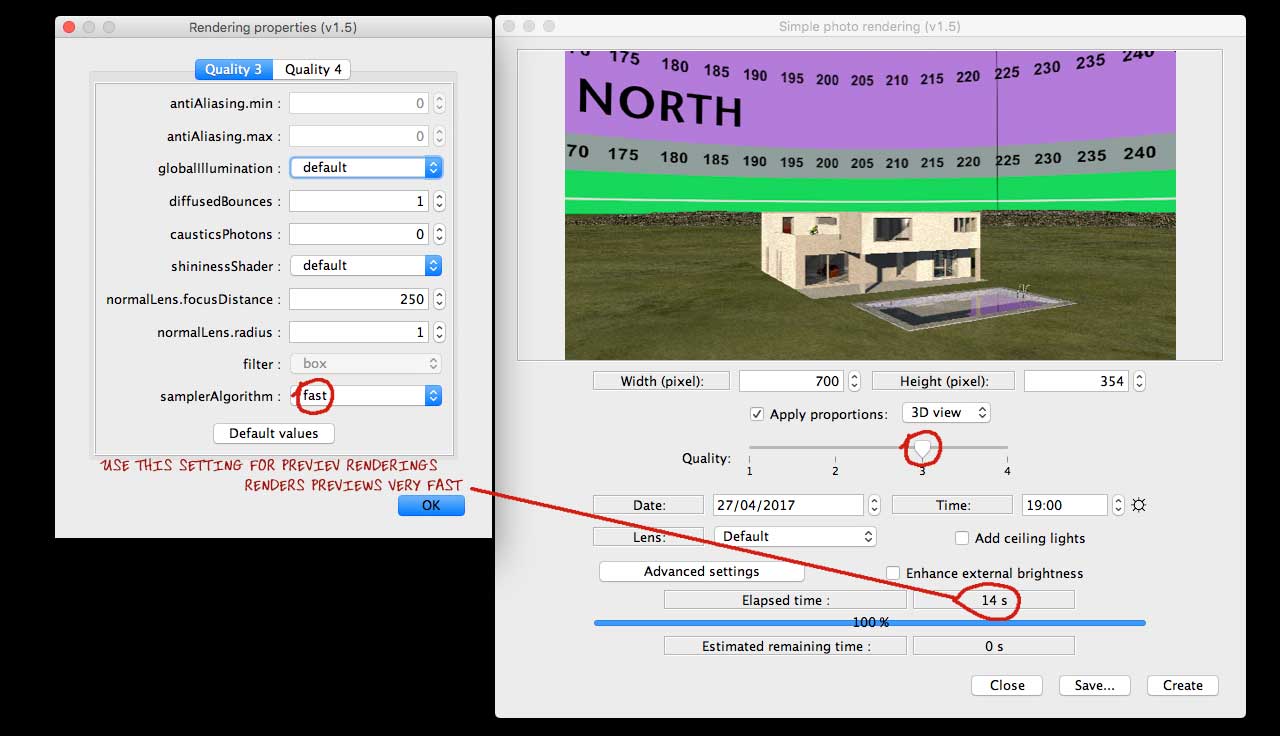
As you might notice, I have made some quick ( and dirty) modifications to the project file, like replacing the sky with my sky template and adding a swimming pool (to get a reflective surface). I have also added some other stuff that you might find useable.
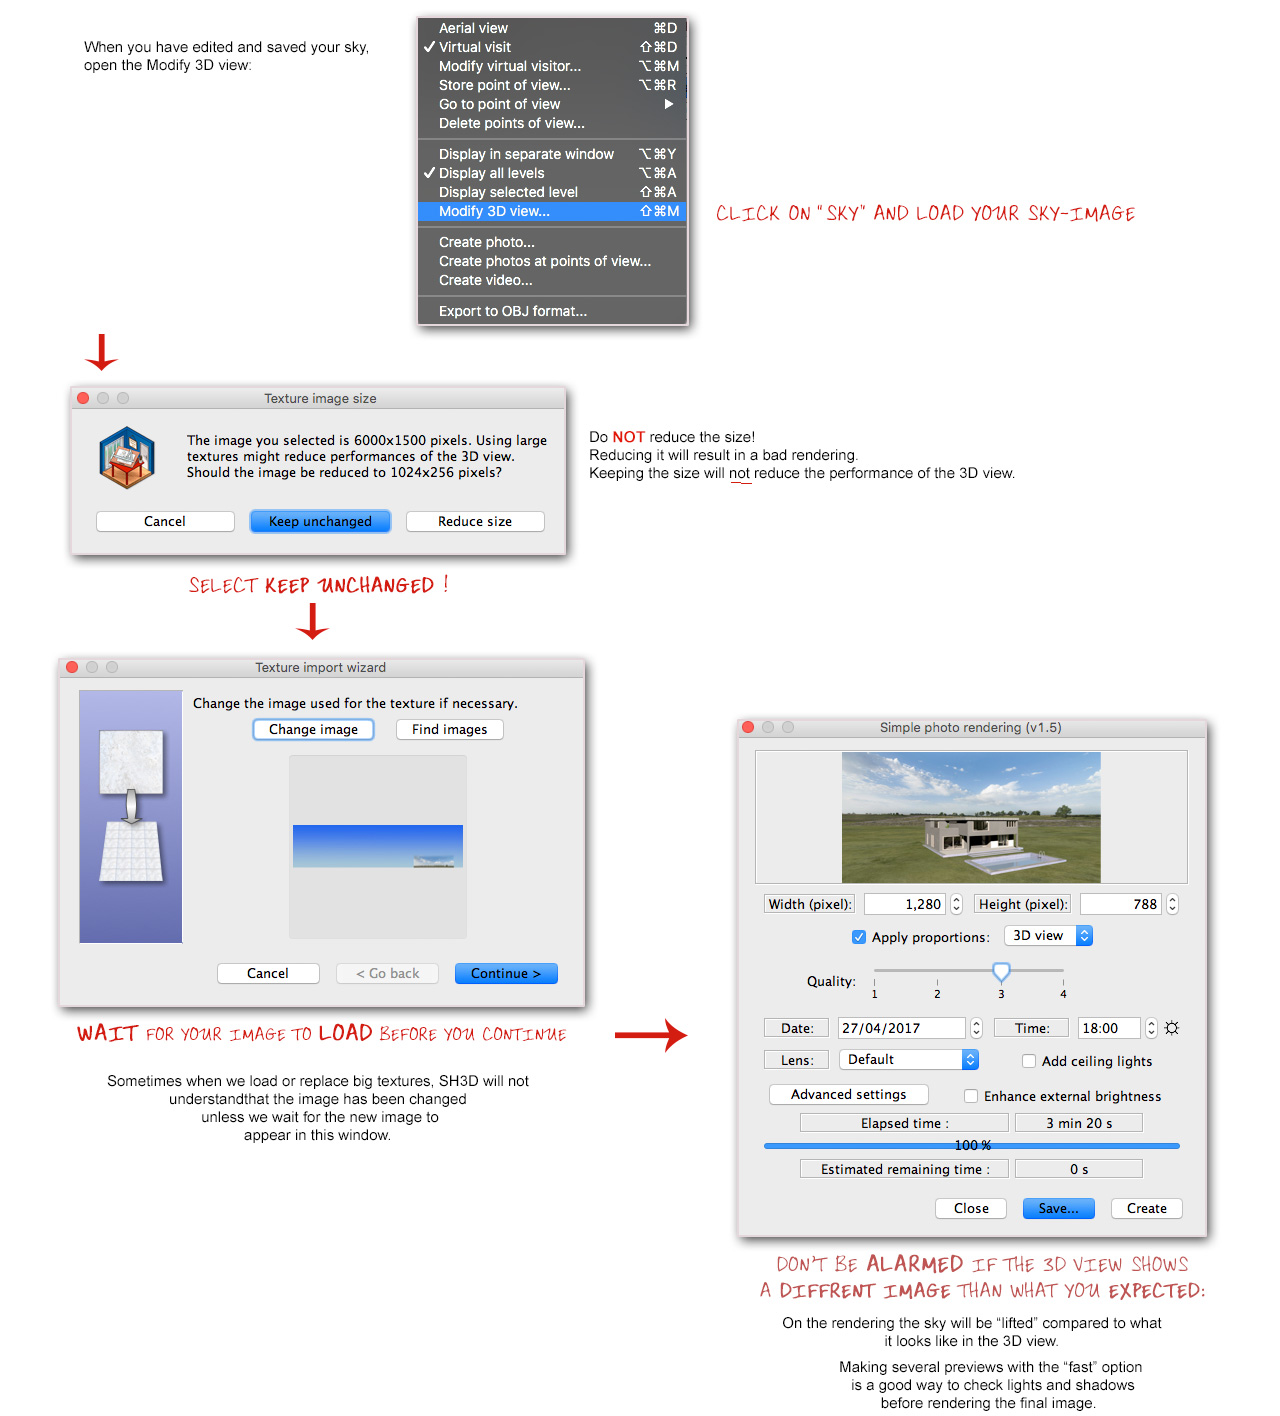
Now you can render a preview where you will see the coordinates for the part of the sky that will be visible in the final rendering.
Find an image that you would like as background, and open the sky template in a suitable editor. Don't choose a small image – choose an image that is at least 1024 px wide, but preferably bigger. The best size is an image you don't have to stretch in order to make it fit inside the coordinates, and remember that if you have an horizon in your sky image, it should preferably not exceed the green area on the bottom of the sky template. Make sure that your image is aligned at the bottom ( preferably moved a few pixels below) so you're absolutely sure there's no gap, as a gap at the bottom will create an ugly line along the horizon.
Save the edited sky template under a different name. Use jpg @ high or maximum quality.
Hope this was helpful.
Cec
______________________
Oh yes, almost forgot, my final image:
Lots of luck, and don't hesitate to ask if something is unclear.


 me too, and my daughter absolutely fell in love with them and named them Popp and Ding. She wants to have them 3D-printed.