Russia
Joined: Aug 13, 2022
Post Count: 737
Status:
Offline
Complex-shaped objects in SH3D, using PNG textures.
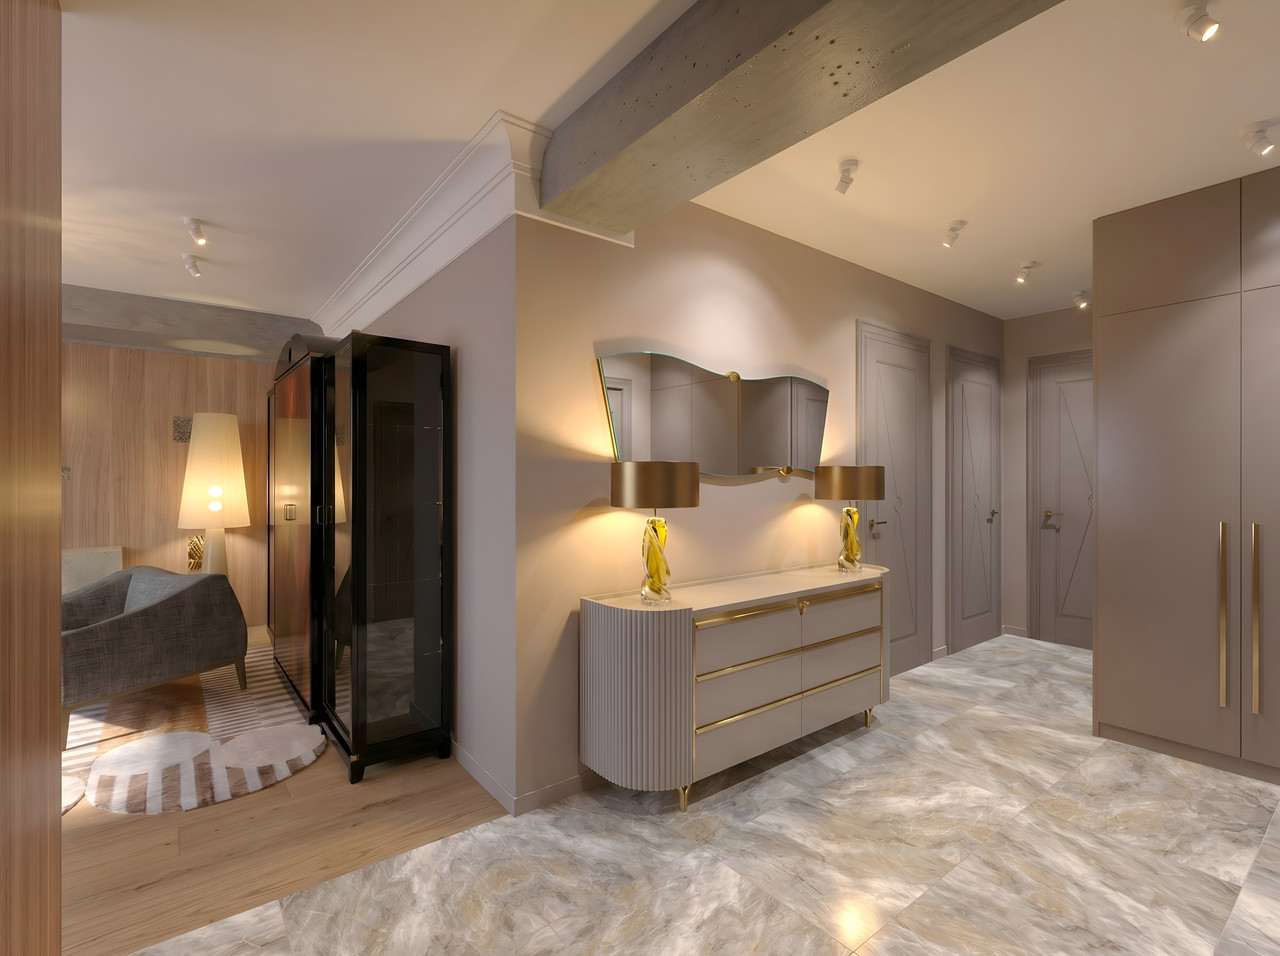
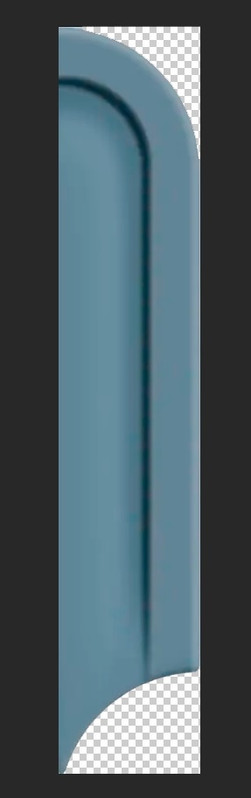
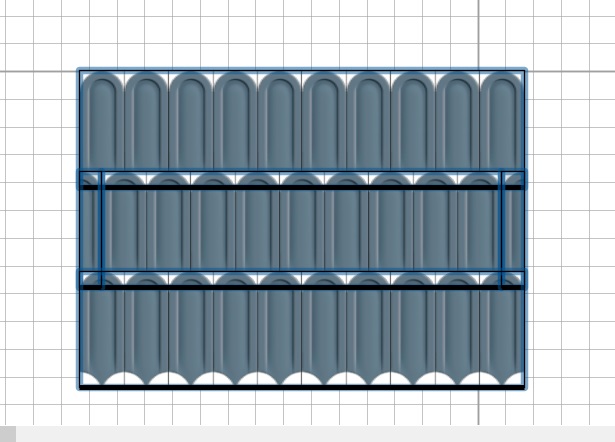
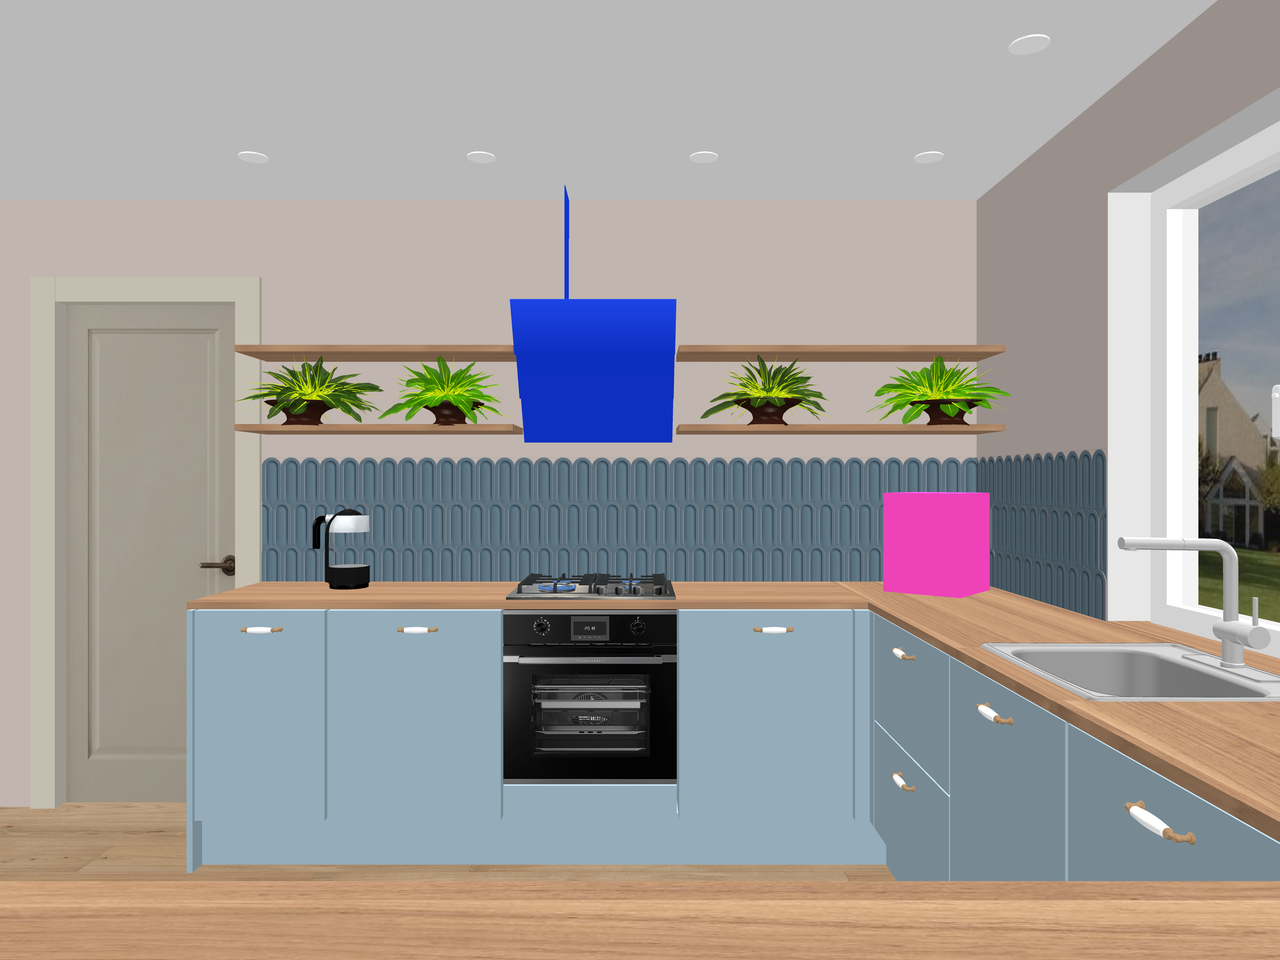
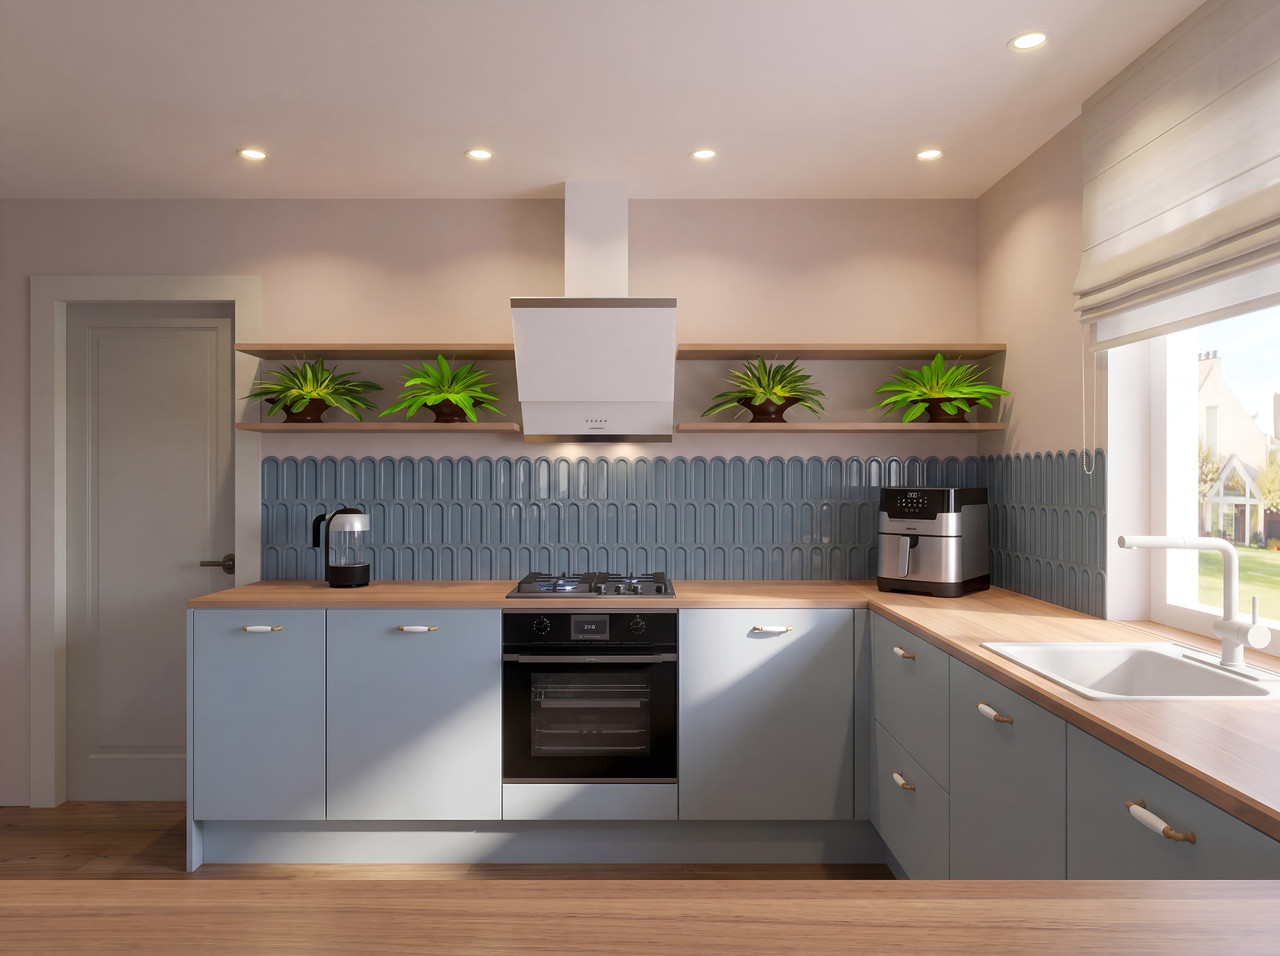
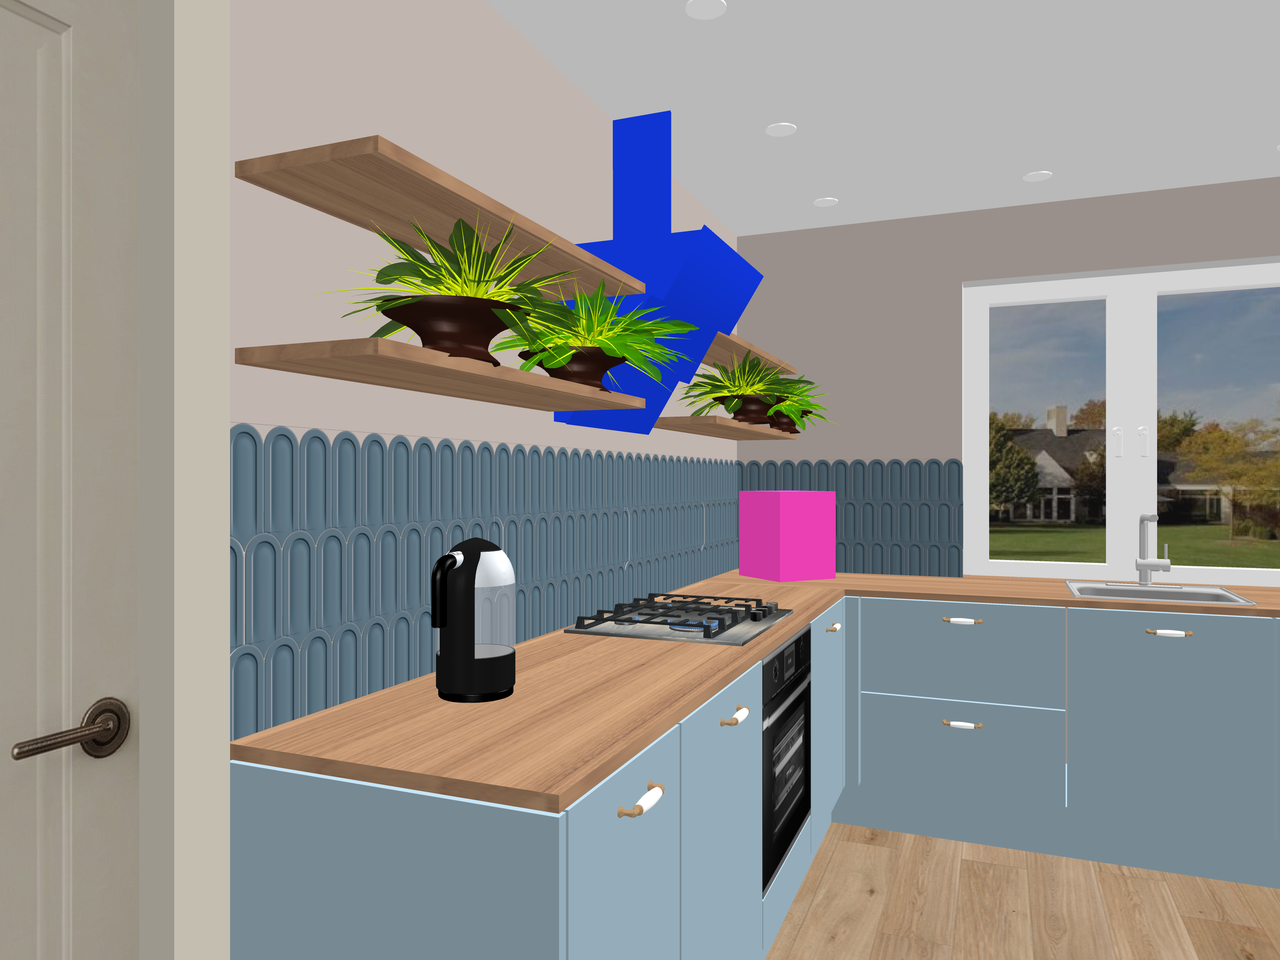
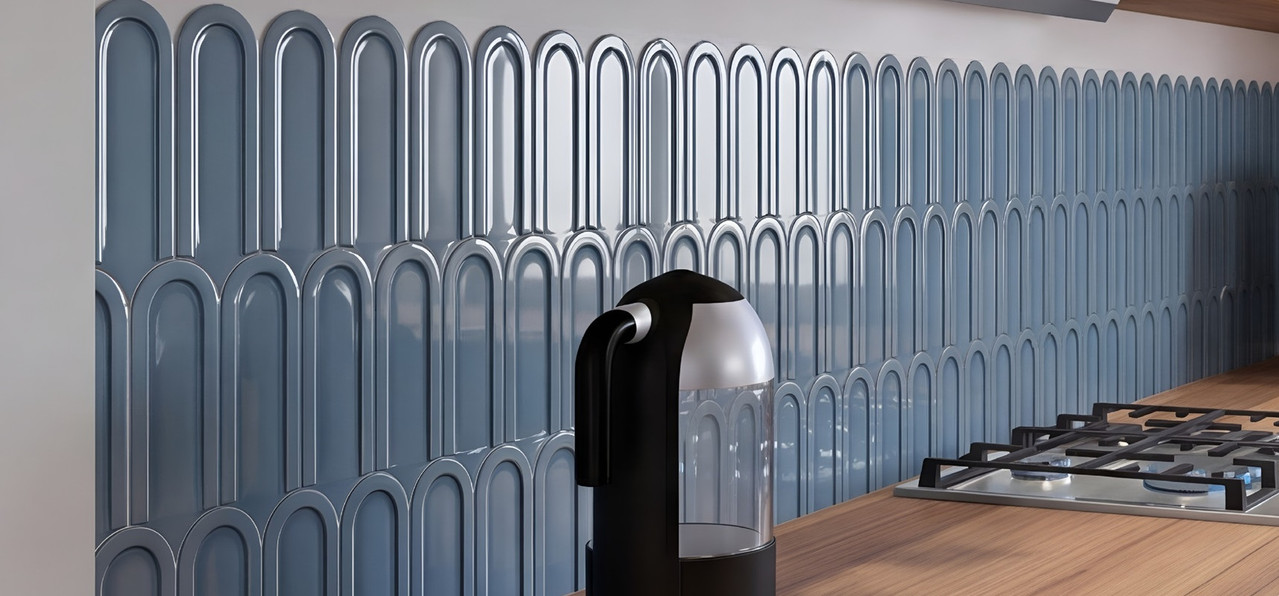
Hi. I keep saying that almost everything in SH3D can be done using only boxes. But often you need to deal with objects that have complex shapes. For example, in a kitchen design project, I need to show a tile backsplash, but the tiles aren’t rectangular and look like fish scales. Of course, with a lot of effort and time, you can create this shape in SH3D (I’ll say right away that it will be a simplified version with sharp edges—the program doesn’t allow for complex modeling), but it’s much easier to use a box and a PNG texture. To start, I found a photo of these tiles with side lighting, in the right color. I cropped the image to the dimensions of the tile, fitted it into a rectangle, used a free graphics program to remove the unnecessary corners of the background and make them transparent, and saved the cropped tile image in PNG format. I also created two halves (the right and left sides of the same tile) to ultimately form a module consisting of a group of tiles. You need to determine right away whether the shadow on the shape in the photo is correct, and where the window or main light source is in your room, so that there is no confusion in the volumes and shadows in the render. If necessary, make a mirror copy of the textured tile in advance and edit the background on that copy. The tile size (dimensions) is 8 cm x 21 cm. I created a box with these dimensions and a height of 2 cm, placed it on the floor, and assigned a PNG texture of a single tile to the top surface; I made all other sides of the box invisible. Using the magnet tool, I grouped ten of these tiles together and aligned them at the bottom using the alignment tool (found in the Furniture column menu). I made the next row out of nine tiles and attached half-boxes on the left and right with PNG textures of half-tiles on top. I aligned everything again. And the third row is the same as the first. You need to slide these rows-groups until the edges of the tiles connect, just as they would in a real tile layout. Now, here’s a very important point. The SH3D program sometimes (not always) struggles with single-layer PNG texture overlays, resulting in irregular black or white patches. This doesn’t happen every time or everywhere; there’s no clear pattern. To convert this module to OBJ format and use it on a wall, you’ll need to make several attempts, adjusting the height of the problematic tiles. For example, I made the top tier 2 cm, the second tier 1.9 cm, the side halves 1.8 cm, and the bottom tier 1.7 cm. This helps eliminate overlaps, and the conversion to OBJ format comes out clean, without errors or bugs. Once you have a high-quality OBJ model in a vertical orientation, you can connect these modules into long groups and place them on the wall without a magnet. If you use a magnet, defects may occur again; you need to slightly detach the modules from the wall plane. Almost everything is ready for the final render: the furniture has been fully modeled using boxes, the tiles have been laid, and there’s a model of a kettle and a gas cooktop on the countertop. I don’t have a model of the air fryer, but I have a photo; I placed a pink box of the right dimensions in its place. The AI will handle the rest later. I’ve also made the range hood bright blue for now, with a shape somewhat similar to the model I need. I have a photo of the model I need; that’s enough. In the text description, you need to specify that the tile surface is glossy. The render in SH3D will serve as the basis for further processing in AI. The quality is at the first level without lighting, with a resolution of 4000x3000 pixels. This AI-processed rendering beautifully showcases the tiles with striking highlights on their surfaces.
But first, everything is done in the best software available, SH3D.
Netherlands
Joined: Apr 8, 2022
Post Count: 1802
Status:
Offline
Re: Complex-shaped objects in SH3D, using PNG textures.
You are absolutely right that using a PNG is the best solution. Just a few weeks ago I did something very similar although with a little different approach.
First I created a dodecagon object split into multiple facets. I initially used room objects and exported this for further processing in Blender. After import in Sweet Home 3D I set different textures to different parts. Since this was for a floor it had to be flat so I didn't have the trouble of having to create rounded elevations. I replicated the resulting objects to form a piece of floor. From that I created a seamless texture that I can set as the texture for the floors. It came out pretty nice. This was relatively easy although the figure was quite complex to create.
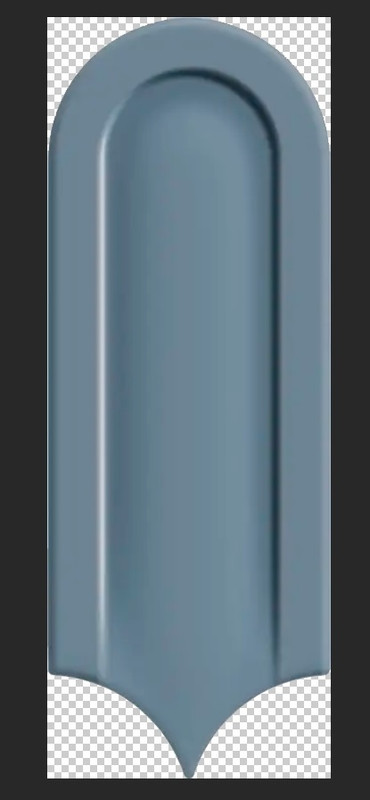
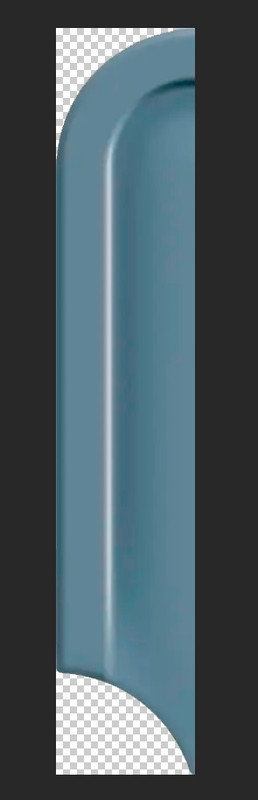
Then I needed something special for the walls. I created two different types of diamond shaped tiles. This also required processing with Blender but the basic forms were created in Sweet Home 3D. The tiles have a small elevation in the center to simulate a real diamond form.(Here are the tile objects) These are still objects and you could create a wall like this, the wall functions as the grout for the tiles. But... I did a little calculation and if I wanted to decorate my shopping mall like this then just the tiles would count for close to 300 MB. That's MB, not kB. But of course as the image shows it is easy to create a texture and use that for the walls. Even a simple screenshot gives a nice result and then edit it with GIMP to make it a seamless texture. The great advantage with having the objects is that I can change the tile colors and even play with different pattern by using multiple colors. Then recreate a texture for on the walls.
All in all GaudiGalopin3324 is exactly right with using a PNG and not the actual objects. Instead of a single tile texture I created seamless textures with multiple tiles but the end result is the same.
---------------------------------------- Dodecagon.nl 1300+ 3D models, manuals, and projects
----------------------------------------
[Edit 1 times,
last edit by Keet at May 28, 2026, 5:48:29 PM]
Russia
Joined: Aug 13, 2022
Post Count: 737
Status:
Offline
Re: Complex-shaped objects in SH3D, using PNG textures.
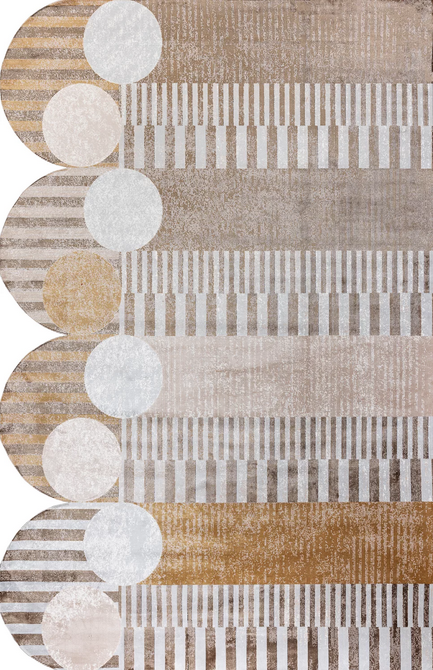
I've always known that the esteemed Keet is familiar with other great ways to apply a wide variety of techniques. Thank you! I’d like to add that the method of using prepared PNG images with the background removed works great for rugs. Just place such an image on the top side of a thin box and make all the other 5 sides invisible. You’ll end up with a rug that has an uneven edge and a precise pattern. It’s all very simple. There’s no need to create a complex shape or search for a ready-made 3D model. Although, of course, you can create such a model in SH3D, which will result in a natural carpet edge. But with the help of AI, you can achieve this carpet edge using a text description.


 (
(