Index  | Recent Threads  | List Attachments  | Search
 Welcome Guest  |  Register  |  Login
Login Name  Password
 

Sweet Home 3D Forum


Member(s) browsing this thread: olive26
Thread Status: Active
Total posts in this thread: 4
[ Jump to Last Post ]
Post new Thread
Author
Previous Thread This topic has been viewed 80 times and has 3 replies
BobMcL
Newbie


Falkland Islands
Joined: Aug 23, 2020
Post Count: 4
Status: Offline
Reply to this Post  Reply with Quote 
how do I draw roof trusses

Hi, I am trying to draw roof trusses and rafters. Is there a library I can import then modify to my dimensions, or how do I do it from the lumbar library? Grateful for any help
[Jul 2, 2025, 1:06:48 AM] Show Printable Version of Post    View Member Profile    Send Private Message [Link] Report threatening or abusive post: please login first  Go to top 
Keet
Advanced Member
Member's Avatar

Netherlands
Joined: Apr 8, 2022
Post Count: 1426
Status: Offline
Reply to this Post  Reply with Quote 
Re: how do I draw roof trusses

Any method is good if you are satisfied with the result. This means you can use the lumber library or resized boxes that you tilt to the right angle.

I often use the Generate 3D Shape plugin for simple specific model parts. Download ShapeGenerator-1.2.1.sh3p
With that tool you can create any form up to 8 points. That means you can create your trusses to the exact size you want with the ends in an angle. You have to get used to entering vertice coordinates (points) but once you understand how it works it's very simple.
The advantage of using the Generate 3D Shape tool is that usually wood textures placed on it are correct with the Materials modify button in the Color and texture section of the modify furniture dialog. If needed you can rotate them for each side.
And if that is not satisfactory you can use the general texture selection in the same Color and texture section without using the Materials modify button.

As long as you don't close Sweet Home 3D the last entered values in the Generate 3D Shape tool are saved. This means that you can restart it again and it will still have those last values to make small changes. Experiment with this tool. I find it one of the most usefull plugins in Sweet Home 3D. I use is for almost every model I create.
----------------------------------------
Dodecagon.nl
1000+ 3D models, manuals, and projects
[Jul 2, 2025, 8:31:07 AM] Show Printable Version of Post    View Member Profile    Send Private Message [Link] Report threatening or abusive post: please login first  Go to top 
GaudiGalopin3324
Advanced Member
Member's Avatar

Russia
Joined: Aug 13, 2022
Post Count: 582
Status: Offline
Reply to this Post  Reply with Quote 
Re: how do I draw roof trusses

The first thing you will need is a correct drawing of the rafter system. Ideally, this drawing is carried out by a design engineer. If you do not have such a drawing, then you can only make a preliminary diagram. But you also need to find a drawing from the Internet that approximately suits you. Save the printscreen with this drawing and place it as a background image in SH3D. For example, I took this dimensional drawing and assigned a vertical size of 188.5cm for the background image, as indicated in the drawing.


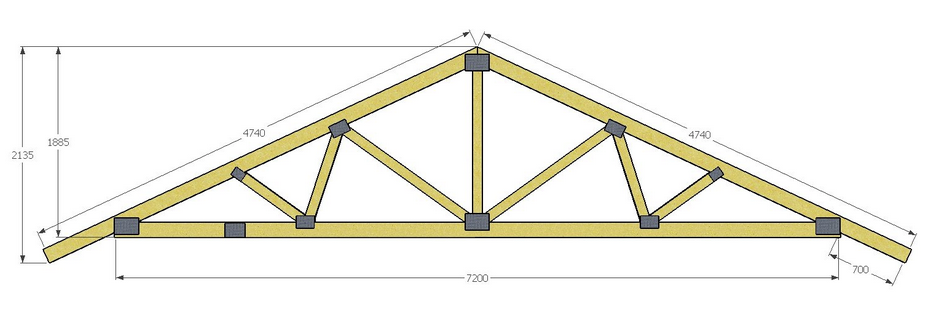
in the stock drawing, you need to check the cross section of the boards from which the farm will be made. The outer perimeter is 15cm x 4cm boards, the inner elements are 10cm x 4cm boards. In the wall settings, set the wall width to 15cm and height to 4cm, make three external elements (disconnect the magnet so that the walls are according to the drawing). Then change the settings to 10cm and make the inner racks. You will get such a composition of walls.


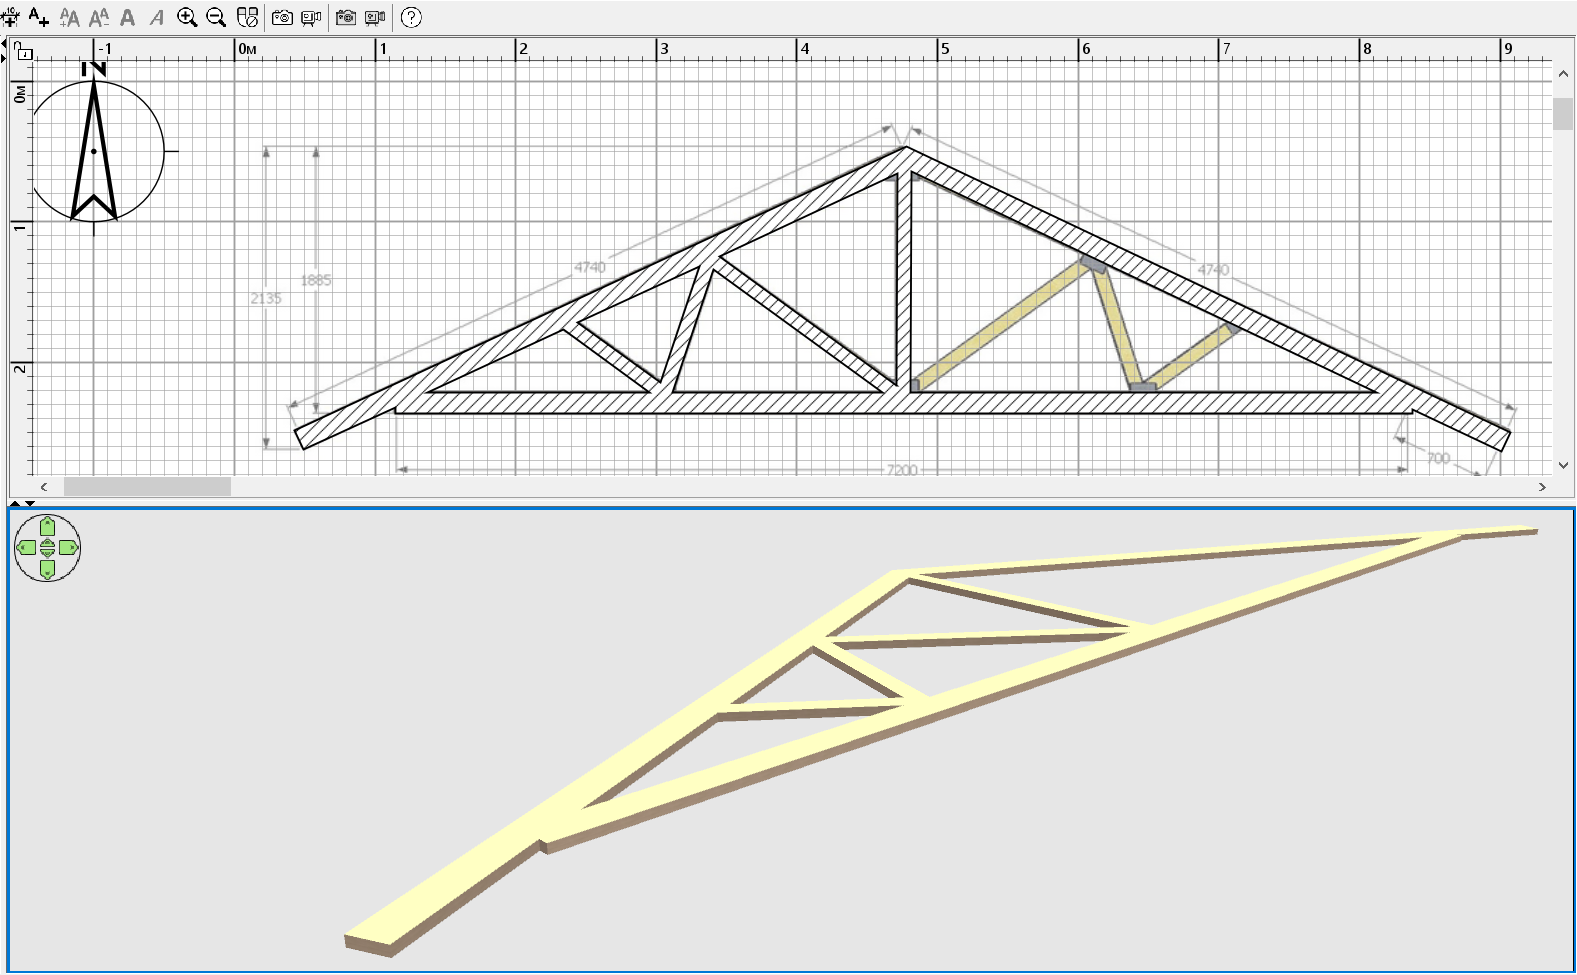
then you can add complexity to the farm and make metal fasteners. These are rectangular plates, they can be made from boxes 0.5 cm high. Assign a metal texture to all sides. One plate will be at a height of 0 cm, the second double at a height of 4.5 cm. These two plates need to be aligned and grouped. Then you can put them in place according to the background image (first remove your rafters-walls to the side in one common group). You'll get a group of plates like this. They are of different sizes (three types), you need to turn off the magnet again for the exact location according to the drawing.


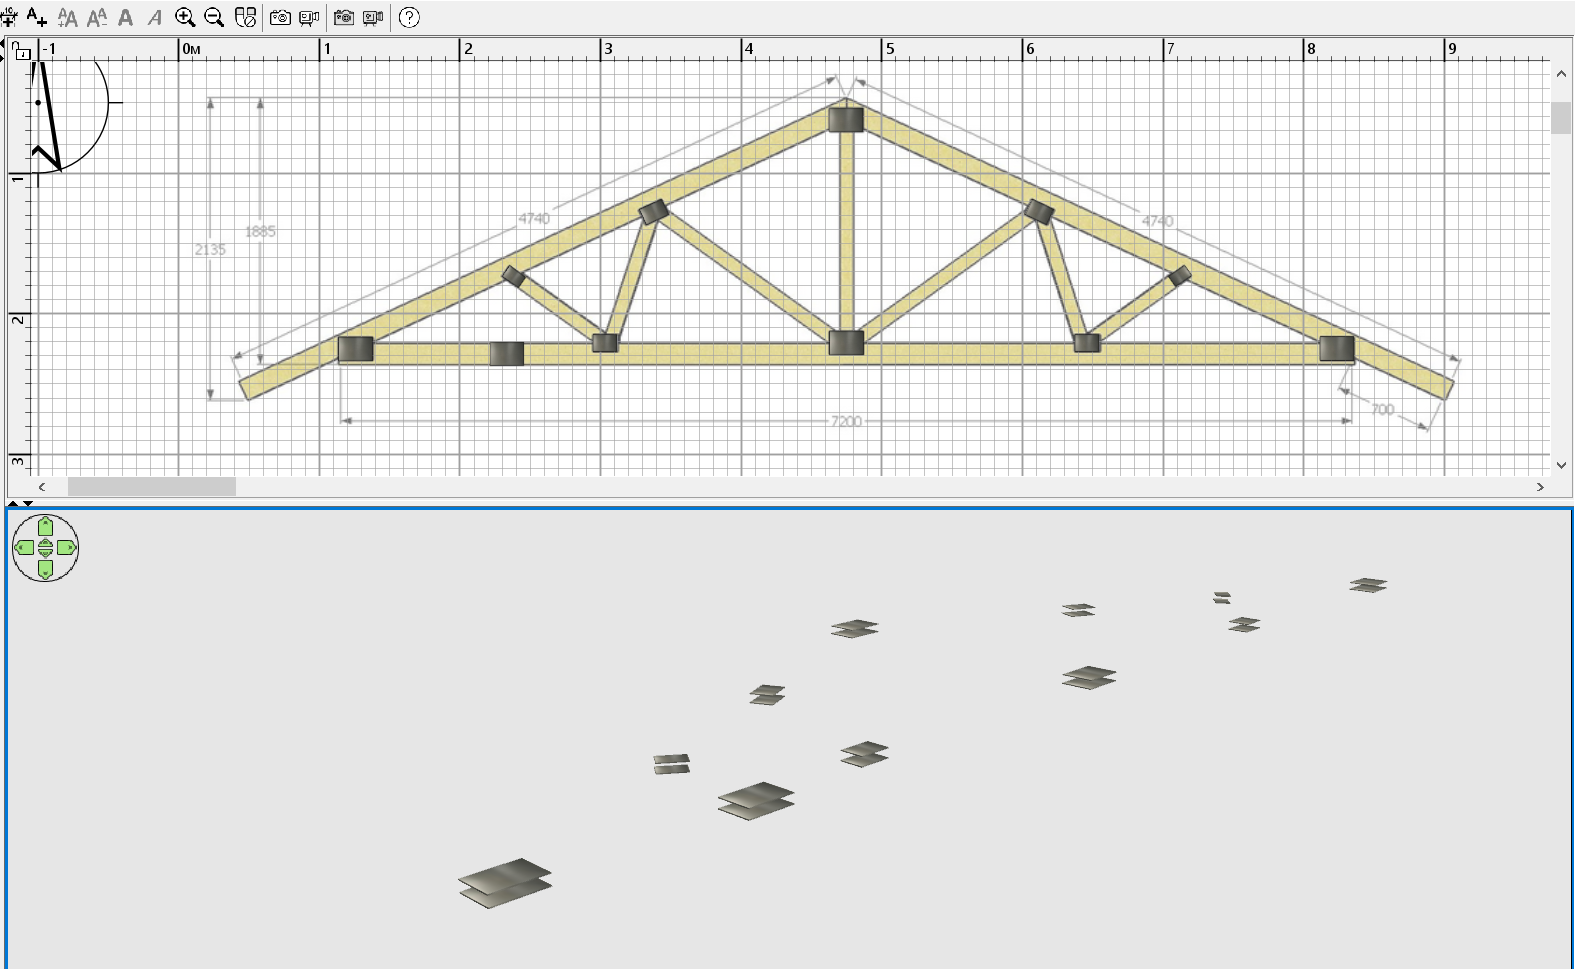
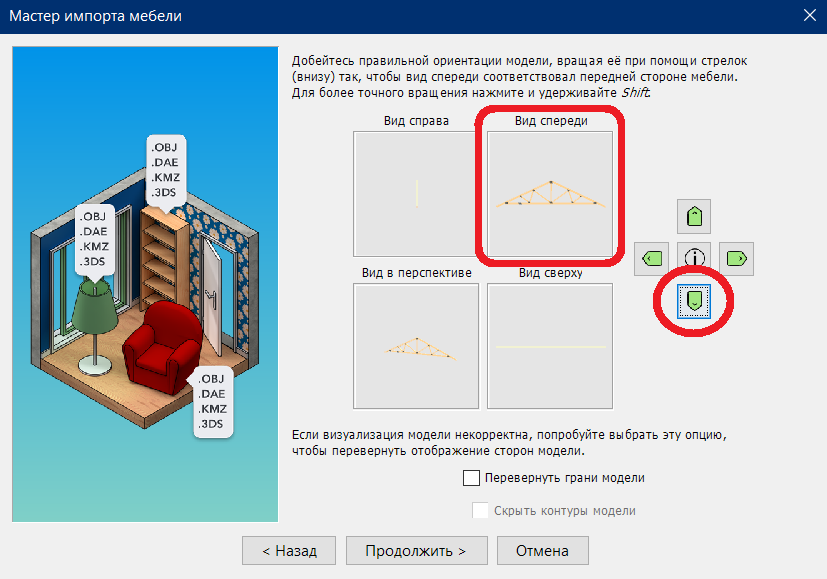
now select the entire farm from the walls and save this group of walls in OBJ format. Return it back to the program as a model, but now set the excess of this OBJ model to 0.5 cm so that the truss fits between the plates. Like that.


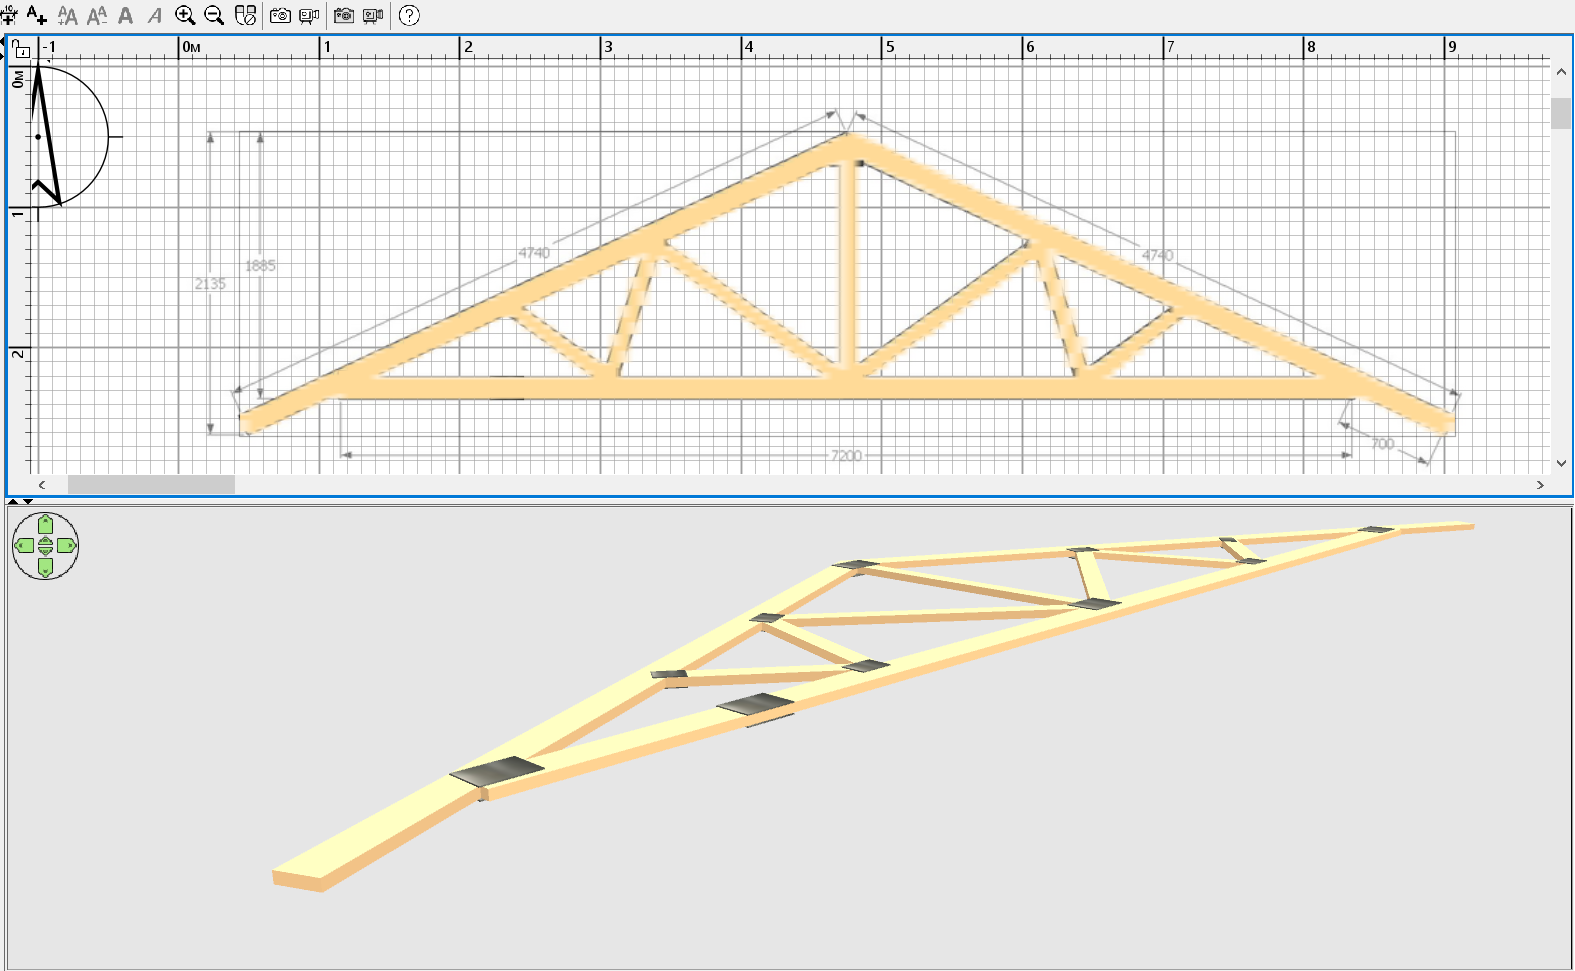
Now select everything, both the farm and the plates, and save it as an OBJ again. Return this final model to the program with a 90-degree rotation so that it stands upright. Now you need to copy it in the right amount and place it on the perimeter of the walls of the house at the right step. Add connections.


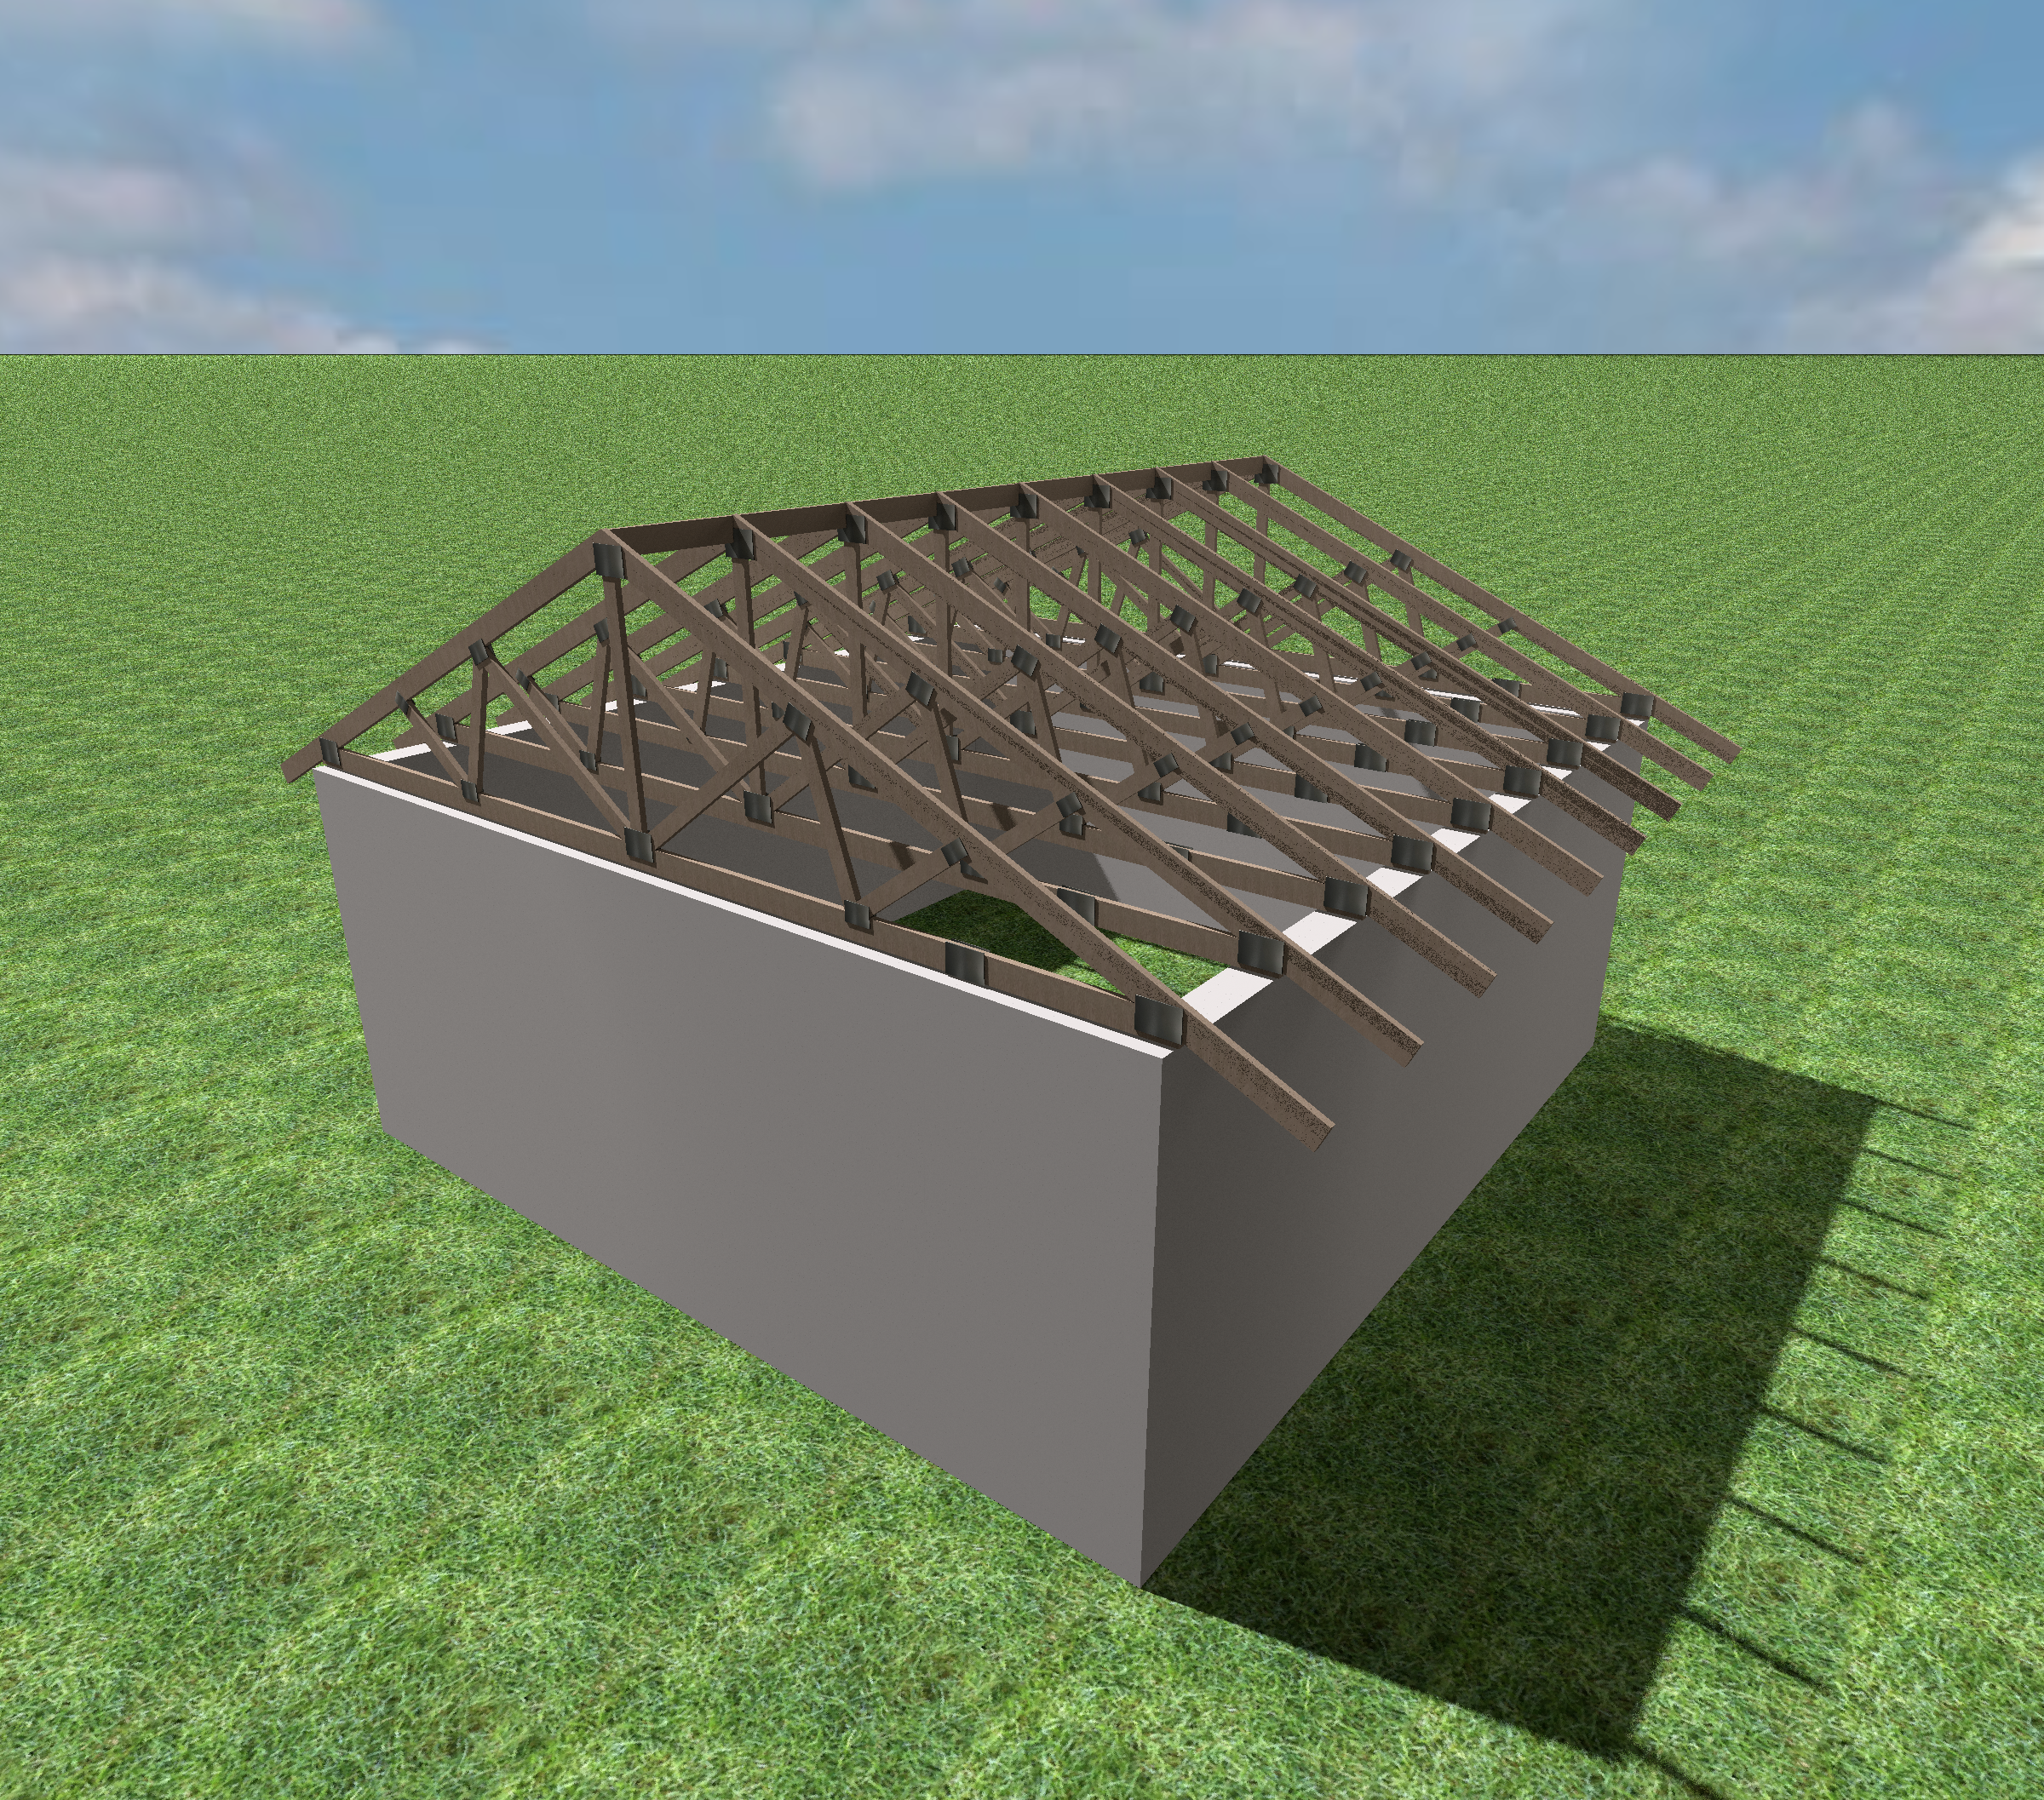
in the design, it is very important to carefully align all the trusses along the same initial one so that everything looks perfectly smooth. If the structures stand up crookedly, then the house will be unreliable)) love struck
[Jul 2, 2025, 11:05:22 AM] Show Printable Version of Post    View Member Profile    Send Private Message [Link] Report threatening or abusive post: please login first  Go to top 
Keet
Advanced Member
Member's Avatar

Netherlands
Joined: Apr 8, 2022
Post Count: 1426
Status: Offline
Reply to this Post  Reply with Quote 
Re: how do I draw roof trusses

Using walls is a good and easy to use alternative method. The only disadvantage is that they don't texture very well. And changing the angle of the texture doesn't work as required. If that is not a problem then by all means, use the wall method. Probably the fastest and easiest method.

If you want perfect texture alignment you will have to use the Generate 3D shape tool. Create each part laying horizontally on the ground. That will ensure perfect texturing including the ends. It will look like real wood with the correct grain in each direction. Then you can tilt the shape to the correct angle. Copy and rotate to get the other side and align them side=by-side.

Whatever method you use, what GaudiGalopin stated is very true: you need the exact measurements of what you want to create. Whether those are real life dimensions or what you make up doesn't matter, you need the numbers. If you have the numbers then creating the model is very easy.
----------------------------------------
Dodecagon.nl
1000+ 3D models, manuals, and projects
[Jul 2, 2025, 12:18:52 PM] Show Printable Version of Post    View Member Profile    Send Private Message [Link] Report threatening or abusive post: please login first  Go to top 
[ Jump to Last Post ]
Show Printable Version of Thread  Post new Thread

  Get Sweet Home 3D at SourceForge.net. Fast, secure and Free Open Source software downloads  
© Copyright 2024 Space Mushrooms - All rights reserved