Russia
Joined: Aug 13, 2022
Post Count: 569
Status:
Offline
the technique of how to set the light for objects in the interior. Sculpture in the room.
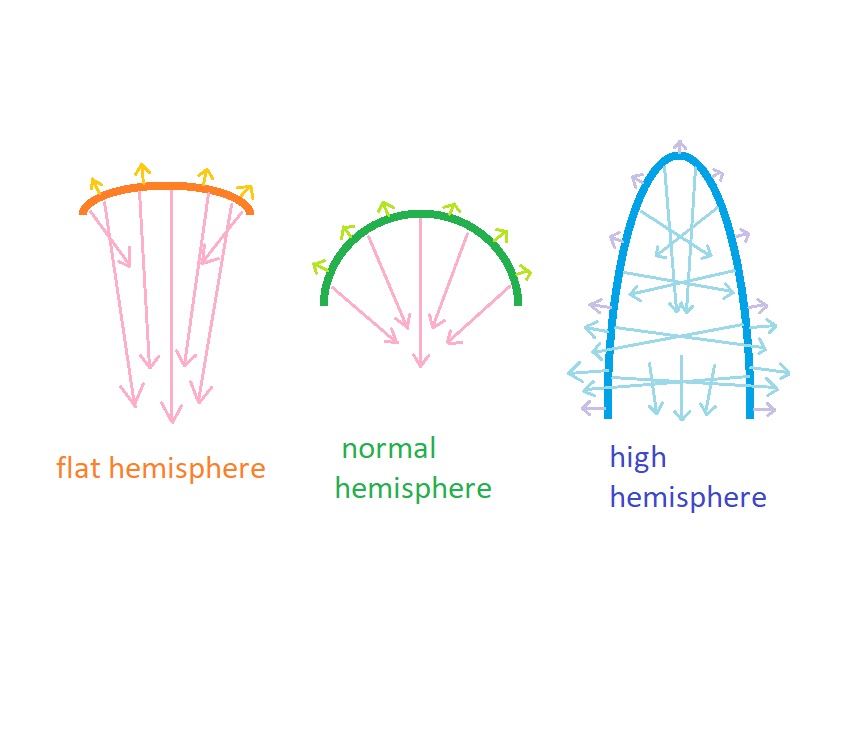
Hi. I want to tell you how I make the light in the room so that the objects look beautiful. The SH3D program has several lighting tools. The most powerful and useful of them is the hemisphere. It is located in the library of lamps. You can adjust the power of this lamp and set the desired color (this is very important and useful). And also this hemisphere can be stretched in all directions, made flat or high, rotated, tilted. The light from these hemispheres goes in different directions, depending on the shape. Initially, they shine inside themselves. Flat hemispheres shine like a spotlight, mostly in one direction, tall towers shine not only down, but also in all directions around. You can use it.
next, I will describe the methodology in detail. Separate answers, so as not to make a mistake.
Russia
Joined: Aug 13, 2022
Post Count: 569
Status:
Offline
Re: the technique of how to set the light for objects in the interior. Sculpture in the room.
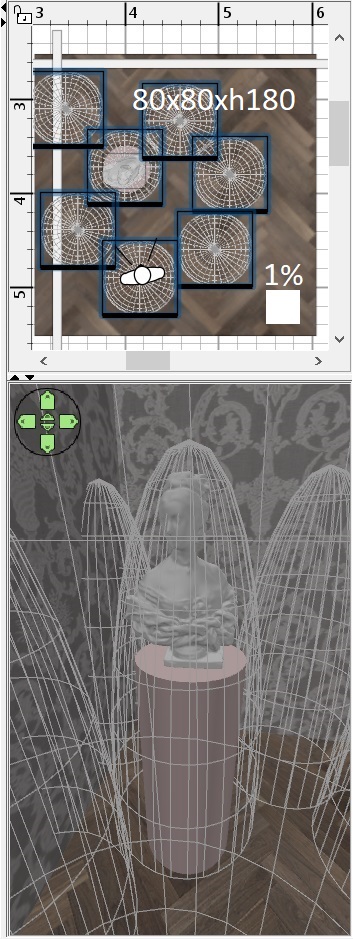
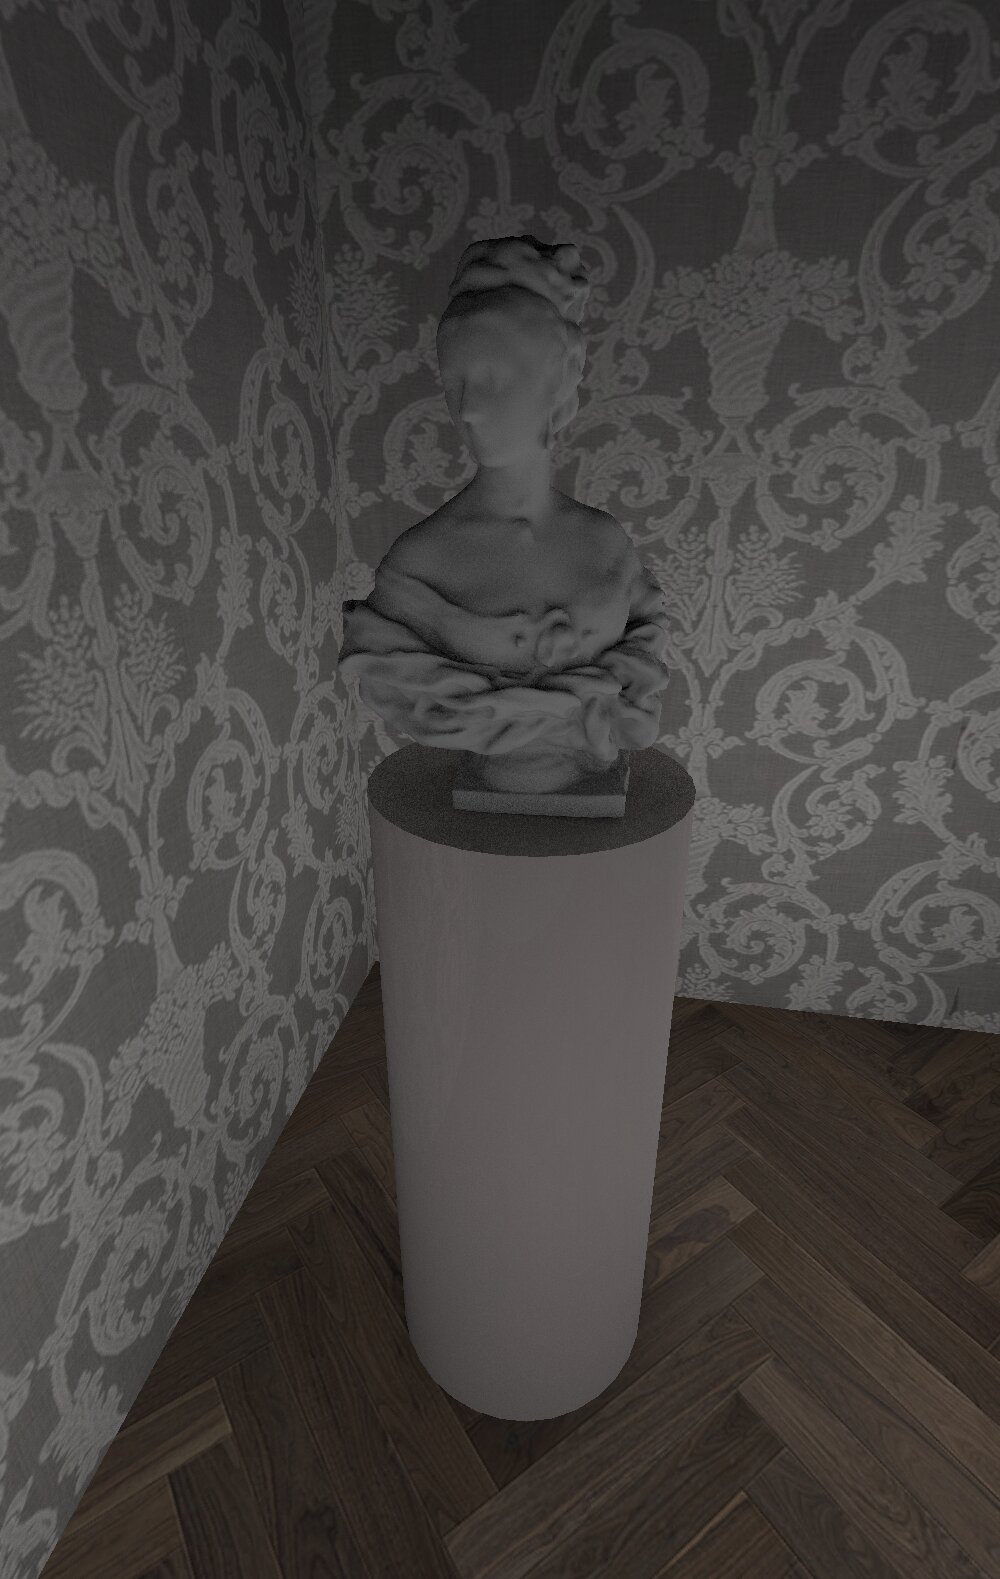
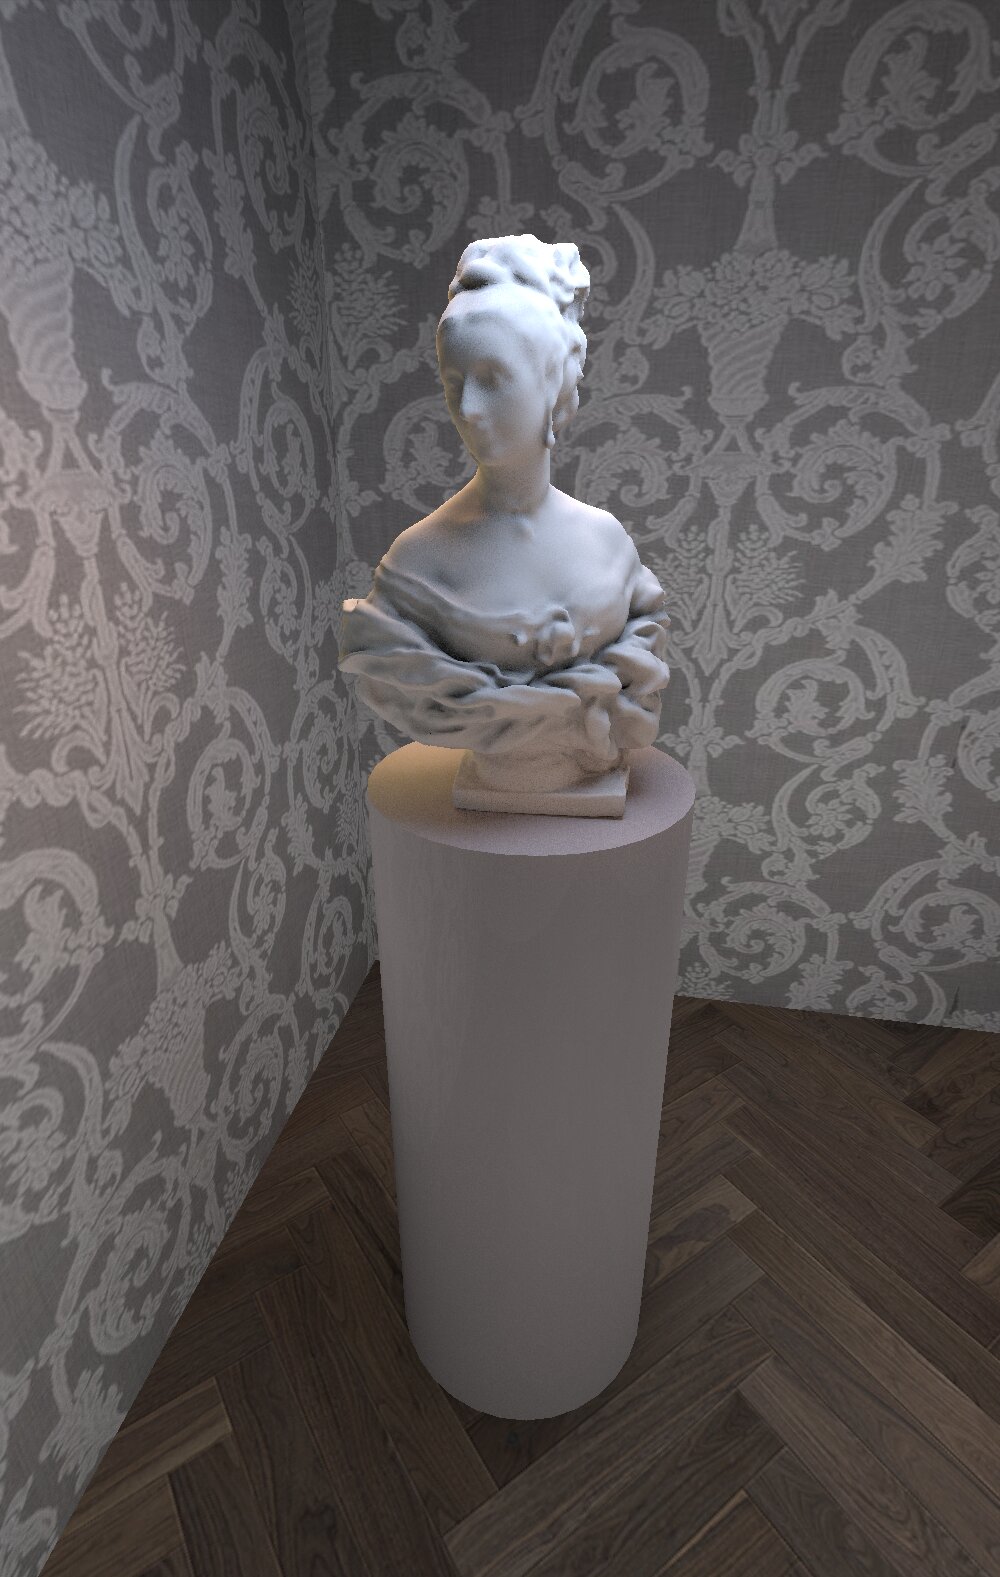
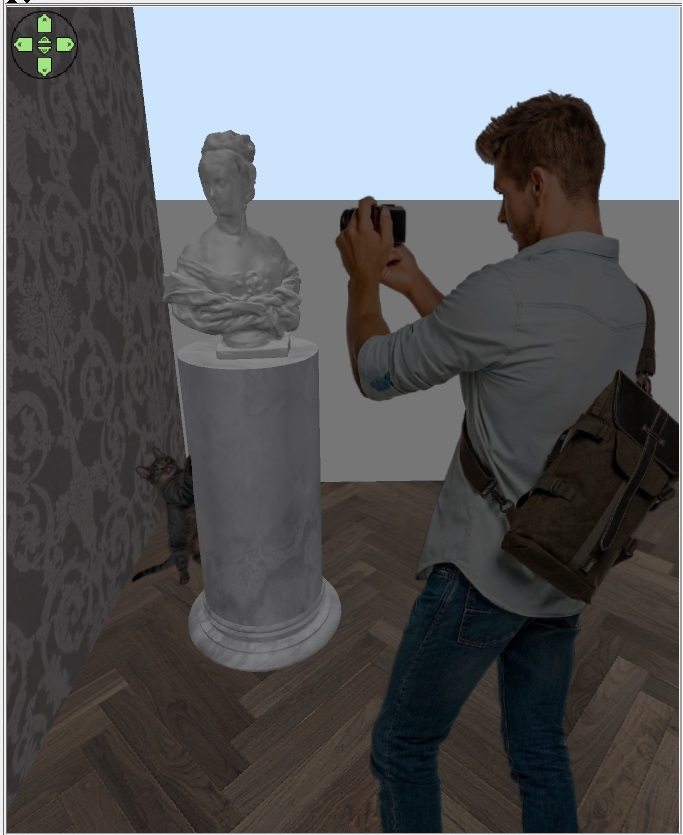
I took a sculpture model. It's a stone bust of a Girl . Such models can be downloaded on free sites. Don't worry that they don't open in the SH3D program. You still have a 90% chance of success. It is necessary to select all files from the package after downloading. There is a 90% chance that the OBJ or 3DS formats you need will be among them. Such models are often painted in the same color, without dividing into parts. It's not important for sculpture. I made two walls out of boxes and a thin box floor. He placed the bust of a girl on a pedestal made of a top hat. At this stage, you need to set the lighting mode to the middle position and work in 3D. So you need to follow one principle in your work. Don't try to do everything at once with one action. We need to act little by little, building up the pressure. Therefore, the first step is a weak filling light medium. I took some tall hemispheres with a base of 80x80 cm and a height of 180 cm. I raised them 20 cm above the floor level. The power of these towers is 1%, no more needed. The color is white, don't forget to set the color from the beginning. YAFARAY render, 0 o'clock night mode. This is what the first step looks like. The quality needs to be set to a weak 400, the image size is 3D in appearance.
it must be remembered that starting from this step, at each stage of complication, you need to see a good result. You can stop at each of the stages. If that's how the work is moving, then that's right.
Russia
Joined: Aug 13, 2022
Post Count: 569
Status:
Offline
Re: the technique of how to set the light for objects in the interior. Sculpture in the room.
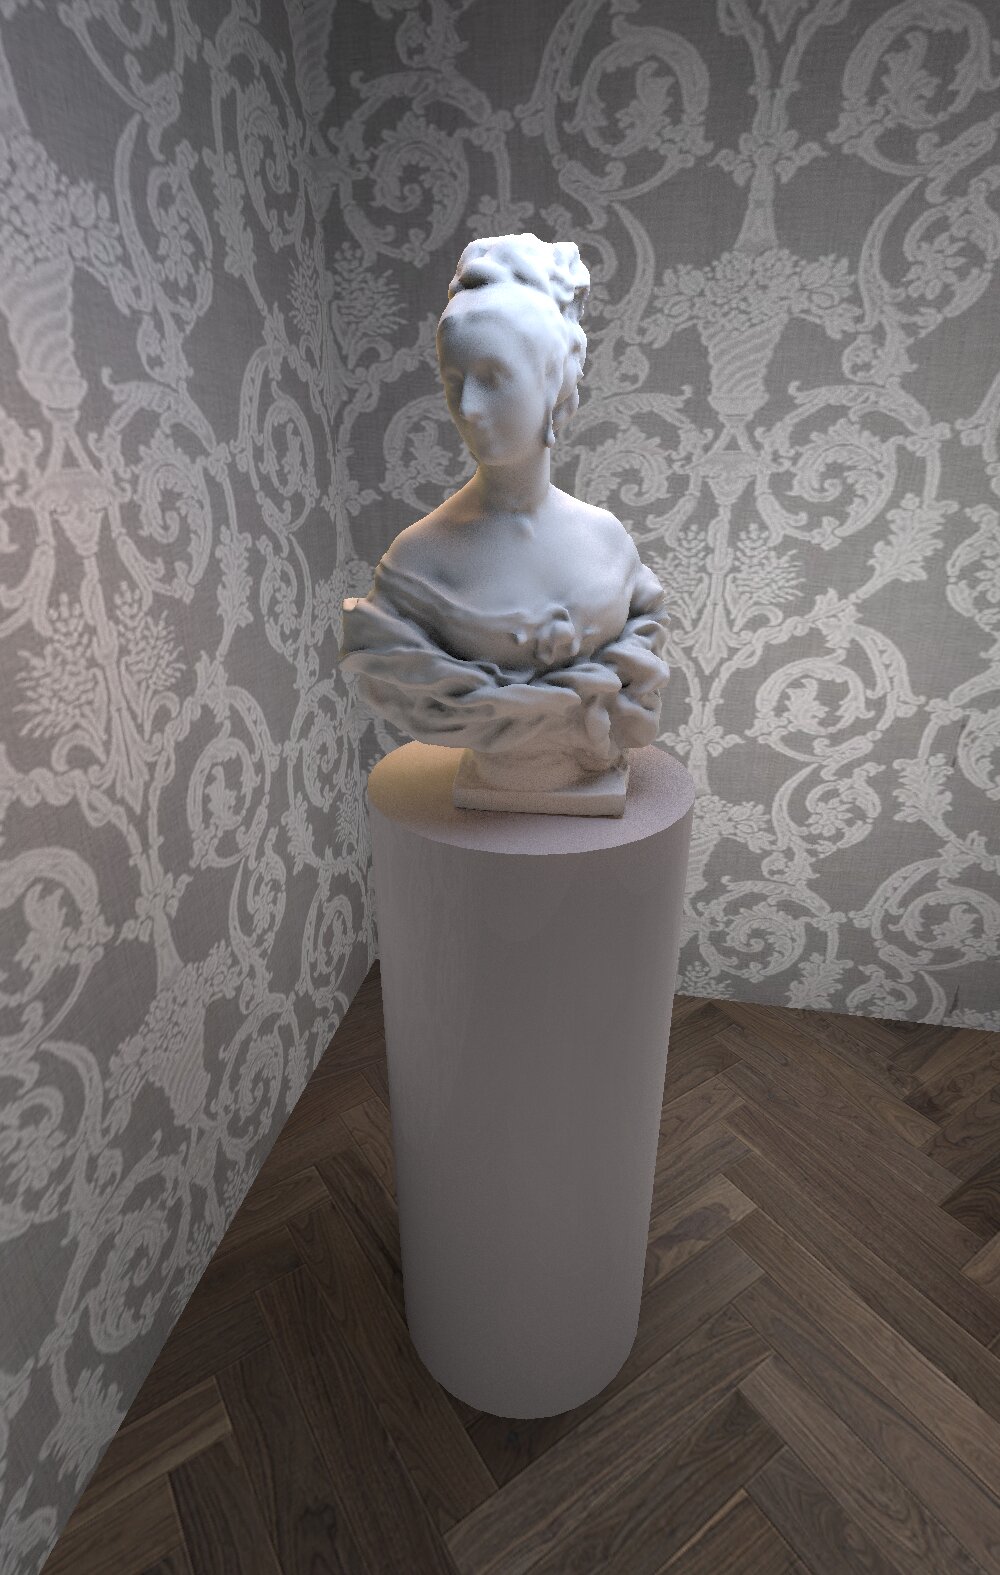
the second step. You need to add a flat hemisphere over the girl's head. The light usually comes from above. A flat hemisphere will produce a very directional stream of light. But this is not the end of the work. Moving on.
please note that in YAFARAY, you can cross the surfaces of walls and objects with hemispheres, this engine is very smart. If the power of the hemisphere is small (1%, for example, as in the first step), then the intersection line will not be visible. Therefore, I placed high towers with intersecting walls, this allows for a more even distribution of the soft light filling the room without worrying about spots.
Russia
Joined: Aug 13, 2022
Post Count: 569
Status:
Offline
Re: the technique of how to set the light for objects in the interior. Sculpture in the room.
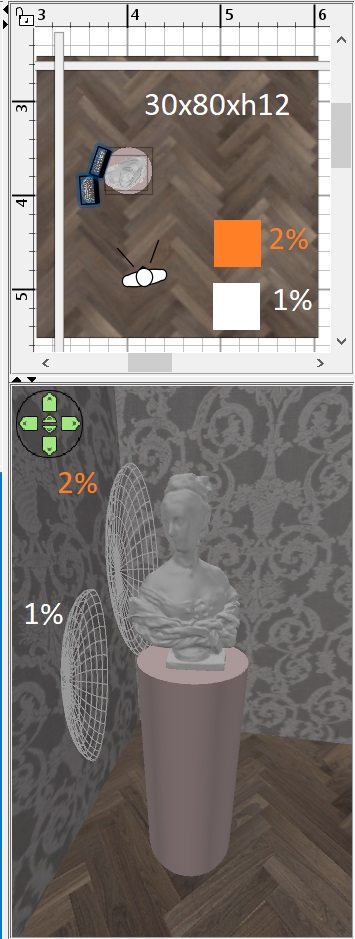
the color of the upper hemisphere is denim blue, 4% power. Next, we need to use different colors of the hemispheres to start a beautiful complex multicolor backlight. In a real room, the sculpture will be illuminated from different sides by reflected light. If the surface is colored in some color, then the reflex will have this shade. Therefore, you can enhance this phenomenon specifically to get a more vivid impression. The third step. I placed two flat hemispheres of different colors and capacities on the side. The white color is 1% below, and the orange color is 2% above at the sculpture level. These hemispheres direct their rays towards the sculpture and almost do not illuminate the wall. With other light sources, for example, using balloons, we would get a bright illumination of the wall, this is not necessary.
you can stop at this stage already. But we have to move on)))
Russia
Joined: Aug 13, 2022
Post Count: 569
Status:
Offline
Re: the technique of how to set the light for objects in the interior. Sculpture in the room.
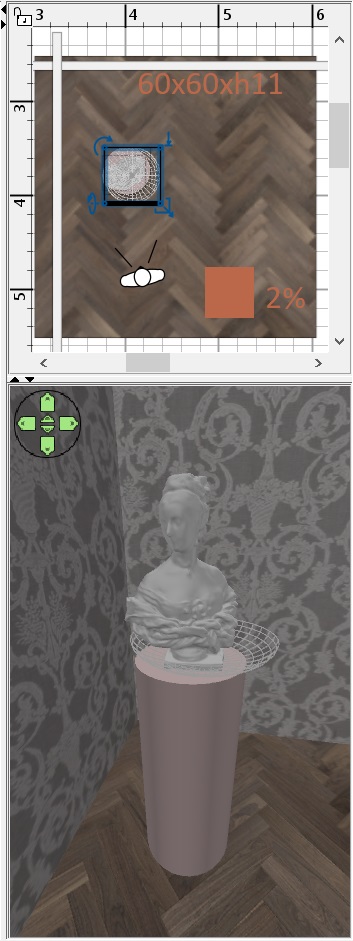
the fourth step. There will be a reflex from below from the cream pedestal and from the parquet. I turned the hemisphere 180 degrees so that it shone upward. This hemisphere is very flat. The color is brick. The power is 2%. I placed it as low as possible, almost touching the top surface of the cylinder-pedestal. So that some surfaces of the sculpture would not be colored by this light.
Russia
Joined: Aug 13, 2022
Post Count: 569
Status:
Offline
Re: the technique of how to set the light for objects in the interior. Sculpture in the room.
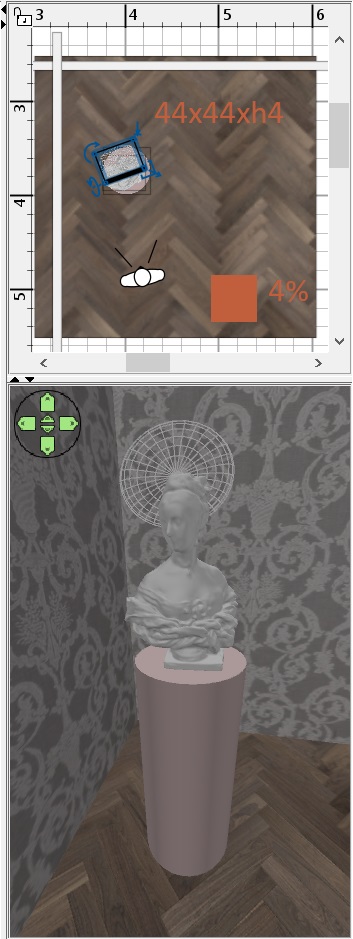
the fifth step. We need to enhance the backlight. I installed a vertical hemisphere with a 90-degree rotation on the X-axis. It is also brick-colored, with a power of 4%. This halo does not shine on the walls at all, but it makes a very beautiful bright outline on the girl's head. Now you need to be extremely careful. It's better to go and drink tea, take a break)). The next step is very important, you can't do the rough work. Subtle processes have begun.
Russia
Joined: Aug 13, 2022
Post Count: 569
Status:
Offline
Re: the technique of how to set the light for objects in the interior. Sculpture in the room.
the sixth step. I had some tea and decided to enhance one of the background tall towers. I made this skirt at the back with a capacity of 2% (she was 1%, like all her sisters). But now there is a neat illumination of the pedestal on the right. Just a little more, you need to make the final injection.
Russia
Joined: Aug 13, 2022
Post Count: 569
Status:
Offline
Re: the technique of how to set the light for objects in the interior. Sculpture in the room.
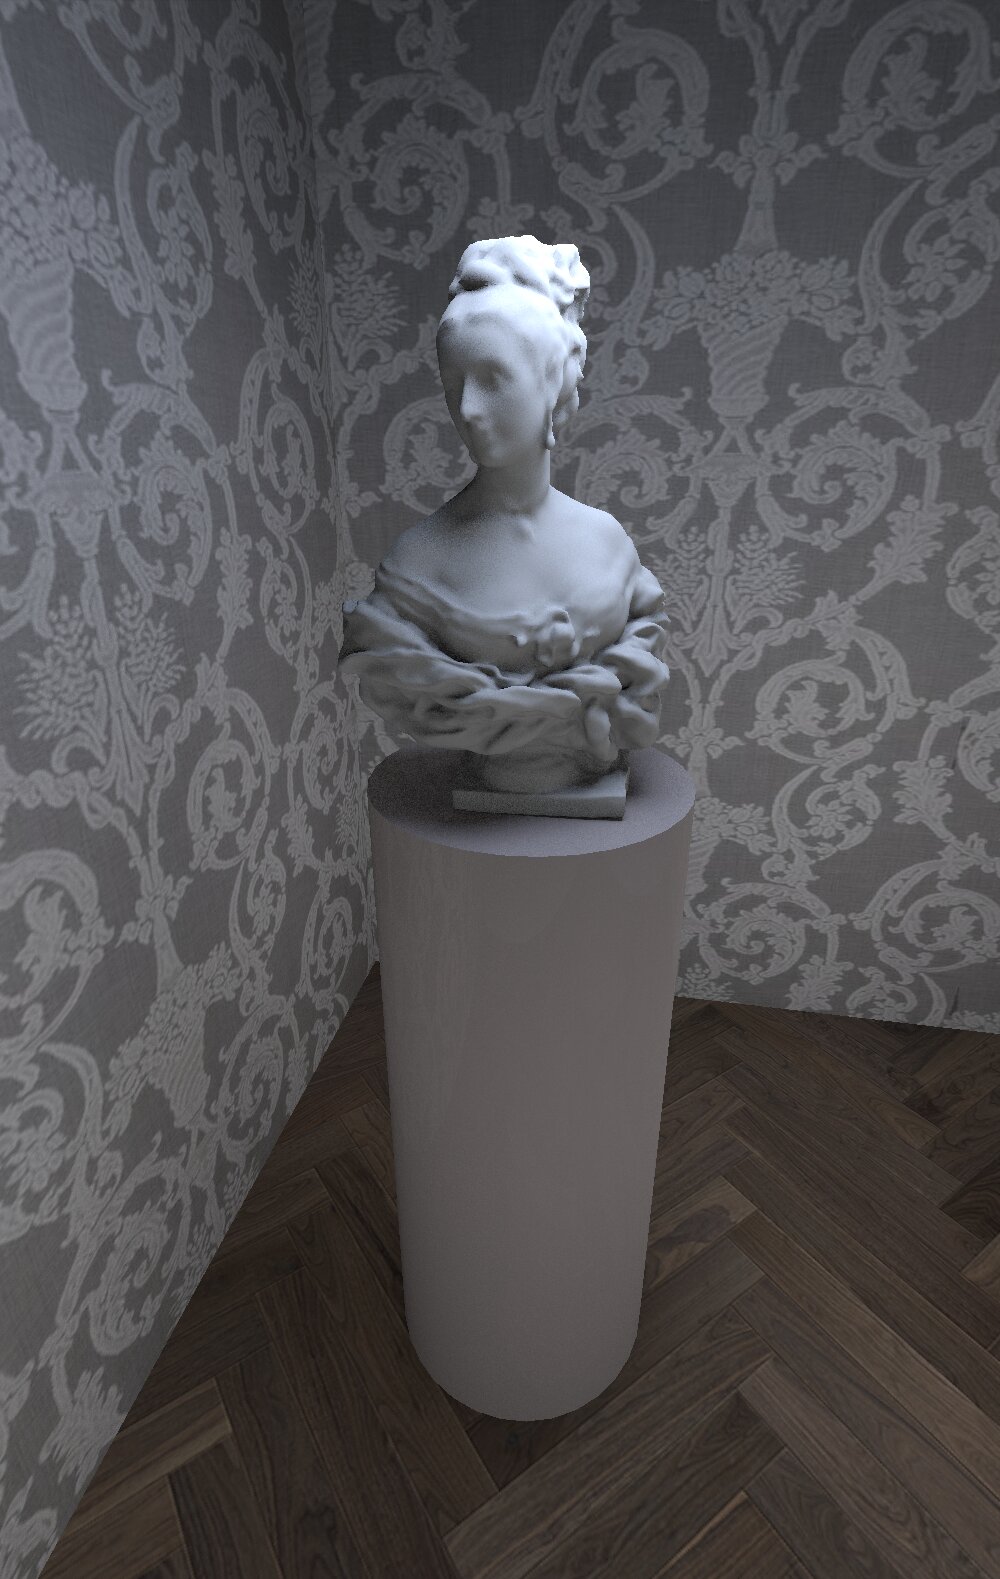
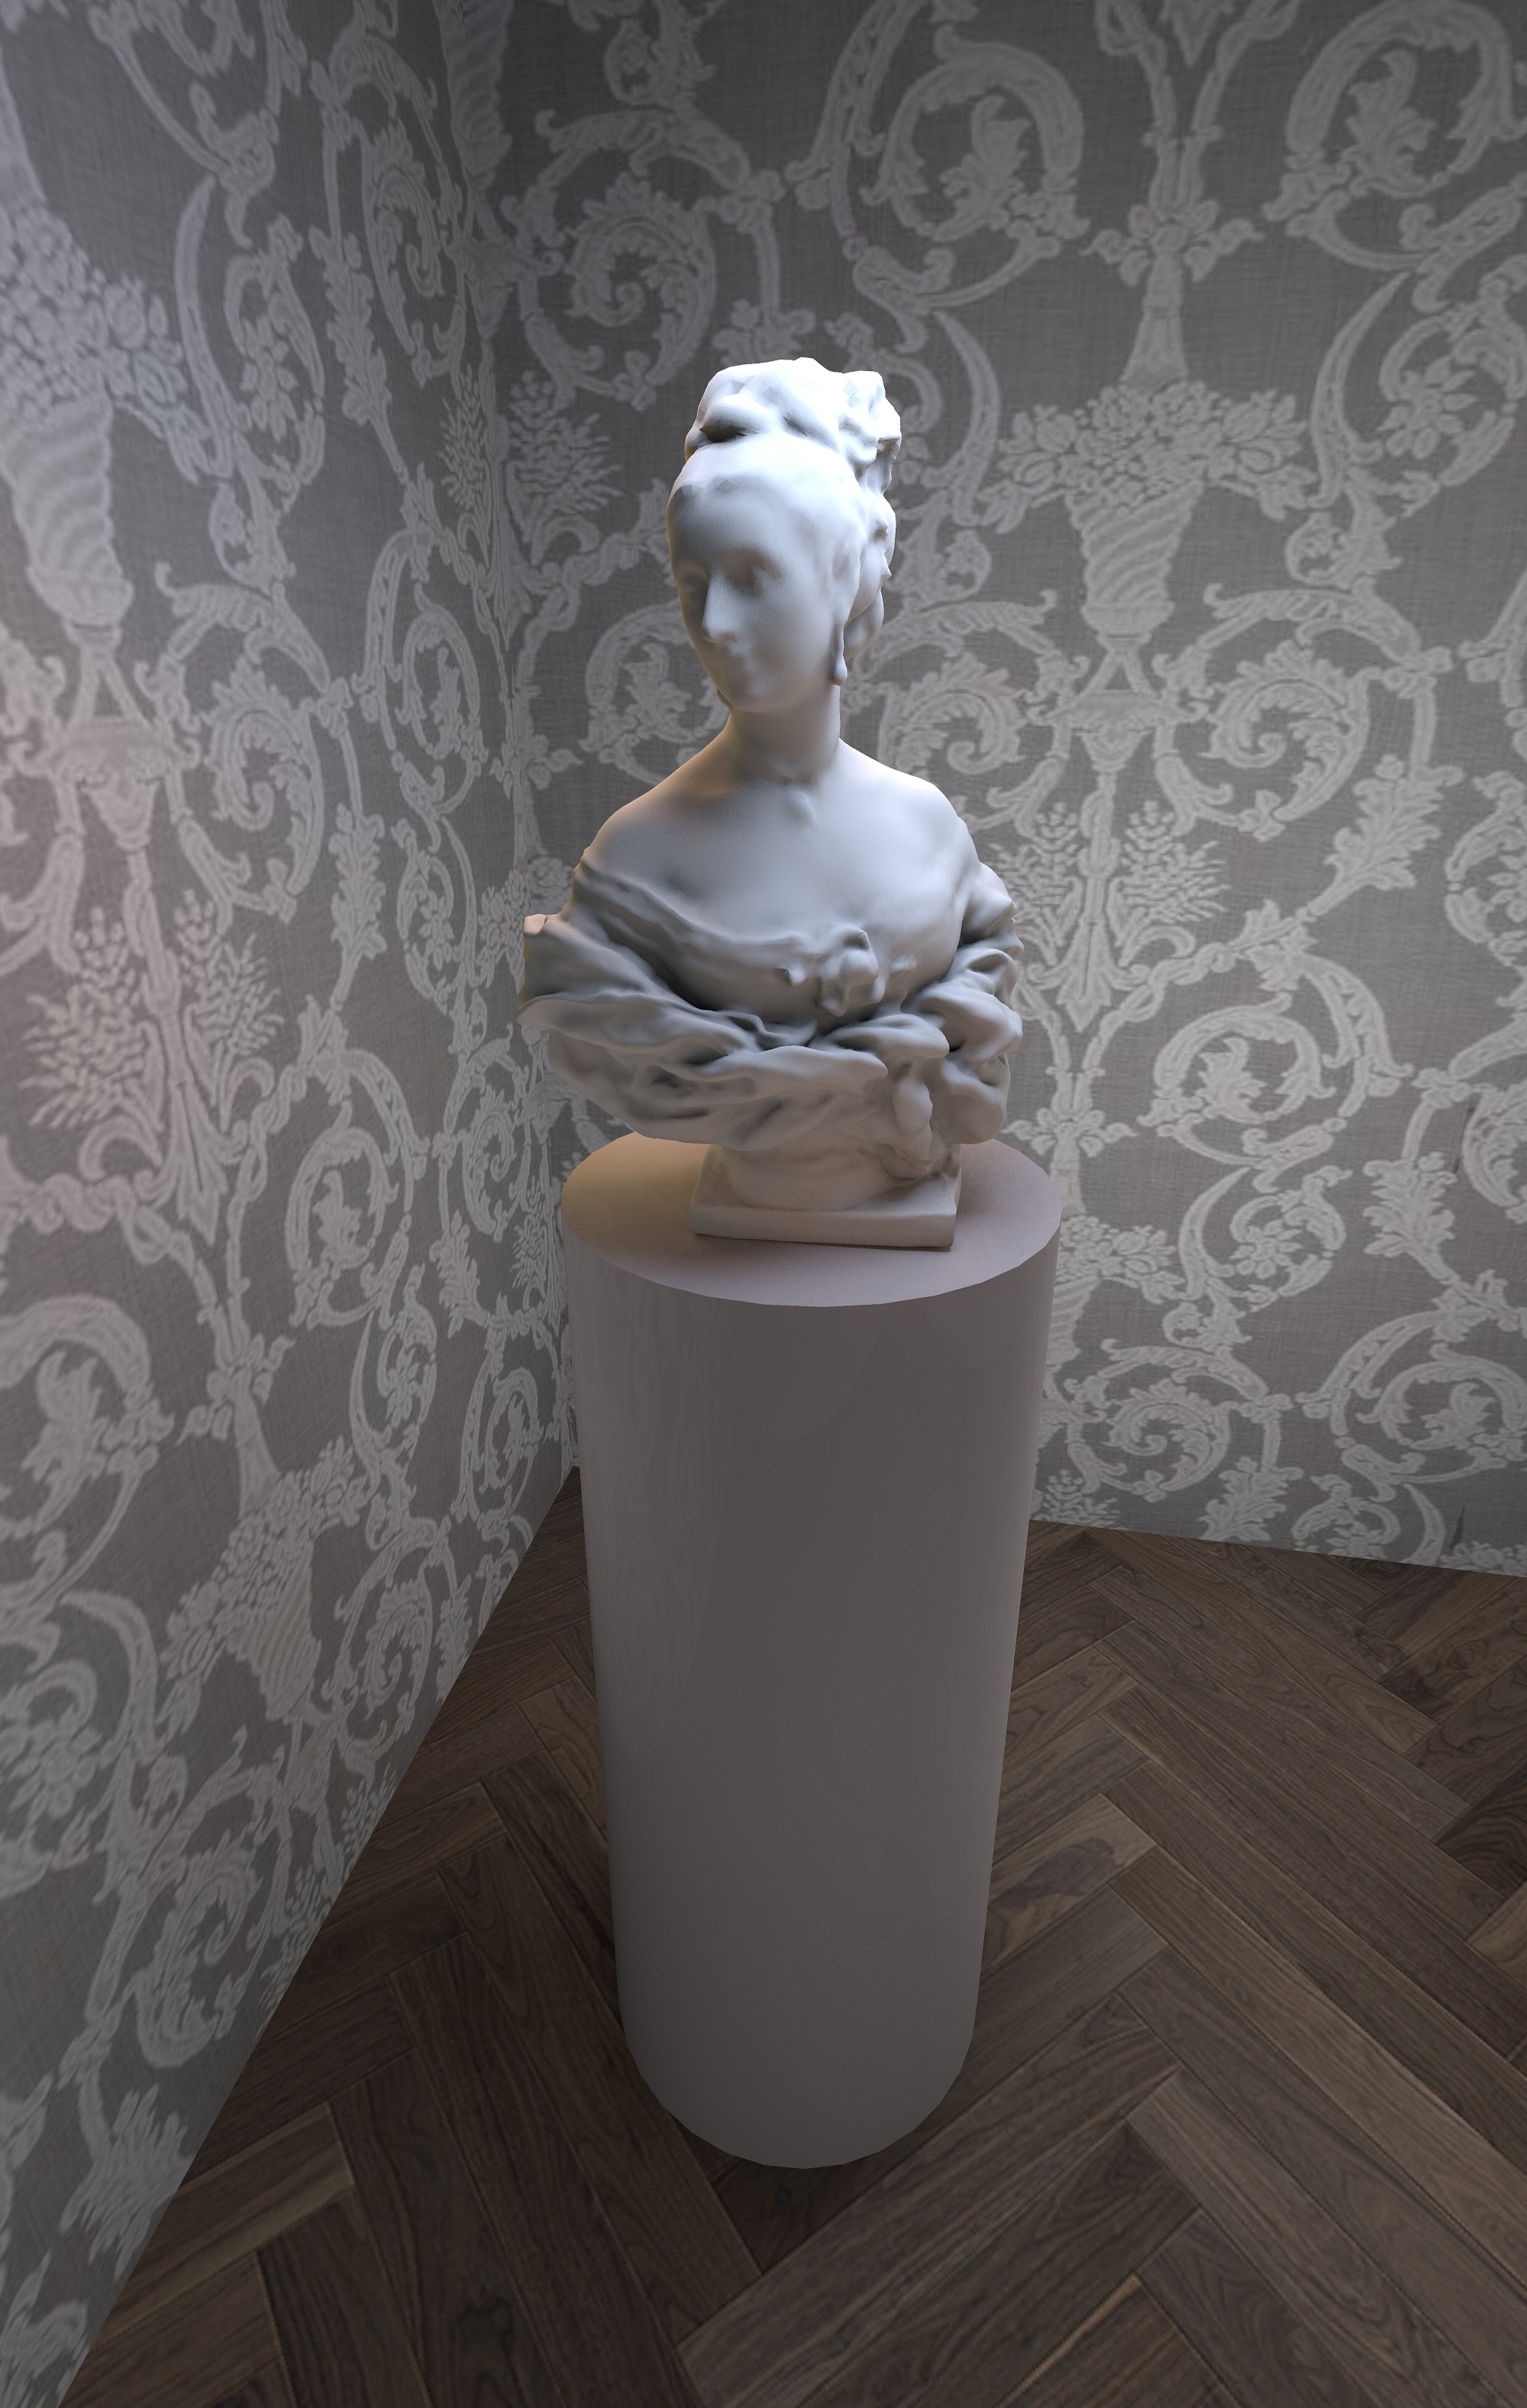
the seventh step. We need to stop now. In painting, there is such a thing as tormenting a painting. The painting should remain a little unfinished. Everyone can decide this moment of stopping for themselves. There are no recipes here. I decided to take another step and that's it. All our steps have led to the fact that the lighting in the room has increased, a new balance of light has appeared. Sometimes this balance needs to be made quieter and this holiday calmed down. I decided to enhance the uppermost blue flat hemisphere by up to 5%, and at the same time lower the illumination level of the entire render by two notches. With this action, I reduced the activity of all other areas and increased the contrast. The final high-quality render is like this. You can go back a step, it's good there too. The main thing is to be able to understand when to make a stop. Neatness, slowness and a critical approach are the most important things in the work.
Russia
Joined: Aug 13, 2022
Post Count: 569
Status:
Offline
Re: the technique of how to set the light for objects in the interior. Sculpture in the room.
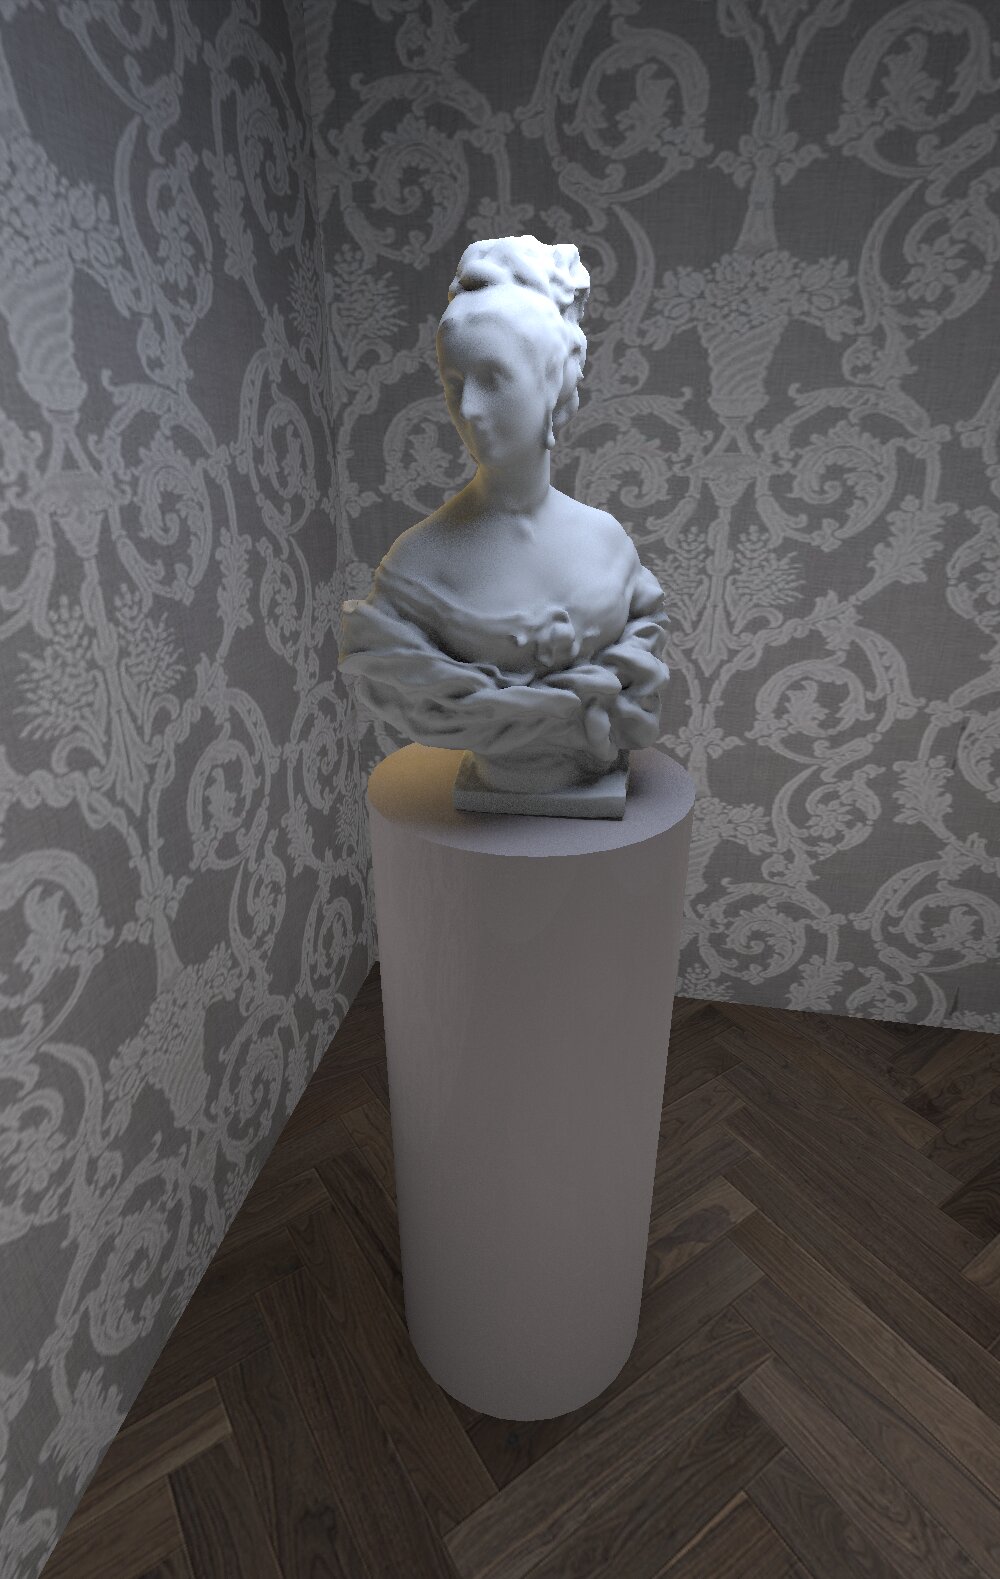
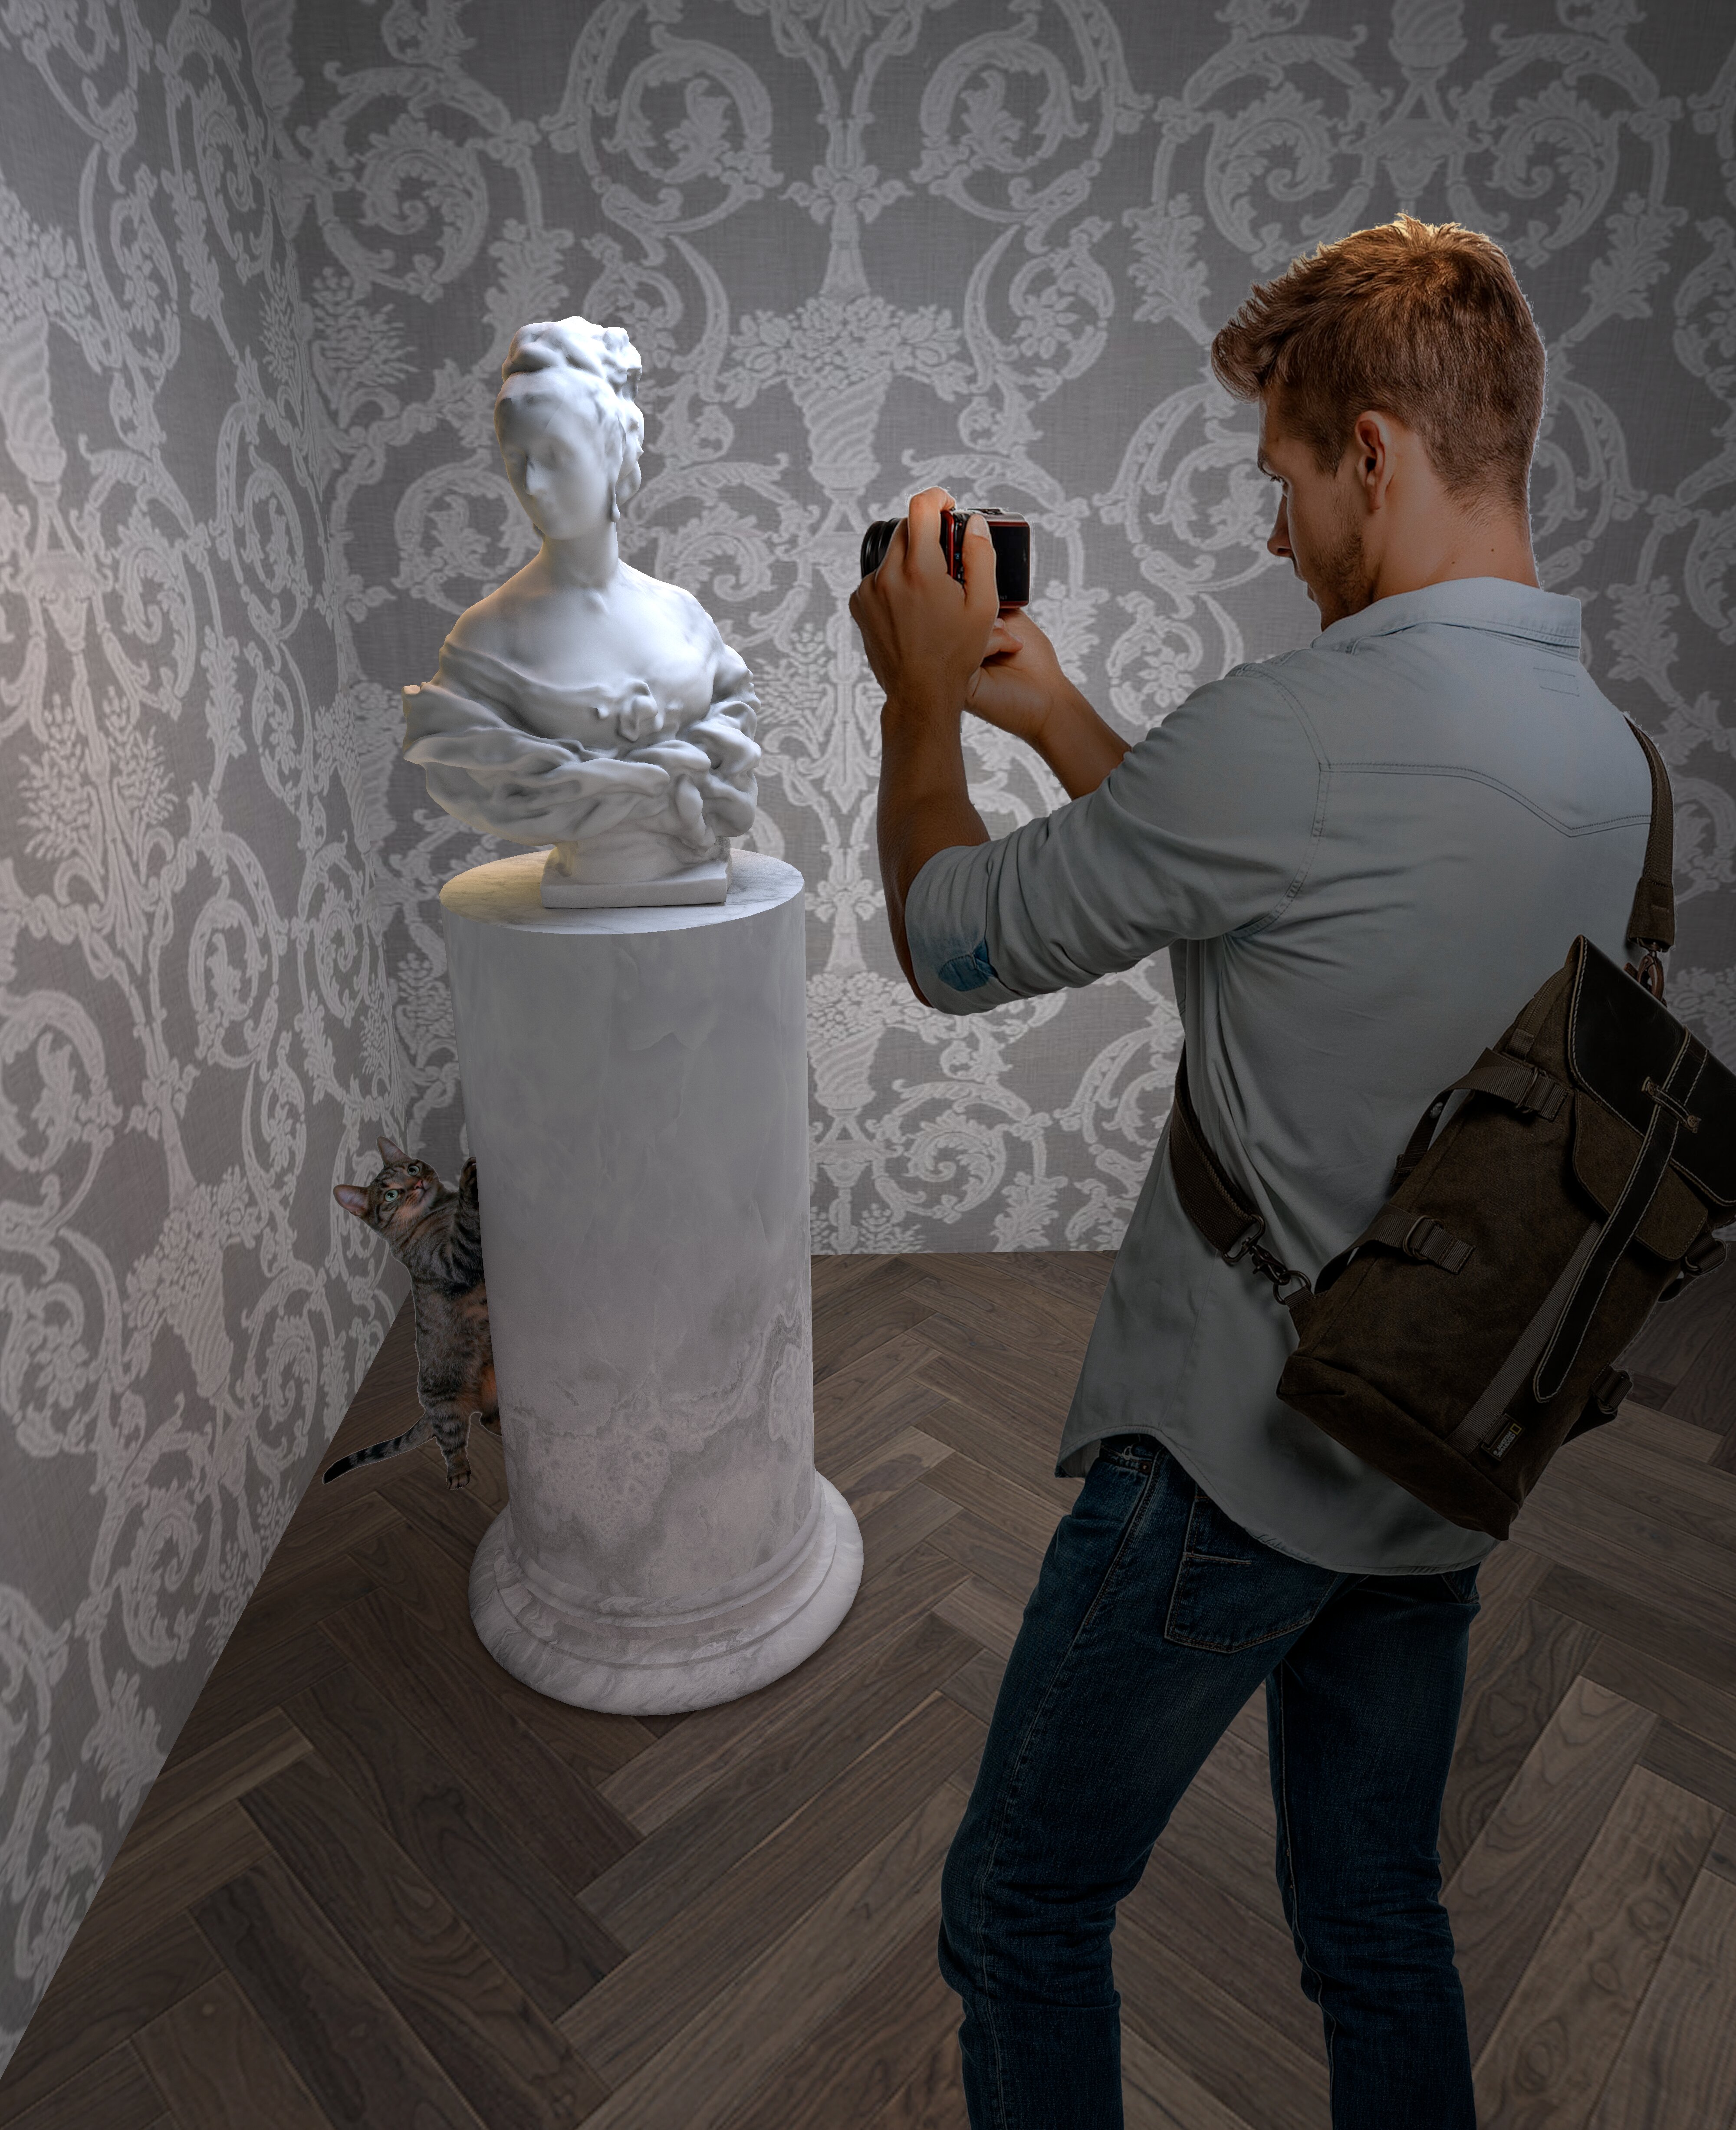
and one more piece of advice. If your item is white, you don't need to make it pure white! Make it a little gray, light gray. This will create a more complex shape when illuminated. Pure white color will immediately become flat and uninteresting, like a toilet bowl.
Russia
Joined: Aug 13, 2022
Post Count: 569
Status:
Offline
Re: the technique of how to set the light for objects in the interior. Sculpture in the room.
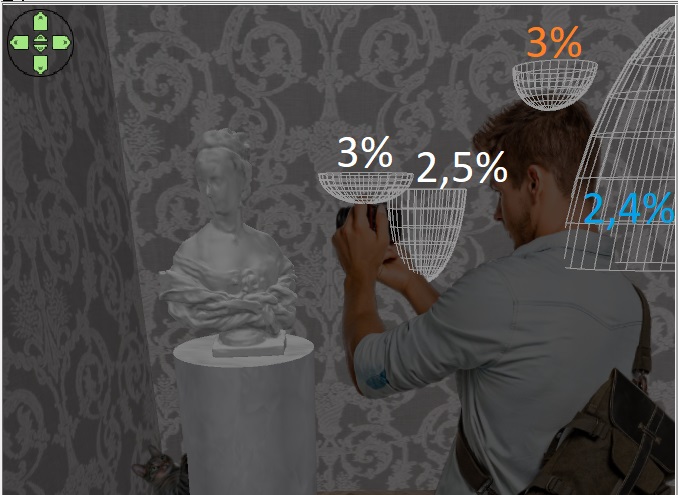
I added a photo of a man and of course a cat. The photo on the box can also be highlighted in a variety of ways. If you need to highlight a very small area with color, then you need to expand the hemisphere so that it hooks the top of the desired area and directs the rays to the side. Then the light will not illuminate a large area of the photo, but will only illuminate, for example, a finger or the very top of the head. I've signed all the hemispheres with color and power.
Please note that the horizon line passes through the eyes of the person in the photo. This means that the viewer is the same height as him. If the horizon line is lower, it means that everything is being watched by a child or a girl (she is probably shorter).