Romania
Joined: Apr 24, 2014
Post Count: 676
Status:
Offline
Re: Generate roof plugin
Isn't the angle a result of a calculation when the position of a point is changed?
No, it is a given value and represent the plane slope. The skeleton algorithm calculate the planes intersections. When I change the position of a point, a new plane will be calculated that passes through that new edge, BUT at the same given angle. The result of intersections of planes will not always be as you want, so you will have to manually change the slope on almost all faces. This is how I finally got some sort of triangles.
use triangle faces and don't try to force rectangular faces
I know this and used triangulation to calculate the area of each visible face to get a total roof area.
texture direction towards the lowest point.
Finally that's OK even for me
PS. The Terrain generator modify the vertices and the resulted object cud be used as something else (eg. an irregular roof).
---------------------------------------- A computer program does what you tell it to do, not what you want it to do. Murphy's Law When all else fails, read the instructions. Murphy's Law If you don't like "AS IS", DIY. Dorin's law
France
Joined: Oct 20, 2017
Post Count: 305
Status:
Offline
Re: Generate roof plugin
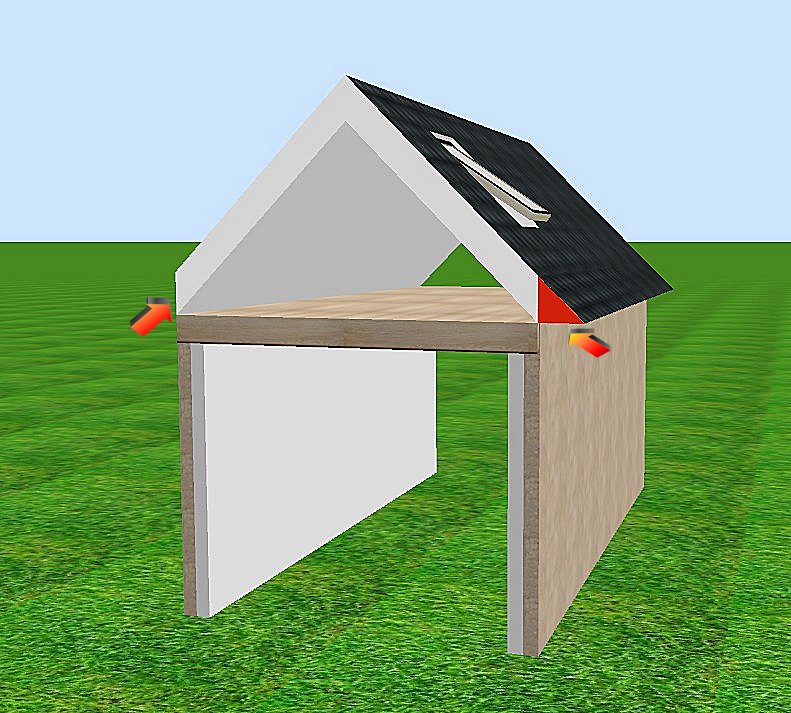
Bonjour Dorin. Excellent travail que vous avez réaliser pour nous aider à créer des toitures adaptées aux différents besoins de chacun. Et vraiment très pratique et efficace la solution permettant de placer des fenêtres de toit. Juste une question. Si je choisis de donner une épaisseur relativement importante à mon toit (30 cm par exemple) cela me permet de créer en même temps le doublage intérieur et sans que cela pose problème au niveau des fenêtres de toit.
Mais comme on le voit du côté gauche de l'image ci-dessous, l'extrémité inférieure du toit représentant son épaisseur est verticale.
Y aurait'il une possibilité de modifier dans le pluging quelque chose permettant de choisir une extrémité différente, par exemple comme celle de droite, que j'ai réalisée en ajoutant un triangle rectangle collé au bord du toit et débordant du mur (dans cet exemple, les pentes du toit sont de 45°). Avec des épaisseurs très faibles du toit, son dépassement du mur ne pose pas le même problème mais par contre on perd la présence du doublage intérieur.
En tous cas, encore merci pour toute l'aide que vous apportez pour améliorer encore un peu plus les possibilités offertes par Sweet Home.
Romania
Joined: Apr 24, 2014
Post Count: 676
Status:
Offline
Re: Generate roof plugin
@CaptainCook 1. I am a silent admirer of your projects. 2. The correct approach to your question is like in real life. Make the roof as it should be(outside the walls) and cover the gap under the roof with another piece of furniture (box). Preferably on the same level with the roof.
---------------------------------------- A computer program does what you tell it to do, not what you want it to do. Murphy's Law When all else fails, read the instructions. Murphy's Law If you don't like "AS IS", DIY. Dorin's law
France
Joined: Oct 20, 2017
Post Count: 305
Status:
Offline
Re: Generate roof plugin
Merci Dorin pour votre réponse.
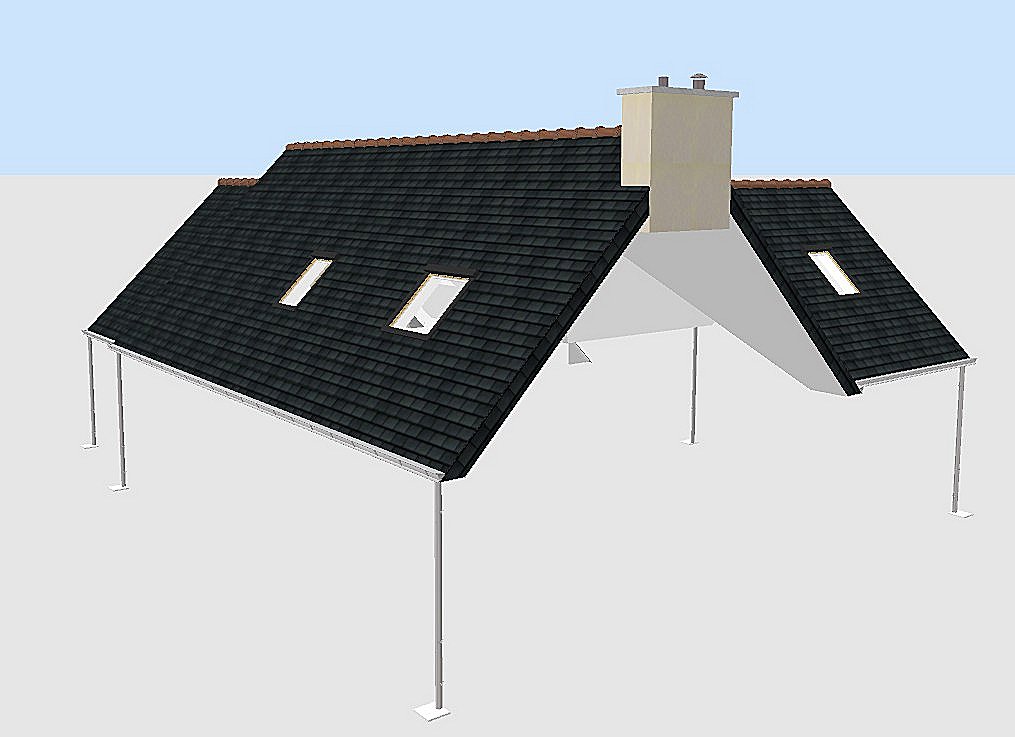
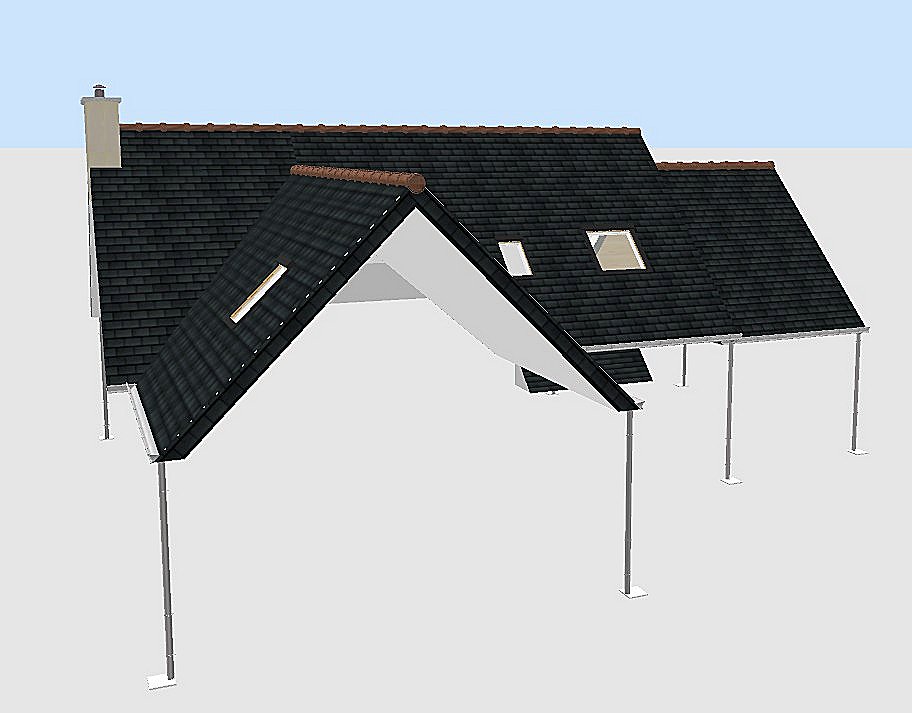
Juste pour info, ci dessous 2 images de la toiture de ma maison réalisée avant la création du générateur de toit (en 2017).
A l'époque, j'avais réalisé toutes ces surfaces (toiture et doublages intérieurs) à partir de murs fins intégrant les fenêtres de toit et convertis en .obj.
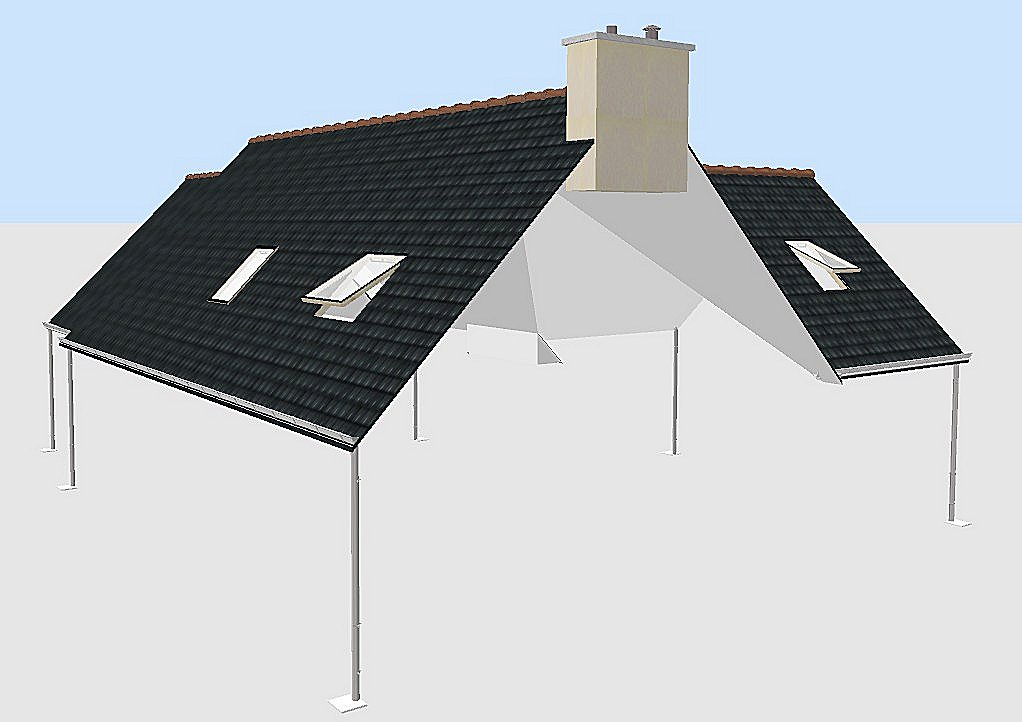
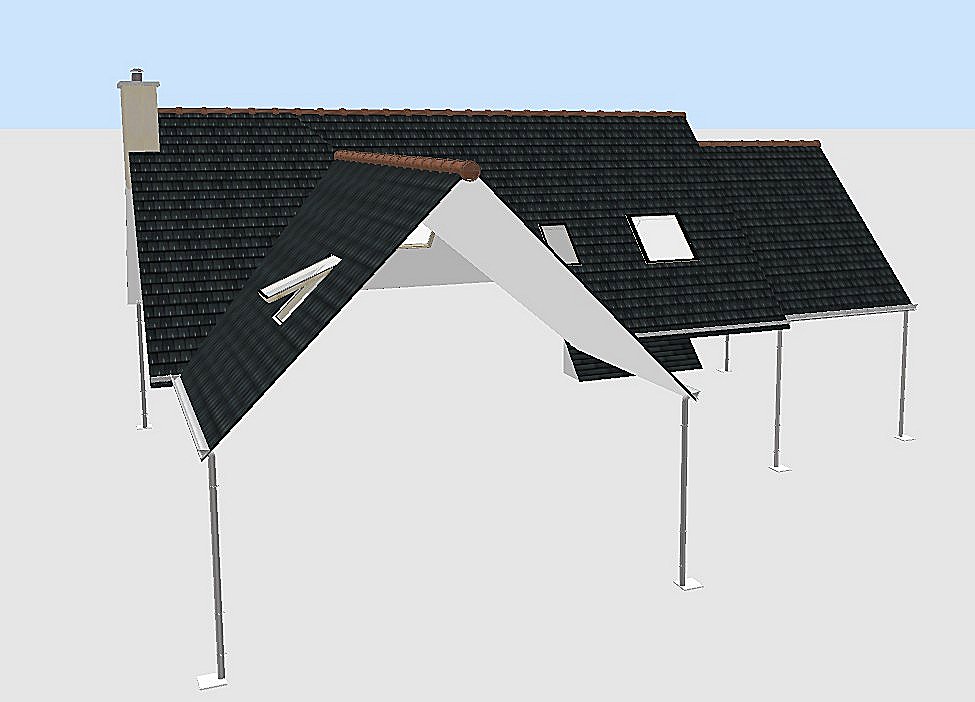
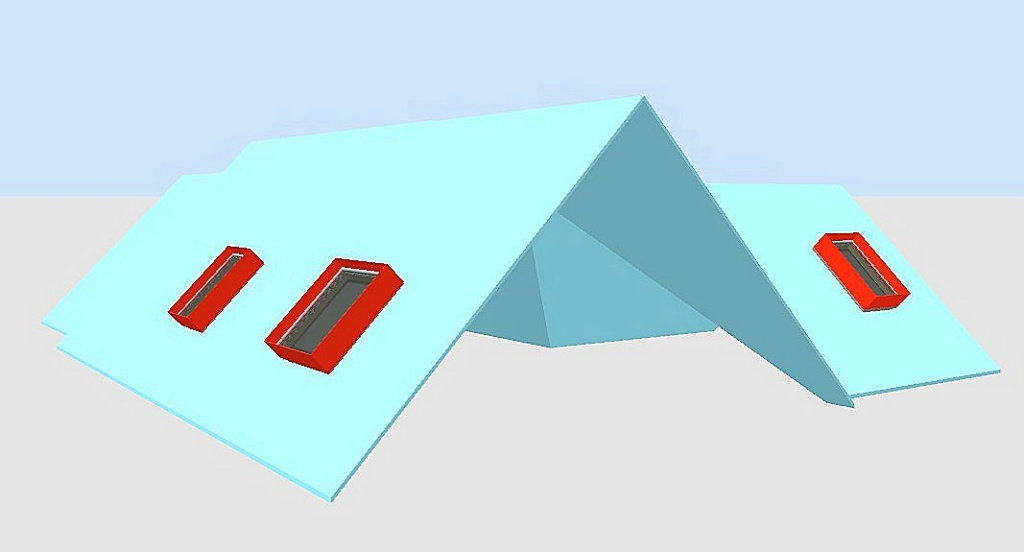
Et 2 images réalisées aujourd'hui avec le générateur de toit.
J'ai fixé l'épaisseur du toit à 5 cm pour limiter la partie verticale des extrémités.
Mais là, il me faudra créer les doublages intérieurs séparément.
C'est néanmoins très ressemblant.
Et en plus, l'avantage aujourd'hui, c'est que je peux aérer ma maison puisque les fenêtres de toit peuvent s'ouvrir.
----------------------------------------
[Edit 2 times,
last edit by captaincook at Apr 23, 2025, 5:18:36 PM]
Romania
Joined: Apr 24, 2014
Post Count: 676
Status:
Offline
Re: Generate roof plugin
Hi captain,
Mais là, il me faudra créer les doublages intérieurs séparément.
Indeed. If you still have to do this, I see two solutions: 1. Make it out of wooden frames (if you want to keep it that way) or 2. Use a doubled roof. For the second option I shared my approach. 2.1 The file:Doubled roof 2.2 Some friendly recommendations (not necessarily for you, but for others) I've used: - Autodimensioning for generate 2 different roof hang projection, - Roof generator for two roofs, - Roof windows library, - Multiplier and Special select/hide to seal the top of the roof.
How I've used: 1. I've made the bottom roof projection at 40 cm. 2. I've generate the bottom roof: -- with vertical borders at 15 and elevation at 210 cm, -- with Reverse faces checked. 3. I added the roof windows in the same tab as the lower roof and set them roughly to the desired position. Select the roof and regenerate it to automatically set the roof windows. 4. Return to level 0 and make a new roof projection at 43 cm for the upper roof. (As the upper roof must be above the gutter - water flow rule) Select the room, Generate roof and set it as the bottom roof BUT: -- DON'T check Reverse faces -- Set the thickness at 5 cm and the orthogonal borders. Save. 5. Fine settings: 5.1 Cut and paste the last roof on the same level as previously and set the object elevation at 12 cm. 5.2 Select the last roof and regenerate it to set the roof windows in the correct position. Now you could group this 2 roofs and export/import as a single object. Don't forget to set the individual face texture before to do this.
I don't know if this Bla-Bla could help you, but it may help others.
---------------------------------------- A computer program does what you tell it to do, not what you want it to do. Murphy's Law When all else fails, read the instructions. Murphy's Law If you don't like "AS IS", DIY. Dorin's law
First indicate that's NOT a window; Second is used to identify it as roof_window; Three it is a value needed to correctly calculate the "window" position. 2. You didn't look at the posted file (RoofChallangeD ). It is different even it have the same name as the one from last year. 3.
Shelves/sides were simple but the door was a struggle with keeping the handle and hinges the same size when the size of the door itself changes.
I've encountered the same problem. In the real life the doors or windows keep their sizes, so I've made the model at same dimensions and I've set the property
doorOrWindowWidthDepthDeformable#1=false
Usualy I do the same for all doors and windows in all the libraries.
---------------------------------------- A computer program does what you tell it to do, not what you want it to do. Murphy's Law When all else fails, read the instructions. Murphy's Law If you don't like "AS IS", DIY. Dorin's law
Romania
Joined: Apr 24, 2014
Post Count: 676
Status:
Offline
Re: Generate roof plugin
I'm currently experimenting with generating furniture parts, for example a cabinet door with handle and hinges.
I'm interested in this. I wish you good lack!
So far it seems to work fine...
That sound good You could make a dedicated tread for this.
---------------------------------------- A computer program does what you tell it to do, not what you want it to do. Murphy's Law When all else fails, read the instructions. Murphy's Law If you don't like "AS IS", DIY. Dorin's law
First indicate that's NOT a window; Second is used to identify it as roof_window; Three it is a value needed to correctly calculate the "window" position.
I did notice it was NOT marked as Door or window. But you are right, I should have examined the properties files. If I wanted to create a roof window, how do I determine what the roof_window_deep value should be? Or is it always 11.0?
2. You didn't look at the posted file (RoofChallangeD ). It is different even it have the same name as the one from last year.
I took a closer look. A few remarks. First of all: great that you could generate this with the roof generator! That is a huge achievement. The borders are double. There are two sets of faces for every border where you only need one. Probably a double line somewhere in your code. And there are (double) borders between connecting roof parts that you never see. In itself not a problem but the object will be more efficient if these are left out.
3. Shelves/sides were simple but the door was a struggle with keeping the handle and hinges the same size when the size of the door itself changes.
I've encountered the same problem. In the real life the doors or windows keep their sizes, so I've made the model at same dimensions and I've set the property
doorOrWindowWidthDepthDeformable#1=false
Usualy I do the same for all doors and windows in all the libraries.
I know the doorOrWindowWidthDepthDeformable property but that was not the problem. My code accepts parameters for the dimensions of a door. I mathematically recalculate the vertice coordinates of a template model to get a door in the given dimensions. And then the hinges and handle must be added but those must remain the same size AND at the correct position on the model. It's not about deforming when inserted in a wall, but generating an object partly re-dimensioned and partially with static dimensions. This particular door is not to add in a wall but for a cabinet.
---------------------------------------- Dodecagon.nl 1000+ 3D models, manuals, and projects
Netherlands
Joined: Apr 8, 2022
Post Count: 1355
Status:
Offline
Re: Generate roof plugin
I'm currently experimenting with generating furniture parts, for example a cabinet door with handle and hinges.
I'm interested in this. I wish you good lack!
So far it seems to work fine...
That sound good You could make a dedicated tread for this.
I still in the early stages of experimenting although I can now generate 7 different parts that allows me to create a huge number of different cabinets. Only creativity is the limit. I'll see if I start a thread about this. A small problem is that it requires Blender at a few stages since the OBJ format I create is Blender. One reason is that is produces no vn lines, so no need to recalculate these. Another reason is that you can generate the same model and by simply changin the line "s off" to "s 1" you can smooth the model(-part). With the Sweet Home 3D export format that would require two different exports with different v* lines. Another reason is that my current code is in C#, I still have to setup a Java environment. The good thing is that C# is 95% the same as Java so a conversion should be easy.
---------------------------------------- Dodecagon.nl 1000+ 3D models, manuals, and projects
France
Joined: Oct 20, 2017
Post Count: 305
Status:
Offline
Re: Generate roof plugin
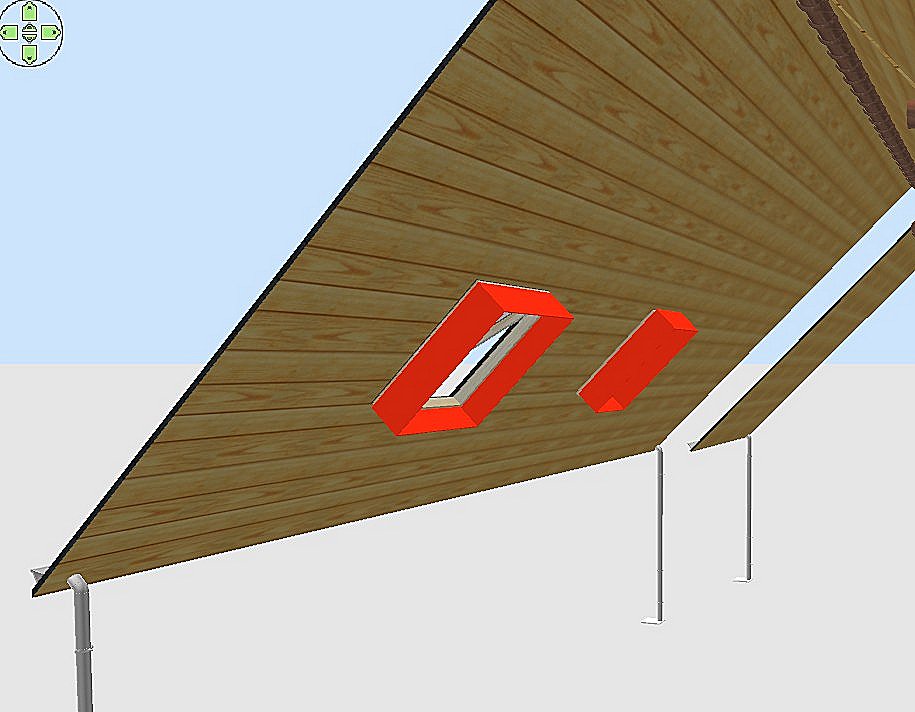
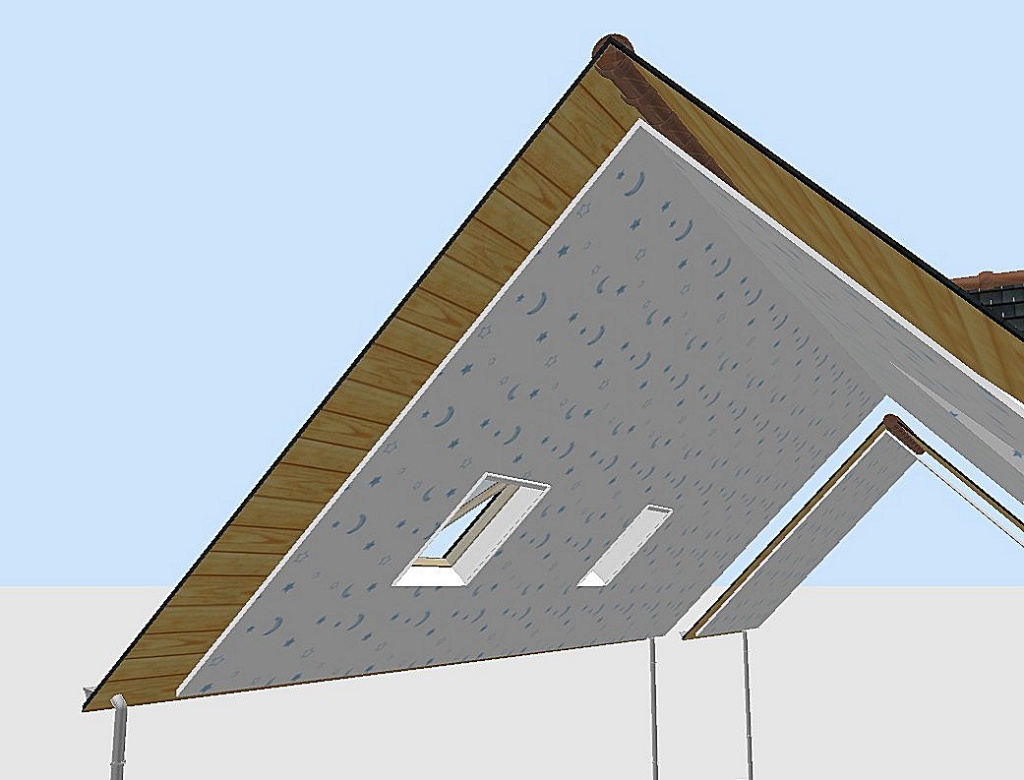
Bonjour Dorin. Bon, j’ai continué à regarder comment faire pour créer un doublage intérieur avec le générateur de toit. Pour commencer, à partir de petits murs très fins, j’ai créé des petits cadres convertis en .obj (en rouge) de 30 cm de haut (distance choisie entre le toit extérieur et le futur toit intérieur), inclinés à 45° et aux dimensions extérieures identiques à celles des différentes fenêtres de toit déjà installées. Je les ai placées du côté interne du toit extérieur, exactement aux niveaux des fenêtres de toit.
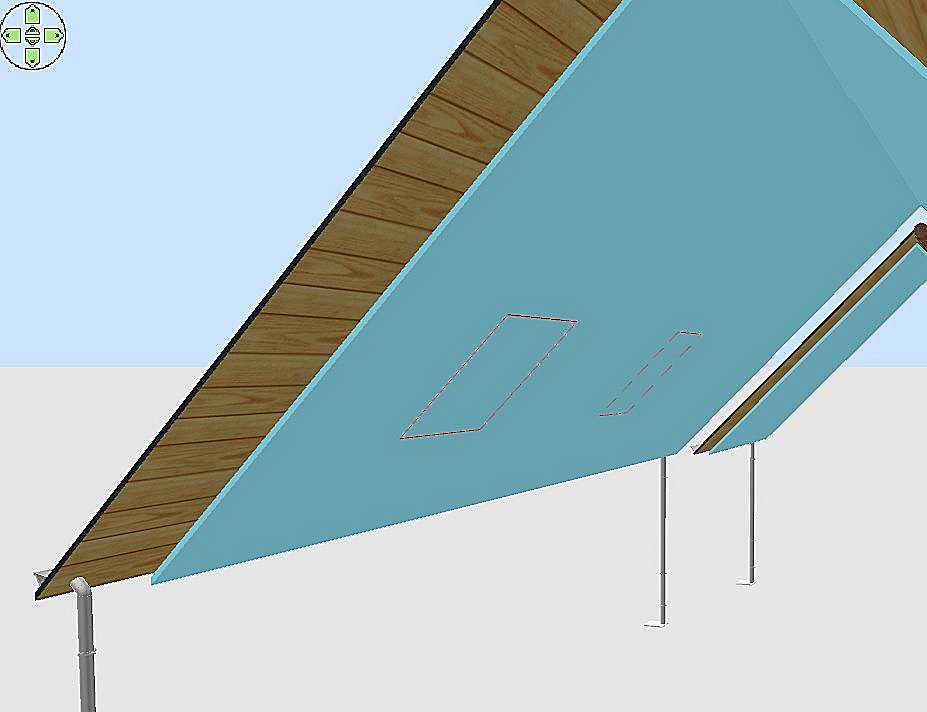
Puis j’ai créé le nouveau toit intérieur, donc un peu plus petit (en bleu clair).
Les cadres rouges m’ont donc permis de voir où créer à l’aide de fenêtres de toit provisoires les trous correspondants dans ce nouveau toit intérieur avec le générateur.
Et au final de boucher l’espace entre les deux toits au niveau de chaque fenêtre de toit extérieure. Les petits cadres sont donc maintenant en blanc et l’intérieur du doublage avec du papier peint.
Merci encore pour tous vos conseils et votre aide.